

The application uses a custom object called PrivSec Request which allows users to drive the data De-identification process. We can create a PrivSec request manually by providing certain field values and then it will generate the records and process it.
Prerequisites –
1. You should have the “CC full access” permission set assigned.
2. At least one mapping should be active for RTBF/De-Identification.
3. Lightning record page should be assigned to your profile.
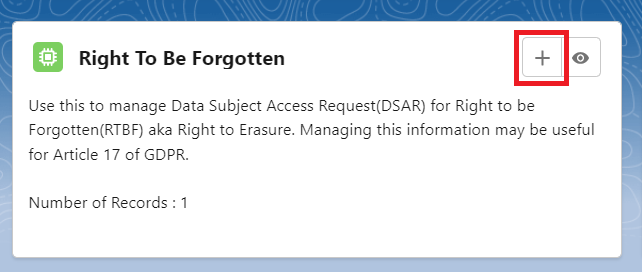
From the ‘Manage’ tab, you can directly create the PrivSec Request for processing the RTBF request.
To do this, you can go to Cloud Compliance Application and can click on the ‘Manage’ tab. DSAR – Right To Be Forgotten will be available. You can click on the ‘Add’ button to create a new PrivSec Request record for RTBF. Then, you will be redirected to the page where you can provide the necessary details to create the PrivSec Request which includes the Subject Id (Record Id of the target parent object).
You can get the Record Id by following the steps –
Step 1: Open the record of an Object that you want to De-identify, here we have taken the record of the Contact Object.

Step 2: Copy the ID from the address bar and this is the Record Id that you can provide in the Subject Id field.

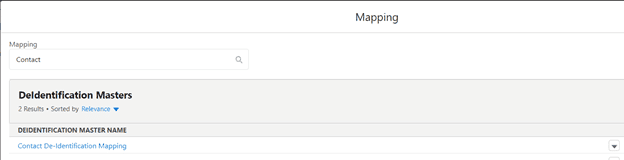
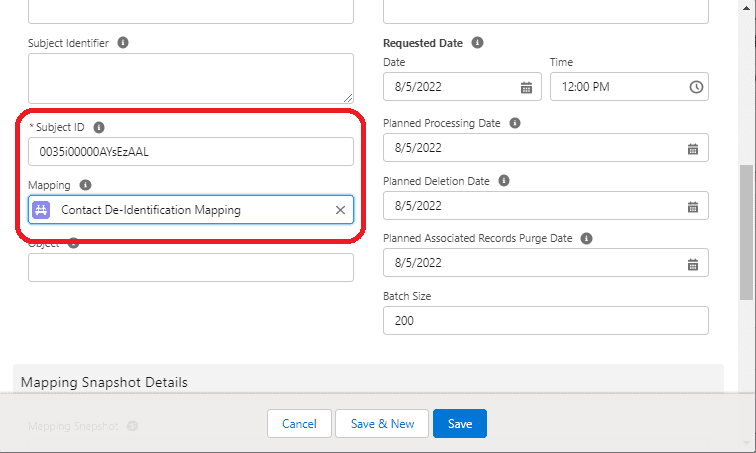
Step 3: Now enter the Subject ID (Record Id of the Parent object ) and select the Mapping that you want to use for the De-identification process.
As shown in the above image, you need to provide the Subject Id and Mapping. Here, the Subject Id is the record Id that the record you want to De-identify, and Mapping is a De-identification mapping name that has been created for De-identification.
Note: The De-identification mapping will show only “Active” De-identification mappings.
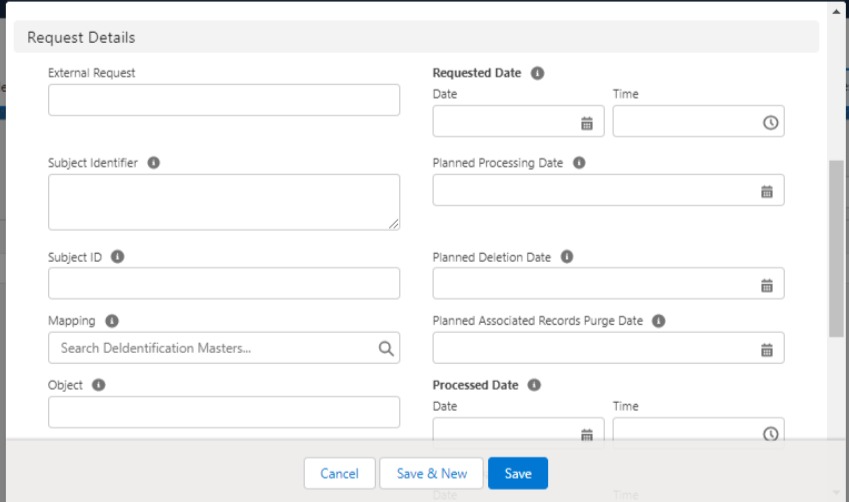
Step 4: You will see a certain date field in the PrivSec Request record as shown in the below screenshot.
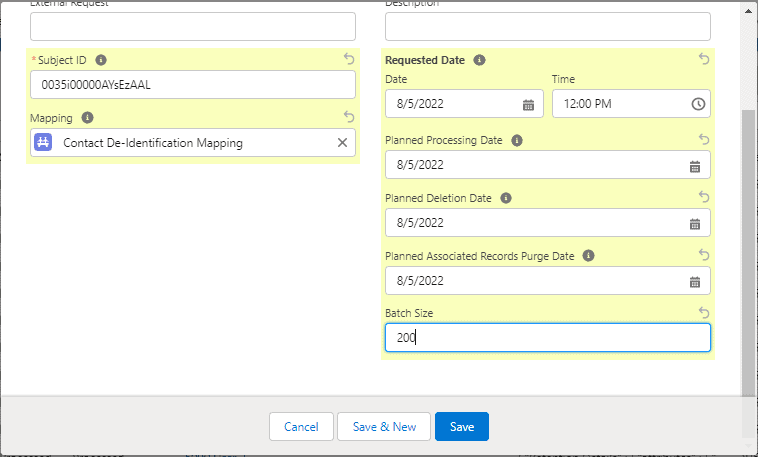
Requested Date – The date on which PrivSec Request is created.
Planned Processing Date – The date the records are eligible to be processed. The records will be processed immediately if the date is equal to or lesser than “TODAY”.
Note: Planned Processing Date should always be lesser than Planned Deletion Date and Planned Associated Records Purge Date.
Planned Deletion Date – The date on which the Data Subject Record Ids are eligible to be deleted. If the date is blank no records will be deleted. If the date is equal to or lesser than ‘TODAY’, the records will be deleted immediately.
Note: Planned Deletion Date cannot be lesser than Planned Processing Date and greater than Planned Associated Records Purge Date.
Planned Associated Records Purge Date – Date on which this request and all the related records are eligible to be purged. If the date is blank no records will be purged. If the date is equal to or less than ‘TODAY’, the records will be purged only when the purge batch is executed.
Note: Planned Associated Records Purge Date cannot be lesser than Planned Processing Date and Planned Deletion Date.
Batch Size – This defines the number of records that should be processed in a single batch.
Fill in the details as per the requirement and click on the ‘Save’ button.
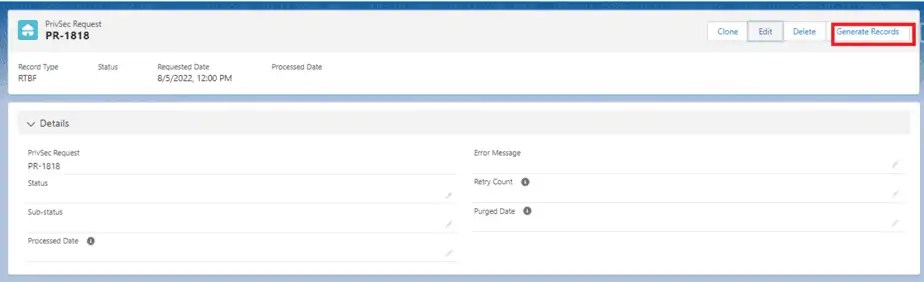
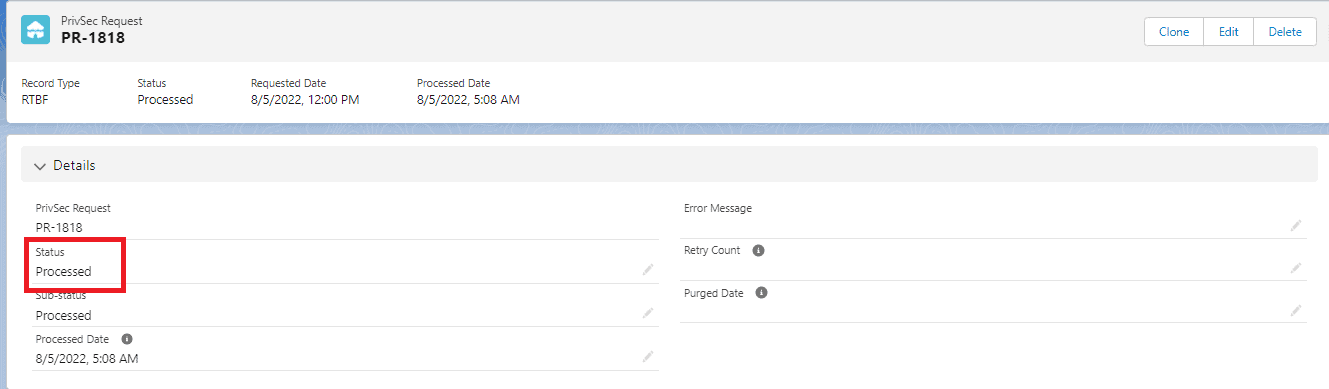
Step 5: Now you will be redirected to the PrivSec Request detail page in which you will be able to see all the other details like Status, Sub-Status, Associated Records, etc.
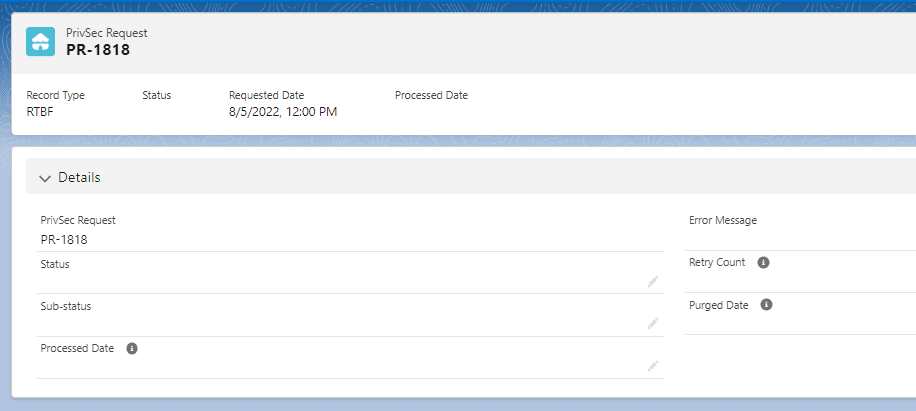
On the detail page, you will find a few more sections as follows –
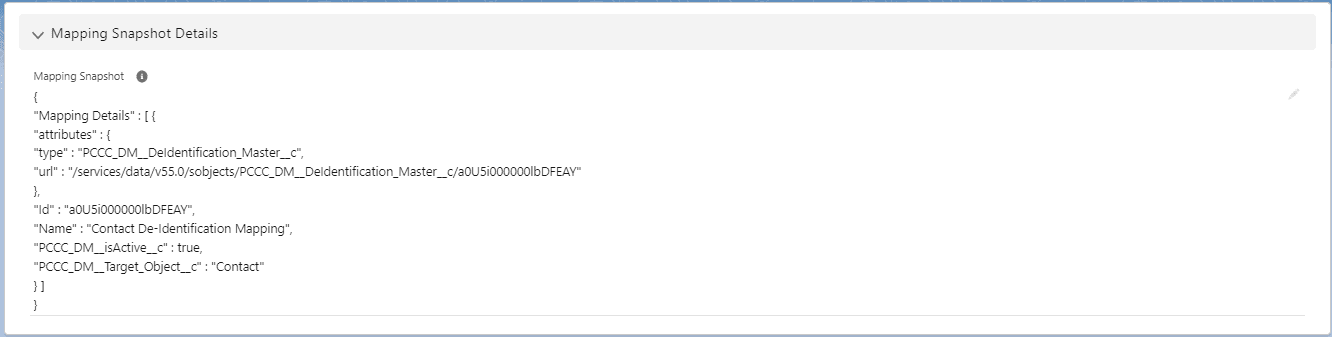
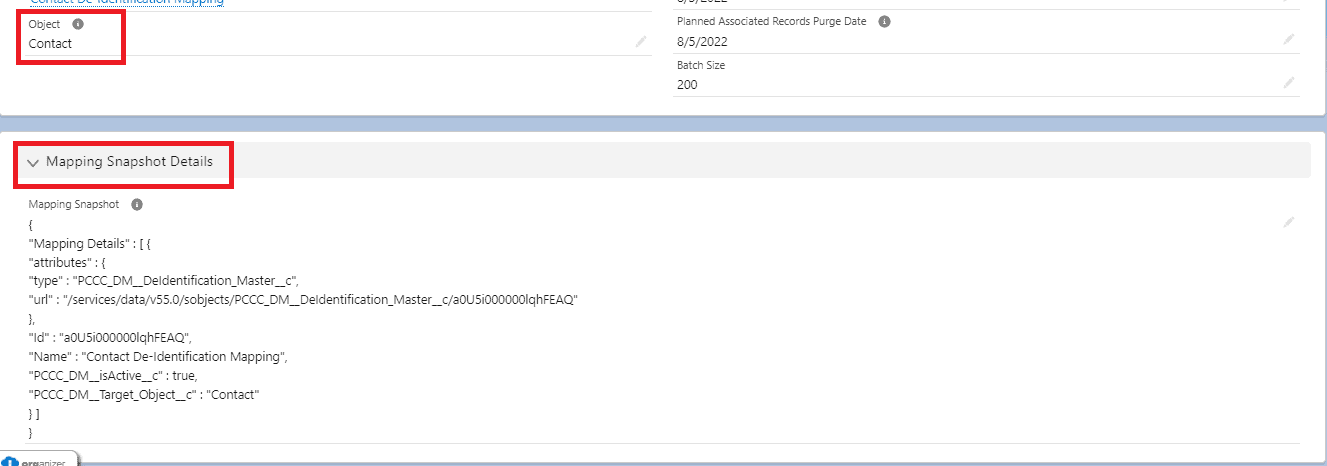
Mapping Snapshot Details – Mapping Snapshot is a detailed view of values that have been provided in the PrivSec Request. This contains the details like Record Id, Mapping Name, Object Name, etc. You will see the Mapping Snapshot Details after clicking on the ‘Generate Records’ button.
Associated Records – This section contains the Data Subject Record Id of the parent as well as associated records along with the details like Status, Action, Object Name, etc.

Associated Record Counts –
Total Count – Total number of records generated into the Associated Records.
In-Progress Count – Records that go under In-Progress after clicking on Generate Records button.
Processed Count – Records which is successfully processed.
Error Count – Records which is errored due to some reasons.

Step 6: Now enter the Subject ID (Record Id) and select the Mapping that the user wants to use for the De-identification process.
Click on the ‘Generate Records’ button.
Step 7: Once you click on the ‘Generate Records’ button, records get generated in the Associated Records section, Status will be ‘In Progress’, and Sub-Status will be ‘Records Generated’.
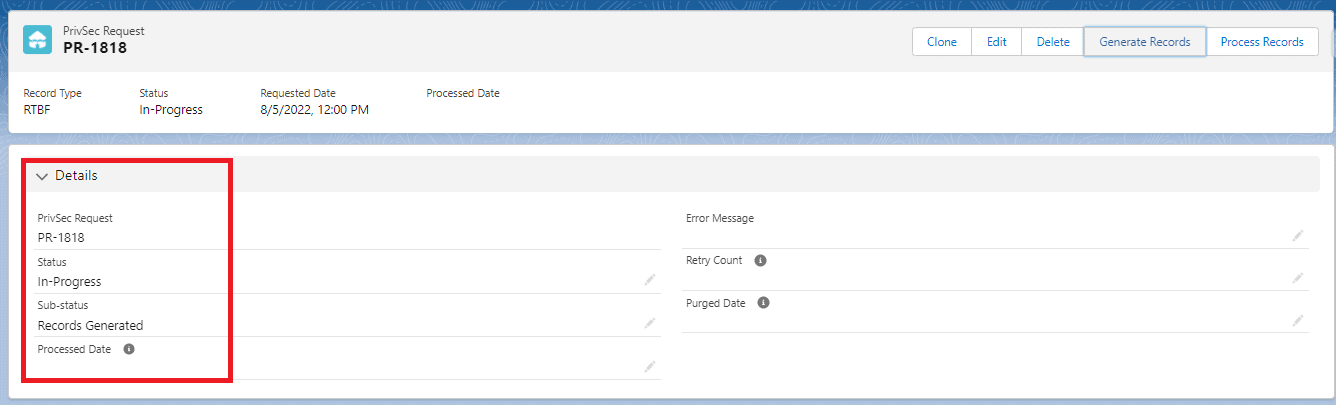
You will see the respective object name gets auto-populated once we click on the ‘Generate Records ’ button and the Mapping Snapshot Details get printed.
Step 8: Now the ‘Process Records’ button will appear once the records get generated.
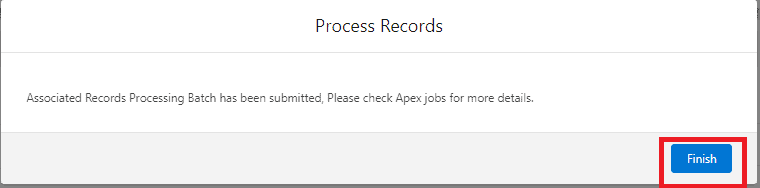
Click on the ‘Process Records’ button once you confirm the details populated in all the sections after generated records.
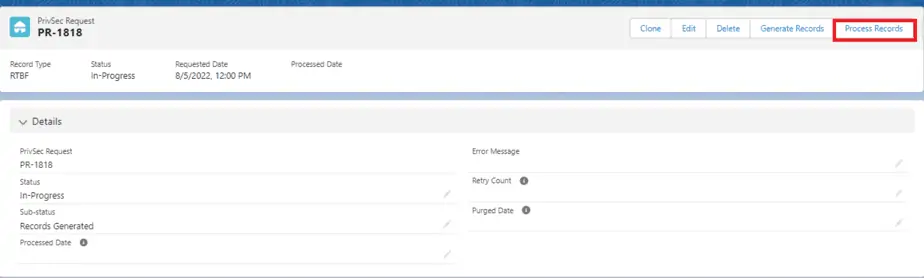
Click on the ‘Finish’ button.
Step 9: After clicking on the ‘Process Records’ button, records get De-identified and Status will be changed to ‘Processed’ from ‘In-Progress’.
If you have provided a future date for ‘Planned Deletion Date’ OR ‘Planned Associated Records Purged Date’, then Status will be ‘Processed’ and Sub-Status will remain ‘In-Progress’.
Once the records get Deleted and Associated records get purged, then the Sub-status will also become ‘Processed’.
Based on the De-identification process, the fields get updated in the Associated Records section as shown below:

Once the Associated Records get deleted, the ‘Deleted’ checkbox will be checked.
Step 10: Now you can check the requested record and its associated records will have been de-identified.

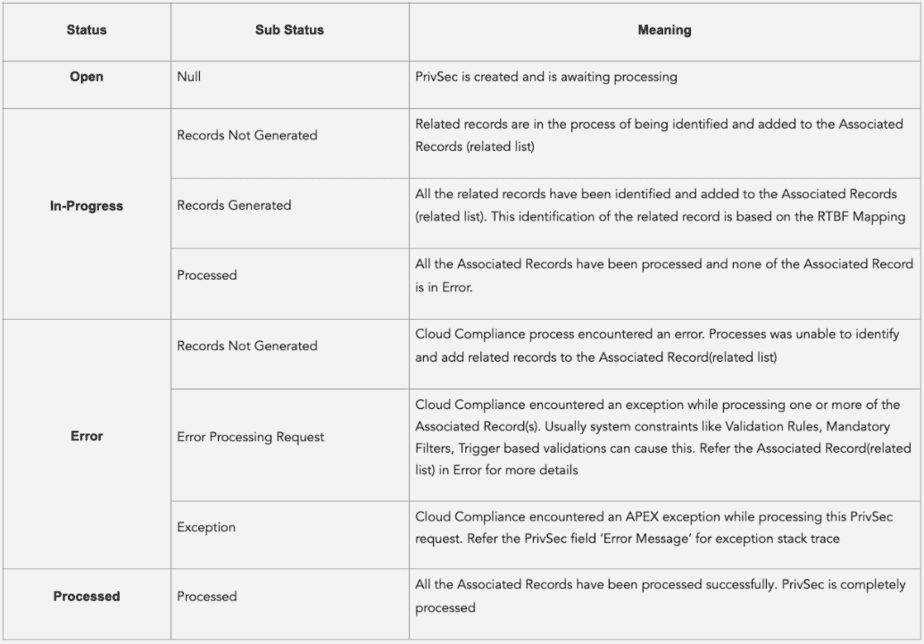
PrivSec Request Status
Progress of PrivSec Request for RTBF and Retention are tracked through a combination of Status and Sub-Status. Here are details on what each of the valid combinations means.