REST API
Users can use this REST API based consent creation method for contacts and leads to address Contact Bulk Import and other scenarios where an implicit contact/lead creation is required. In the use cases, the Consent Creation is by a REST API interface.
The POST method used for consent creation is as follows –
URL– For POST Method.
/services/apexrest/PCCC_DM/v1/ConsentRestAPI |
Request Body –
{ "ConsentRequest": [{ "consentGiverId": "0PK0b000000D6hKGAS", "captureContactPointType": "Web", "shortCode": "CUS-PHO", "status": "OptIn" }] } |
Mandatory Parameter
consentGiverId – mandatory
captureContactPointType – optional
shortCode – mandatory
status – mandatory
Where –
- consentGiverIdis the Individual ID of the Contact/Lead object record.

- captureContactPointType refers to one of the mandatory fields on Contact Point Type Consent which is basically the contact point used to capture consents. (Restricted Picklist Field)
- shortCode is a field that will store a shortcode that is used to link the Data Use Purpose record for consent processing. This field will need to be unique across all records for “Data Use Purpose” ( concatenate the first three initials of Purpose & Channel name eg. if “Purpose = Marketing” & “Channel = Phone” then shortcode = “MAR-PHO”)
- statusrefers to one of the mandatory fields on Contact Point Type Consent which is Privacy Consent Status (Picklist Field) with the value as OptIn or OptOut.
This status basically confirms whether the individual associated with this record agrees to this form of contact.
Solution Steps
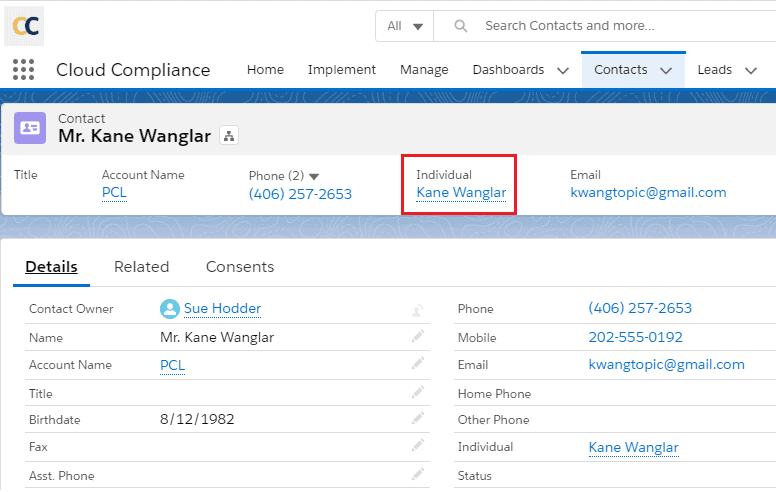
1. Navigate to a Salesforce Contact/Lead record for which users want to manage consent. Make sure that it is associated with the Individual and click on it. For the demo, a contact record is used
Note– If the individual is not associated with the Contact/Lead record, the user can run the auto Individual batch provided by “Cloud Compliance”. It will automatically create individual records for each Contact/Lead record based on defined criteria.
For more details about this batch refer to this link Grouping Rules for Individual.
2. Copy the Individual record Id from the URL. The id is highlighted for reference in the screenshot –
3. Navigate to a REST tool such as Salesforce developer workbench, Postman, Insomnia, etc. (This example uses Salesforce Developer Workbench)
4. Navigate to the ‘REST Explorer’ utility within the workbench and select the “POST” method
5. For the “POST” method, enter the Cloud Compliance’s REST API URL which is already mentioned above.
6. Copy the Individual Id (consentGiverId) and other required data in the JSON format of the request body as shown below –
7. Click the “Execute” button to invoke the REST API.
8. The REST API returns a consentSFId which is nothing but the Id of the newly created “Contact Point Type Consent” record and a success status as true/false.
9. Navigate to the Consent tab of the contact record in salesforce to validate consent creation.
10. The Opt-Out Consent created for Marketing Phone is as follows –