Track masking progress with the custom field 'Masking Status' (Optional)
In the Data Masker application, the user can create a Configuration that is used for the Data Masking process.
This document showcases how Data Masker Configuration can be transferred from one org to another in order to efficiently migrate data from sandbox to production using the Import/Export feature of the Data Masker application.
Overview
- Create a custom field ‘Masking Status’
- Add ‘Masking Status’ to each of the ‘Object Masking’ records.
Step 1: Create a custom field ‘Masking Status’
Add Custom Field ‘Masking Status’ to each of the Objects that is being masked.
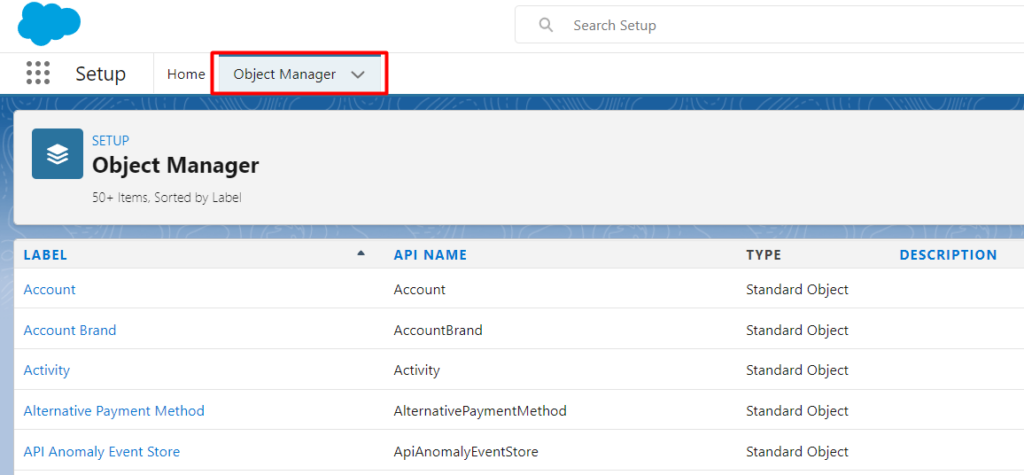
Navigate → ‘Object Manager’ and Select the object in which you need to add a field.
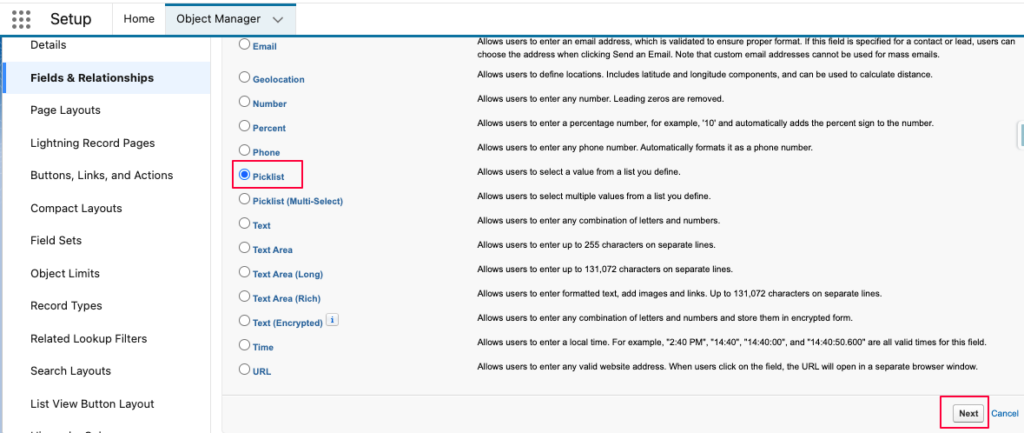
Navigate -> ‘Fields and Relationships’, and click on ‘New’
- Select Data Type Picklist
- Click on Button ‘Next’
Key in the field details:
- Field Label: ‘Masking Status’
- Values: Select ‘Enter values, with each value separated by a new line. ‘
- Enter Value: Masked
- Click on the Button ‘Next’

Select ‘Visible’ for each of the profiles under which DataMasker will run.
Click ‘Next’
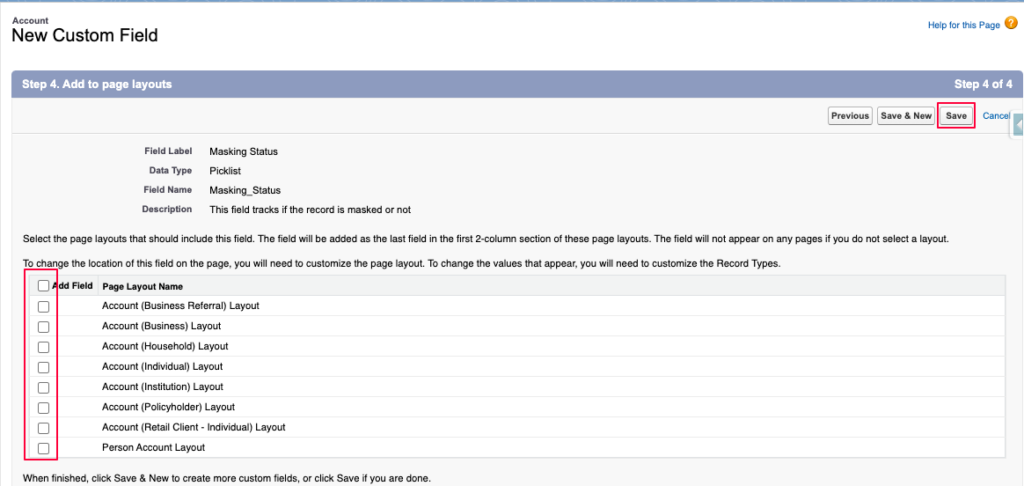
- Unselect all of the Page Layout
- Click on the button ‘Save’
Step 2: Add ‘Masking Status’ to each of the ‘Object Masking’ records
- Navigate to the DataMasker App
- Configurations tab
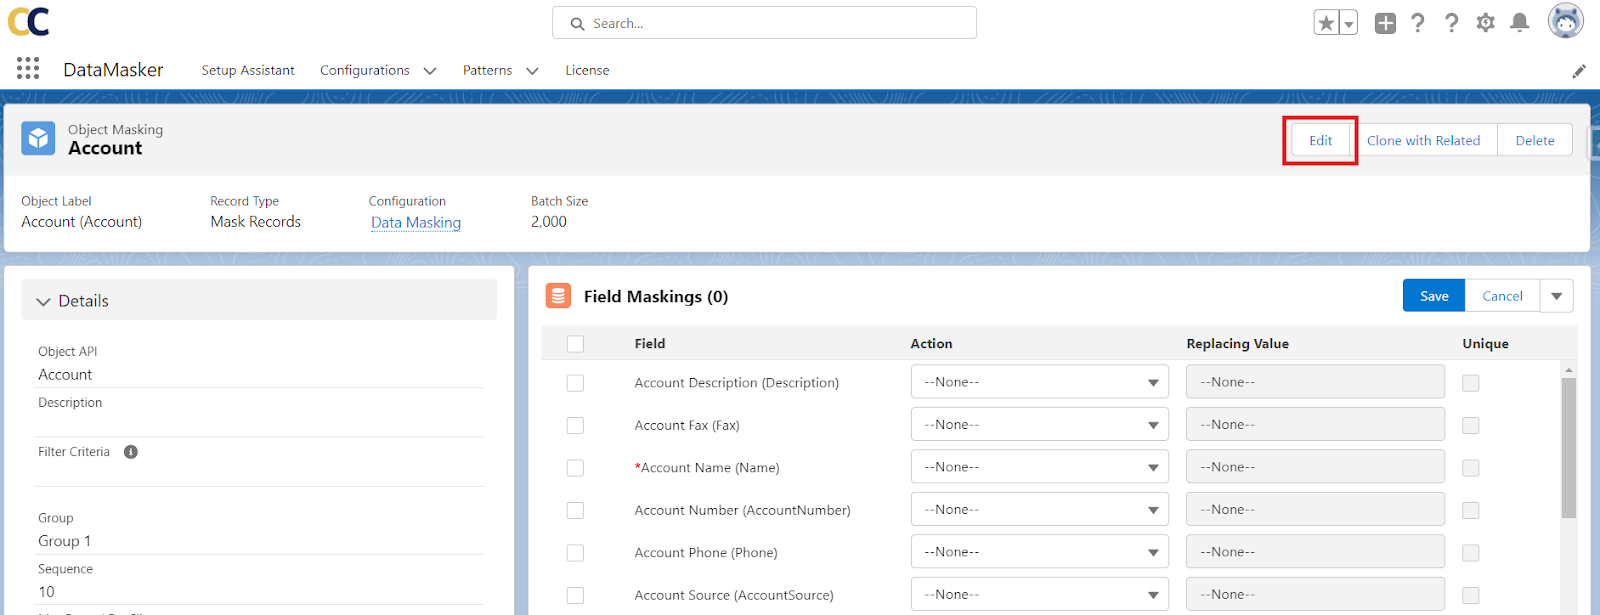
- Click on the Configuration Name
- Click on the Object. Example ‘Account’ in the screenshot below

- Click on the button ‘Edit’
-
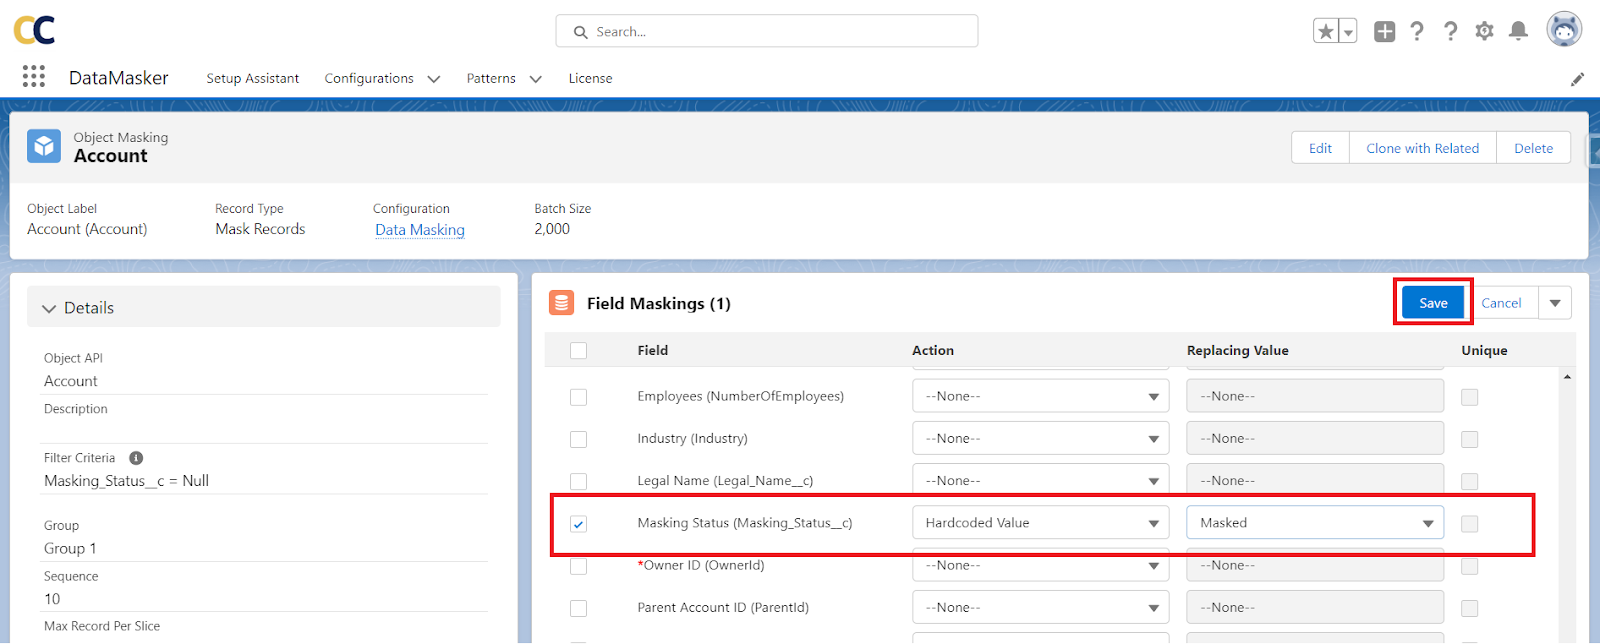
Update value of field ‘Filter Criteria’
masking_status__C = NULL
Click on the Button ‘Save’
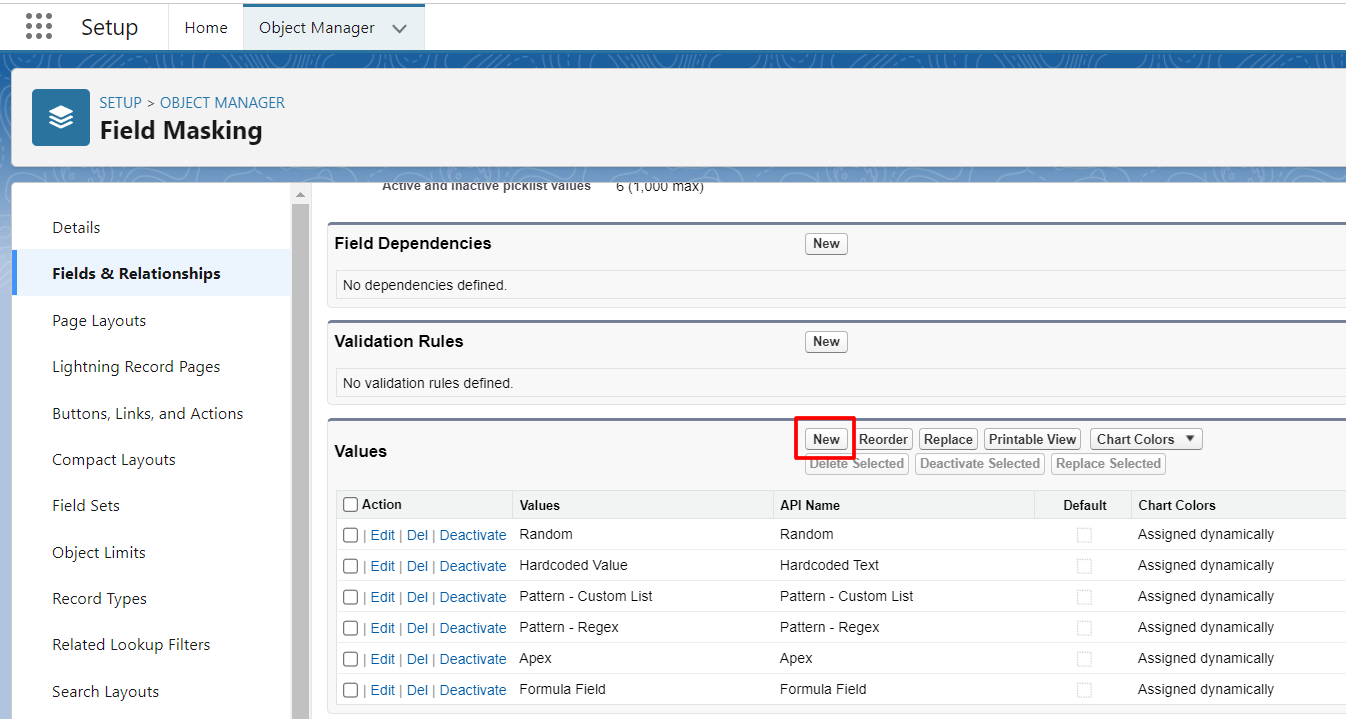
- Add ‘Masking Status’ to Field Masking
- Click on the button ‘New.’
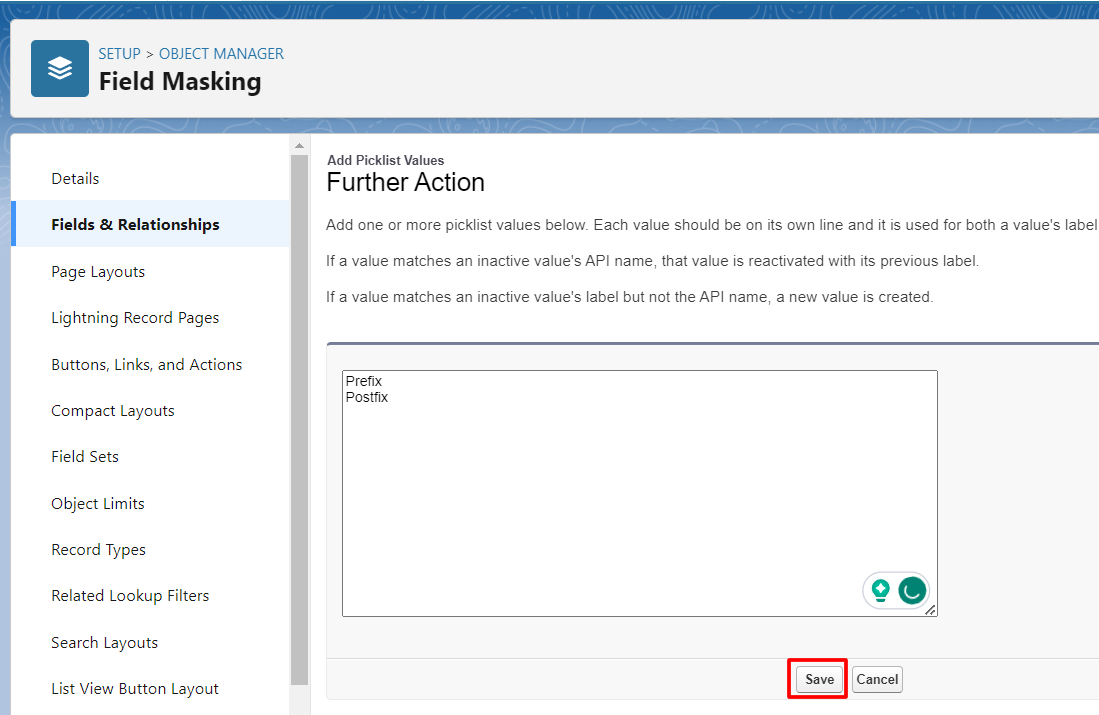
Enter details of this new field
- Select Action: ‘Replace’
- Select Further Action: ‘Hardcoded Value’
- Select Field: ‘Masking Status’
- Select Value: ‘Masked’
- Click on the button ‘Save.’
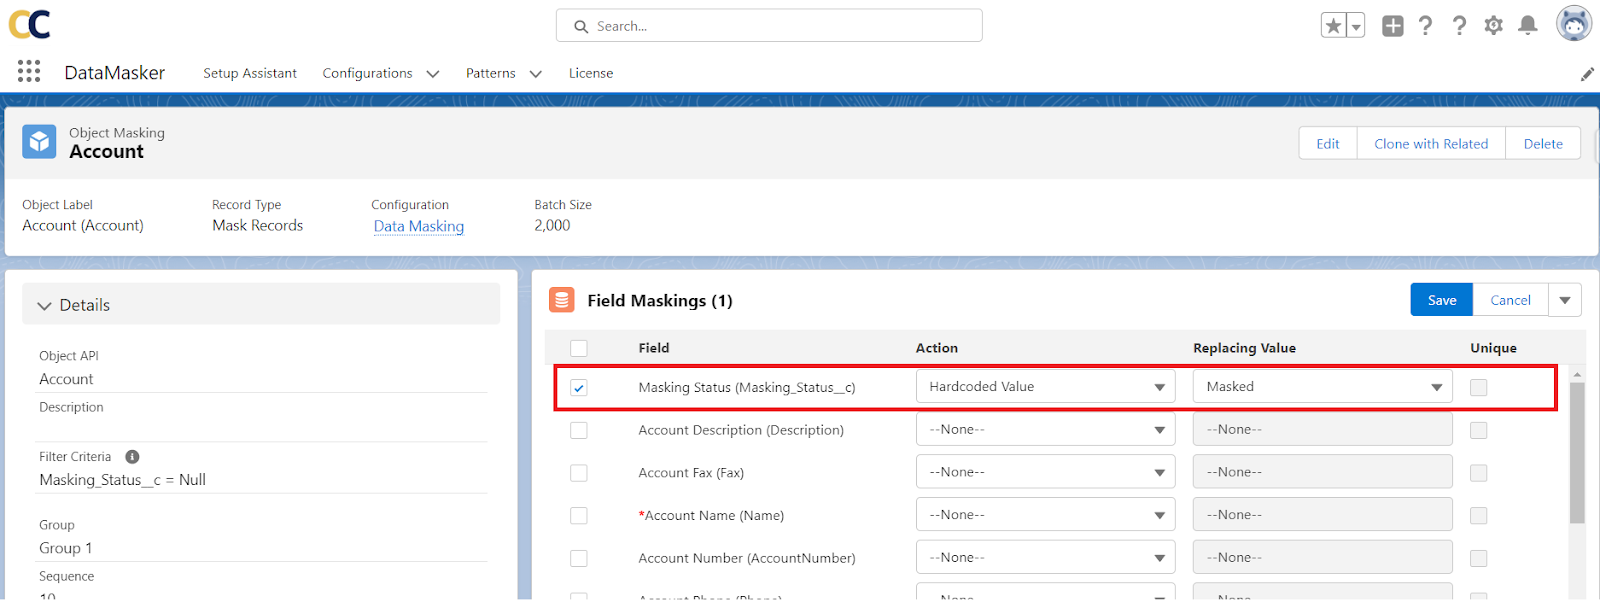
- Masking Status Field should show under Field Maskings as below
- Repeat adding the custom field ‘Masking Status’ to all the remaining Objects that are being masked.
Need Help?
If you have questions about this documentation, please contact our support team.