With the help of Cloud Compliance, users can integrate consents available in Salesforce (CRM) with Pardot. It helps Prospects (in Pardot) for managing their own consents via the Self-service portal (Cloud Compliance).
Whenever there is a change in the consent values, Pardot can trigger various automation or unsubscribe prospects from various email lists.
Prerequisites In Salesforce (CRM)
Before doing Cloud Compliance’s integration with Pardot, the user needs to complete the following steps in the same order as mentioned below :
- Consent Management – Please refer to the link – Consent Management
- Self-service consent management – Please refer to the link – Consent Settings, Individual Field Mapping, Individual Email Field Mapping, and Enabling Triggers
- Marketing integration guide ( contact & lead fields should have the same APIs)
- Connecting Pardot and Salesforce(CRM):
Click the below link to know about Pardot & Salesforce connection in detail
https://help.salesforce.com/articleView?id=pardot_salesforce_connector.htm&type=0
Click the below link if you want to download the Pardot-Salesforce connector guide
https://www.pardot.com/training/salesforce-connector-setup-guide/
- As mentioned in the connector guide, add Pardot buttons on Contact/Lead layouts.
Note – We have used Connector Version V2 for verifying Pardot integration with Cloud Compliance.
Prerequisites in Pardot
- CRM should be connected in Pardot settings and should not be paused.
Solution Steps
1. After configuring data use purpose records and system preferences, the Consent matrix for Contact records in Salesforce (CRM ) will be as follows –
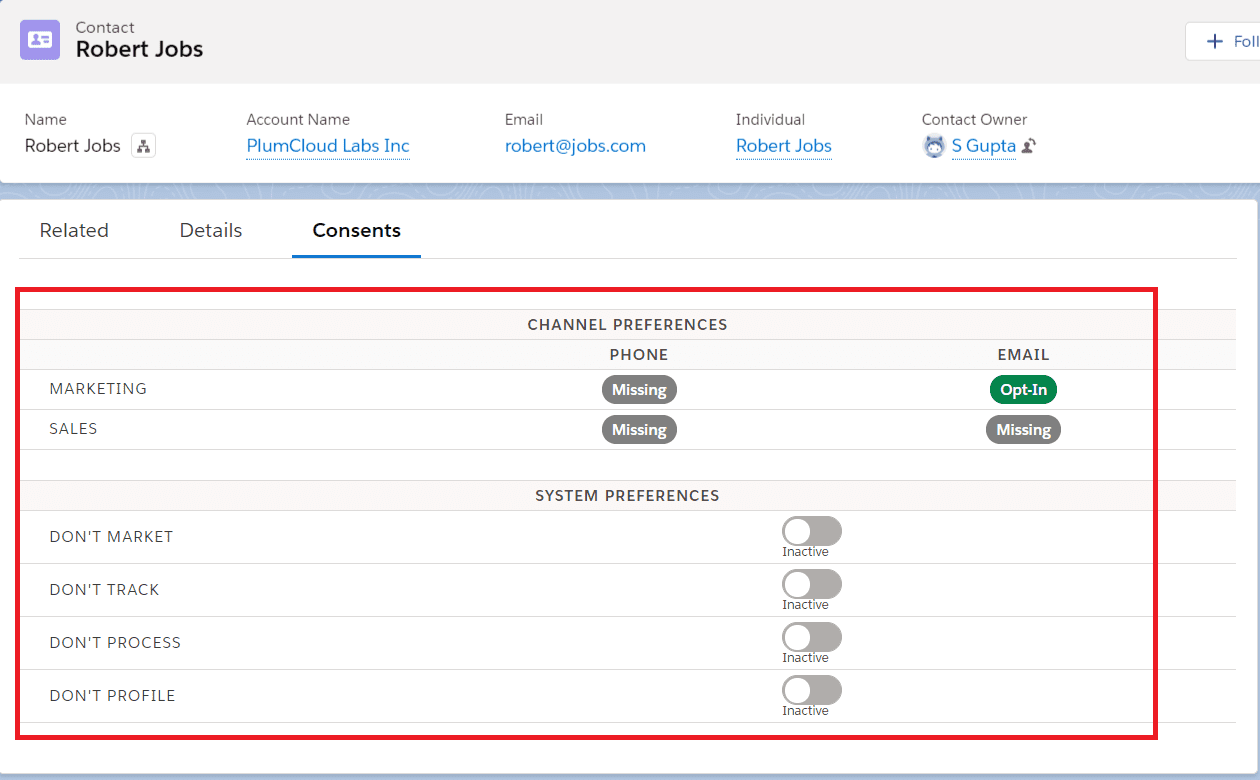
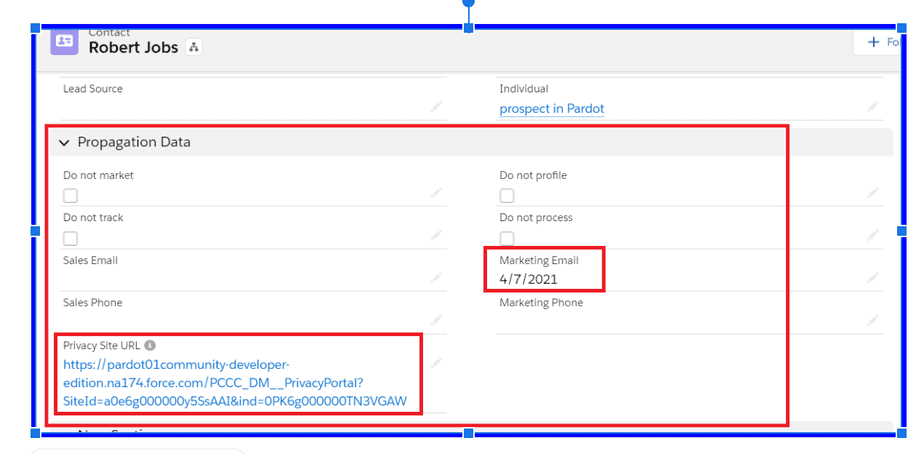
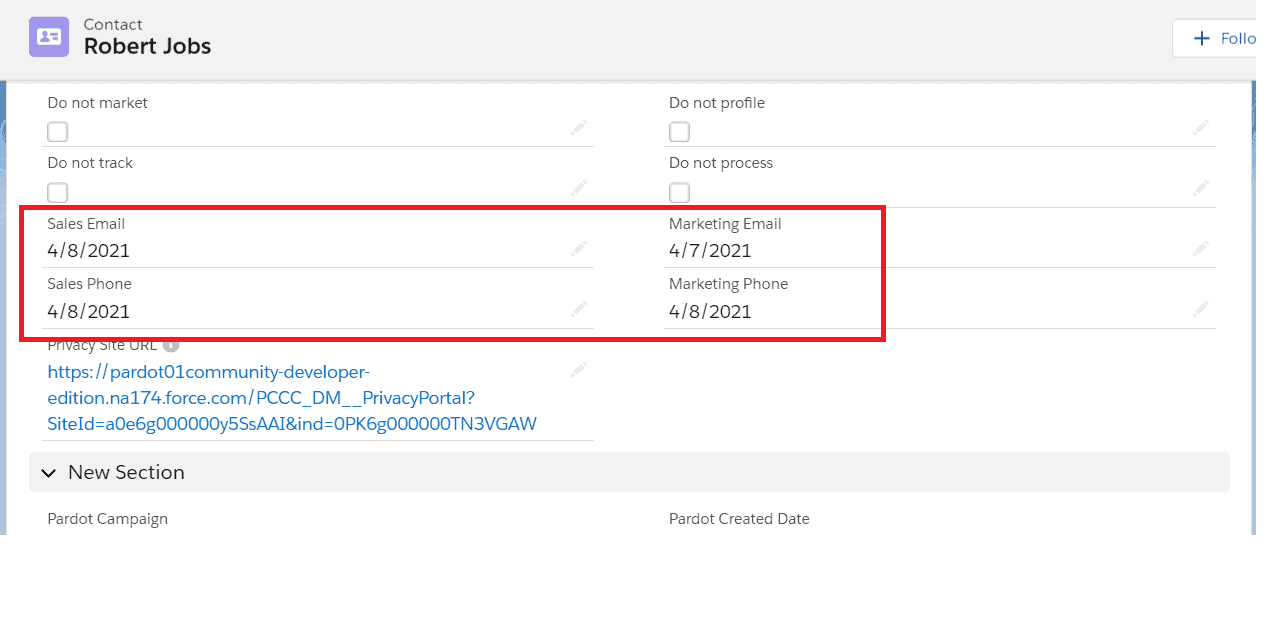
2. In Propagation Data Section on the contact record page, a few fields will be auto-populating the values. Here Marketing Email has the status as Opt-In. So whatever is the End date of this consent, it will be propagated to the custom Consent Date field created on the contact object.
In the following screenshot Marketing email is the date field showing the End date of the Consent- ‘Marketing Email’, Privacy Site URL with the pre-populated URL which will be pointing towards the Self Service Portal related to the contact. All this data propagation is controlled by Cloud Compliance.
Note – Ensure the “Privacy Site URL” field is added to the contact page layout.
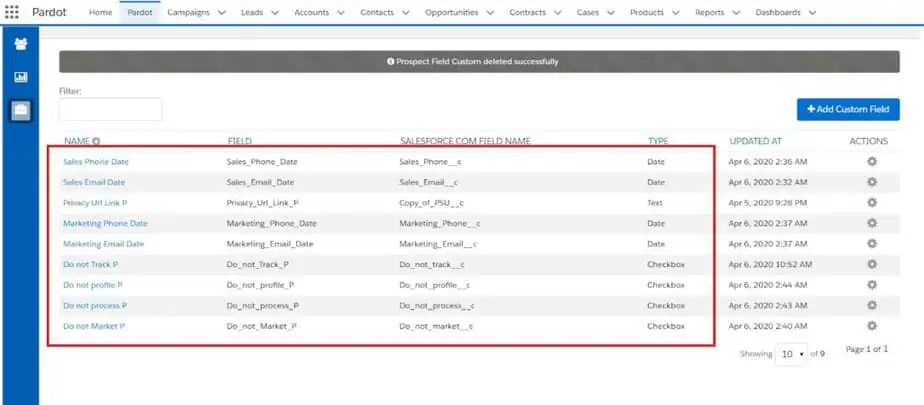
3. Create Prospect custom fields for e.g. ‘Sales Phone Date’ (date type), ‘Do not Track’ (Checkbox), etc. Map these custom fields with corresponding custom fields of Salesforce (CRM). Ensure that the API name of the Contact & Lead fields of CRM should be the same. For e.g., the Marketing Email field (date type) on Contact and Lead, should have an API name as “Marketing_Email__c”.
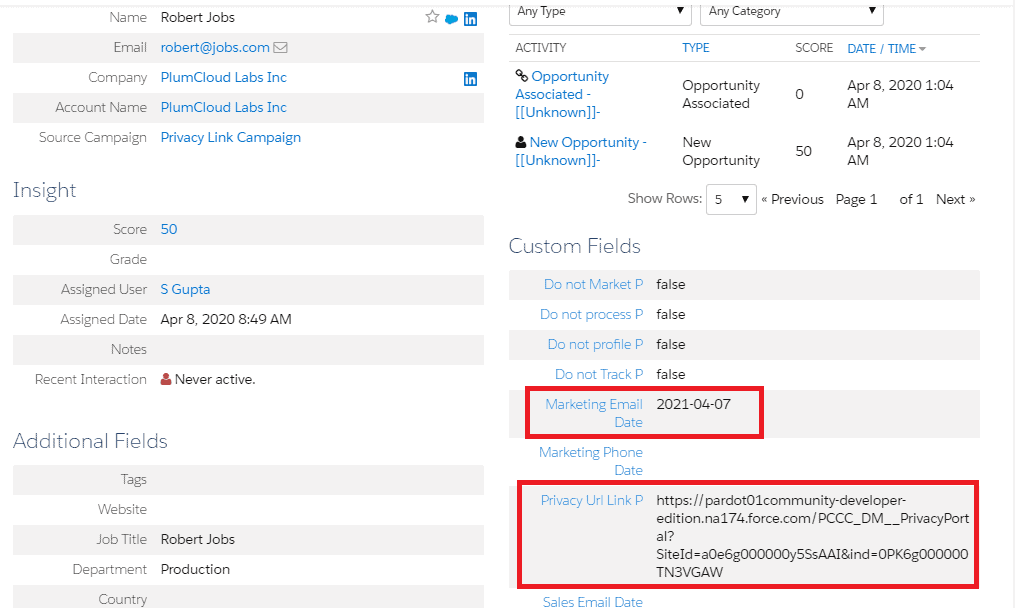
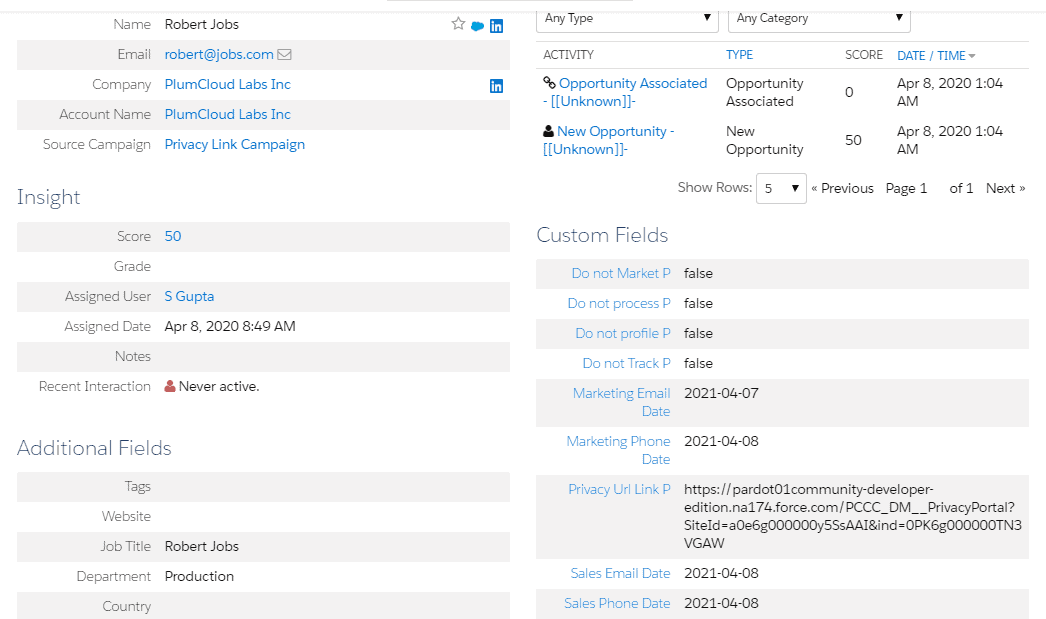
Note: The necessary custom fields for Prospects in Pardot are mentioned in the following screenshot.
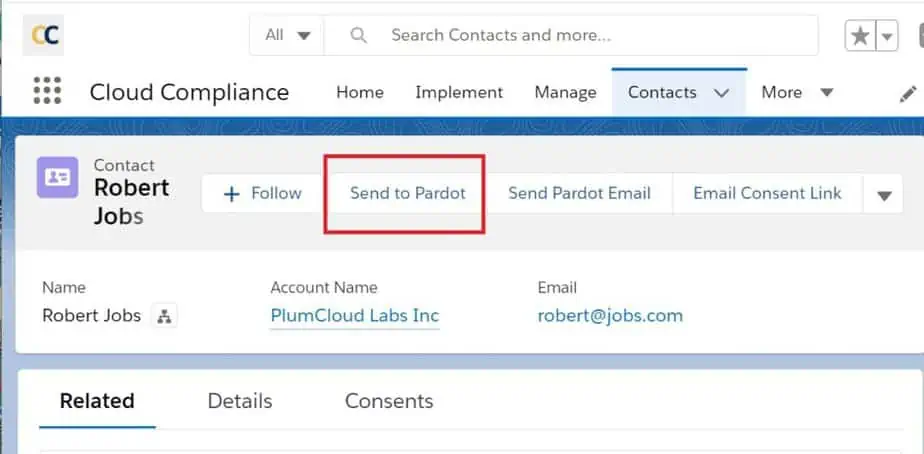
4. To send contact/lead records to the Pardot, users need to click on the button “Send to Pardot”.
Note – This is to be done when a new Prospect is to be created in Pardot.
5. Navigate to the Prospect list in Pardot and open the new prospect record. User can see the marketing integration consent fields synced with the custom consent fields of Pardot. Along with all the consent fields, the ‘Privacy Site URL” field value is also populated in Pardot which is in sync with Salesforce (CRM) values.
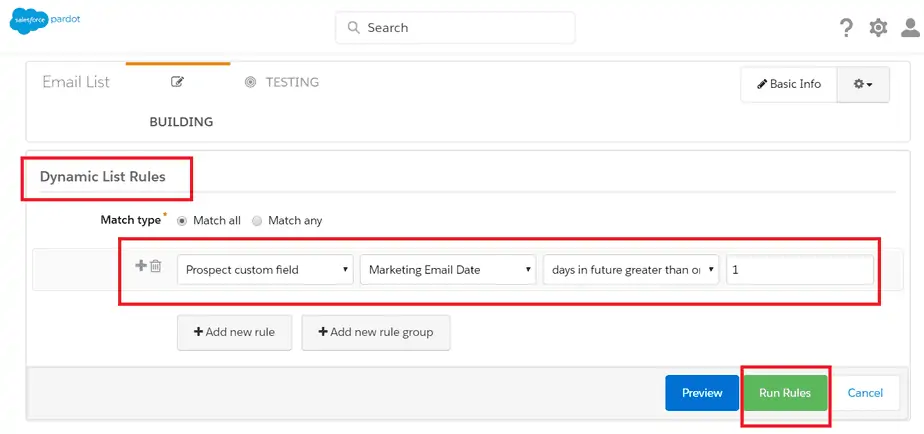
6. Users can configure a Dynamic email list in Pardot based on the Consent field values and set up Rules accordingly.
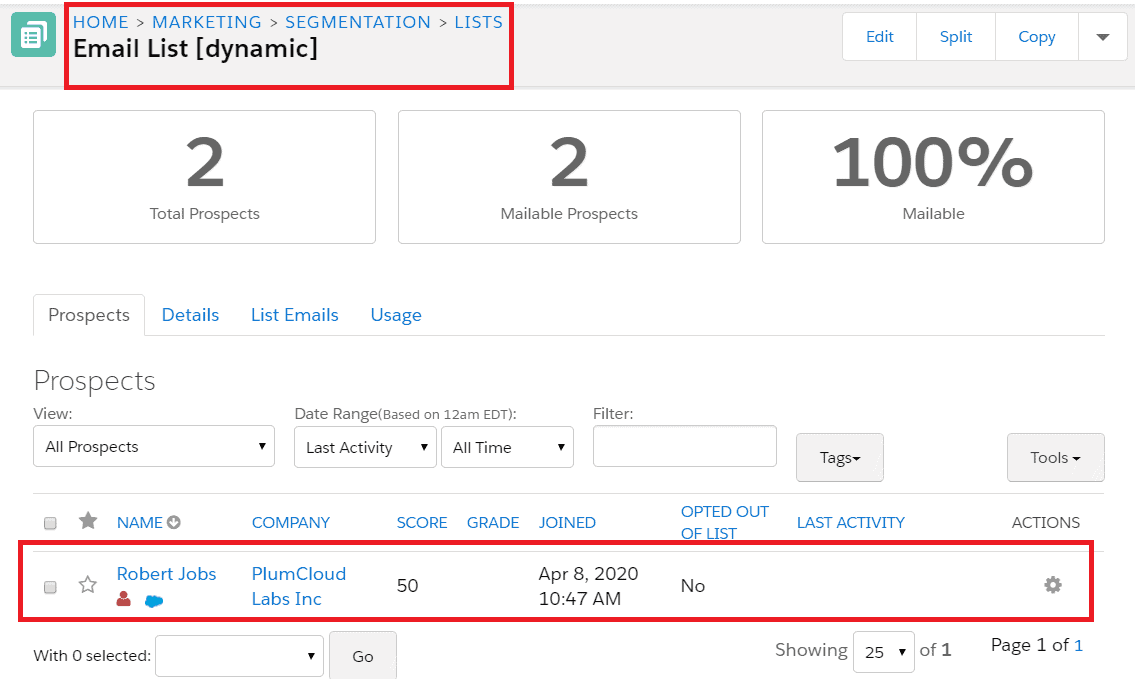
7. Based on the rules set in the dynamic list, the prospect will be added to this list.
8. To send an email to the prospect, the user needs to embed the ‘Privacy Site URL’ variable tag in the footer section of any email template. This URL will allow the prospect to manage their own consents using the Self-Service Portal(Cloud Compliance).
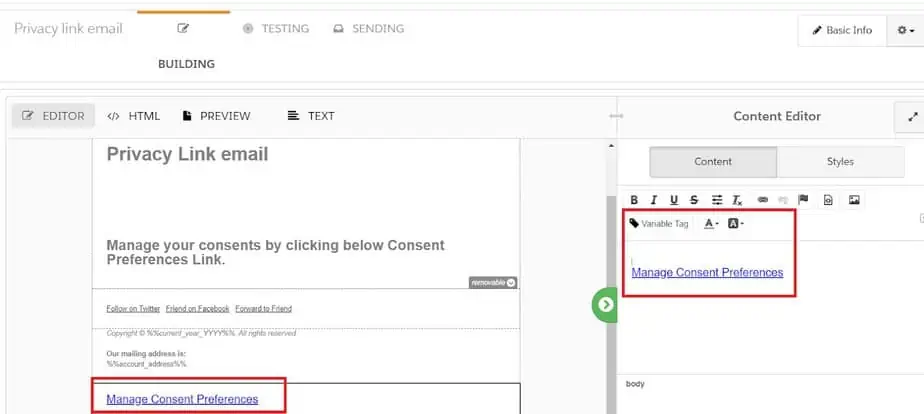
9. Users can use this template to send to any of the active email lists so that prospects will receive the email.
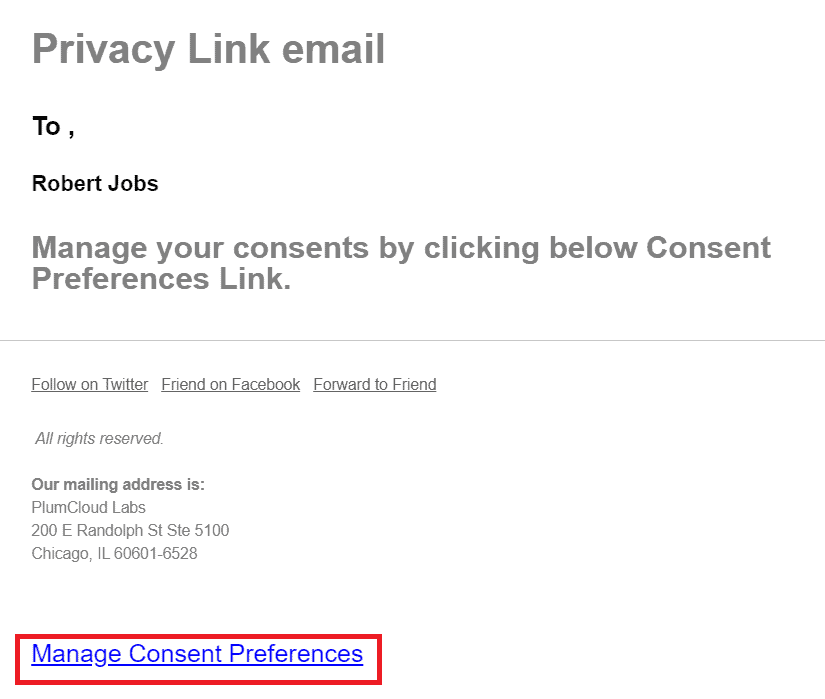
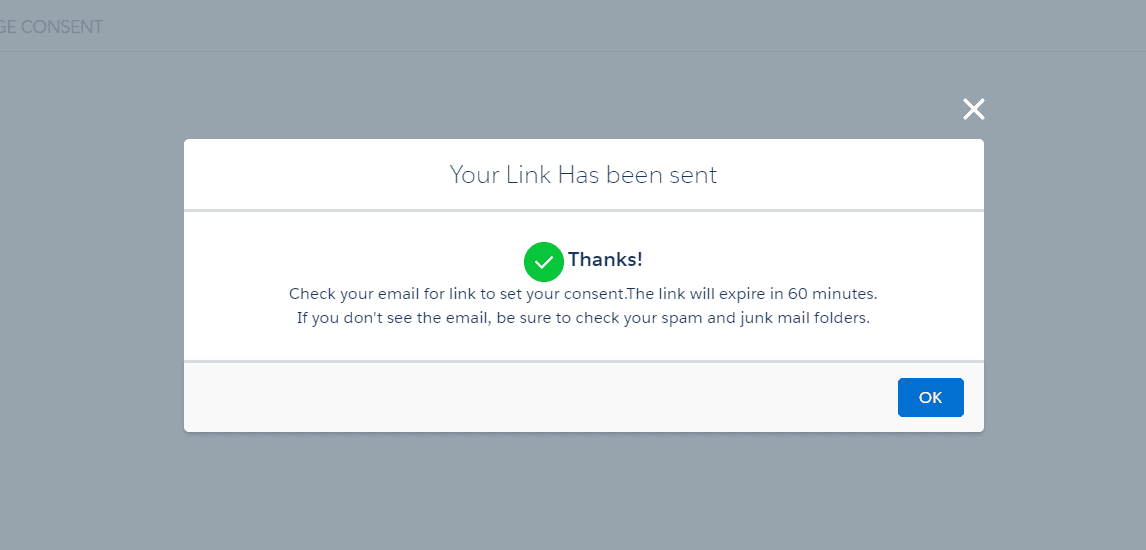
10. Once the prospect clicks the link, a pop-up window will display the message that a verified link is emailed to them. This is done in accordance with the security so that only the prospect can receive their consent management link.
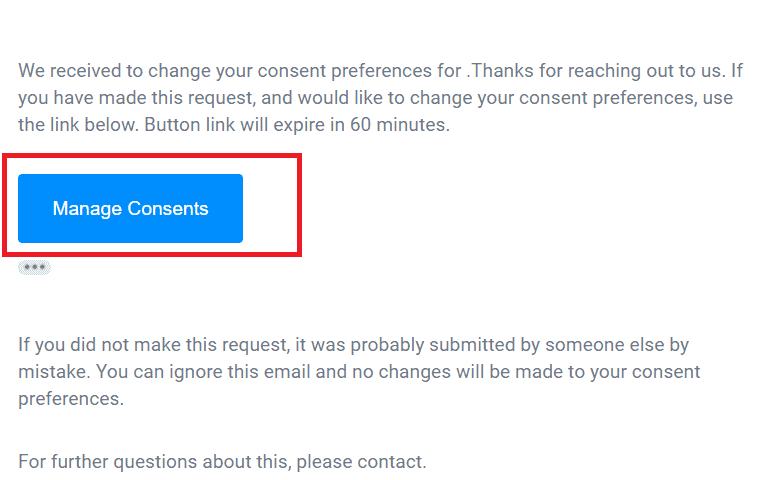
11. Once the verified prospect receives the email, the next thing that prospect needs to do is to click on the ‘Manage Consents’ button which will navigate to the Self-Service portal.
12. After clicking the ‘Manage Consents’ button the Self-Service Portal will be as follows –
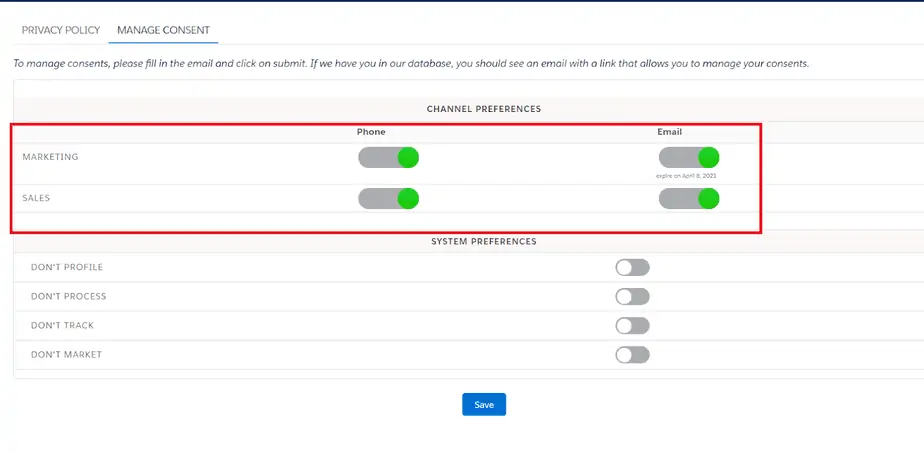
13. New consent values are synced to Salesforce (CRM) in the background and will be reflected in the Consent matrix of Salesforce (CRM).
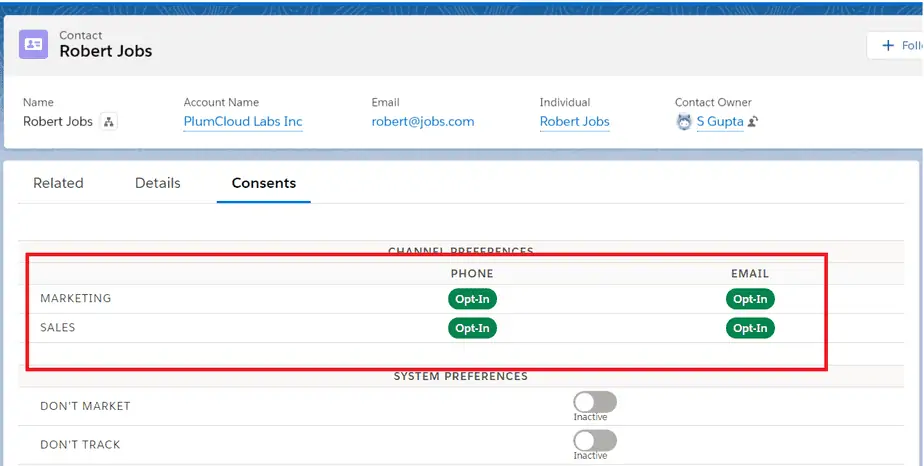
14. Once again these new consent preferences will be allowed to propagate on custom date fields on the Contact/Lead object of CRM.
15. Navigate to Pardot. Click on the button “Sync to CRM” on the corresponding Prospect record.
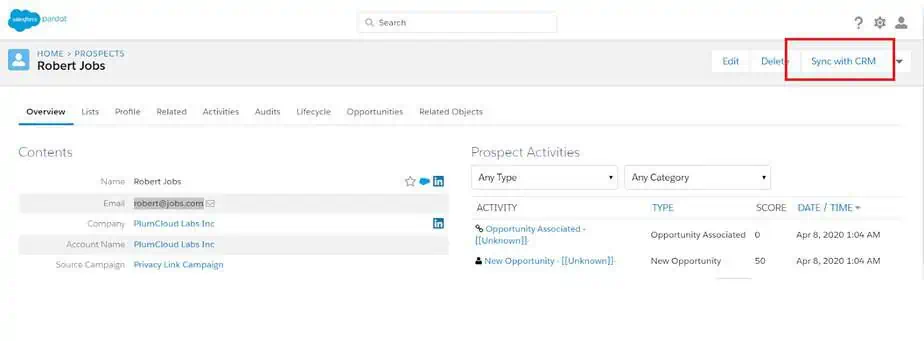
16. Prospect record will now pull new consent values which were given by the prospect on the Self Service portal.
Note – Users can add this prospect to the new dynamic list as per the rule criteria. For this process refer to steps no 6 & 7 mentioned above.
This is the complete life cycle of Pardot synchronization with Cloud Compliance.


