Masking User Records (Optional)
Step-by-step instructions (assumes an installed product with appropriate permission sets assigned):
Initial configuration, test, and validate: Do this in a Dev Sandbox first. Start by creating an SOQL to filter out users who do NOT need to be masked.
Test the SOQL from the workbench or other SOQL editors to make sure it works well.
Note: This is a crucial step to get right, as any users not in this query will be masked and inactivated.
					 //This query will show the details of the users that WILL BE MASKED.

 //Make sure to put all user ids that do not need to be masked in the SOQL query.     Especially add user ids of Site guest user, Automated, Integration & Platform Integration users.

 //You can also use other criteria such as profile name, role or others that DO NOT CHANGE   between Prod and Sandboxes.

 //Do NOT use username as it changes between prod and sandboxes.

 select id, name, username, profileid from user where Id not in ('0054K000002hqbxQAA',     '0054K000002hqbxQAA','0054K000003PkltQAC', '0054K000003PklrQAC',
 '0054K000003PklvQAC')

  //Use your user record's Id, not the ones provided here for example.
- Copy the filter criteria (Everything after the ‘where’ in the SOQL clause)
//From the query above, the filter criteria is the following Id not in (‘0054K000002hqbtQAA’, ‘0054K000002hqbxQAA’, ‘0054K000003PkltQAC’, ‘0054K000003PklrQAC’, ‘0054K000003PklvQAC’ )
- Navigate to DataMasker App Configuration and modify (or add) a Configuration.
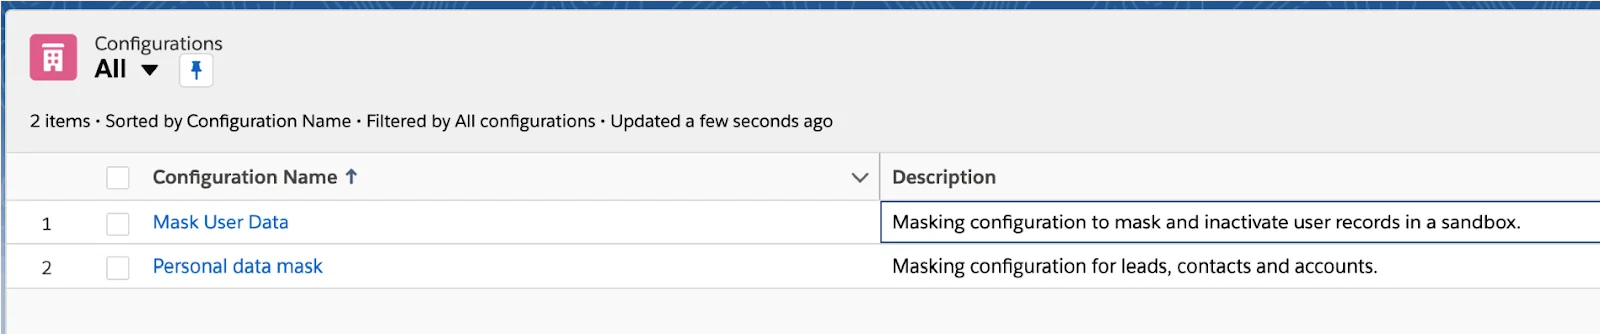
- Navigate to the configuration details view. Click the “New” button select the record type ‘ Mask Records’ and further add an object for “User” (if one does not exist).
Make sure to add the filter criteria as shown below.
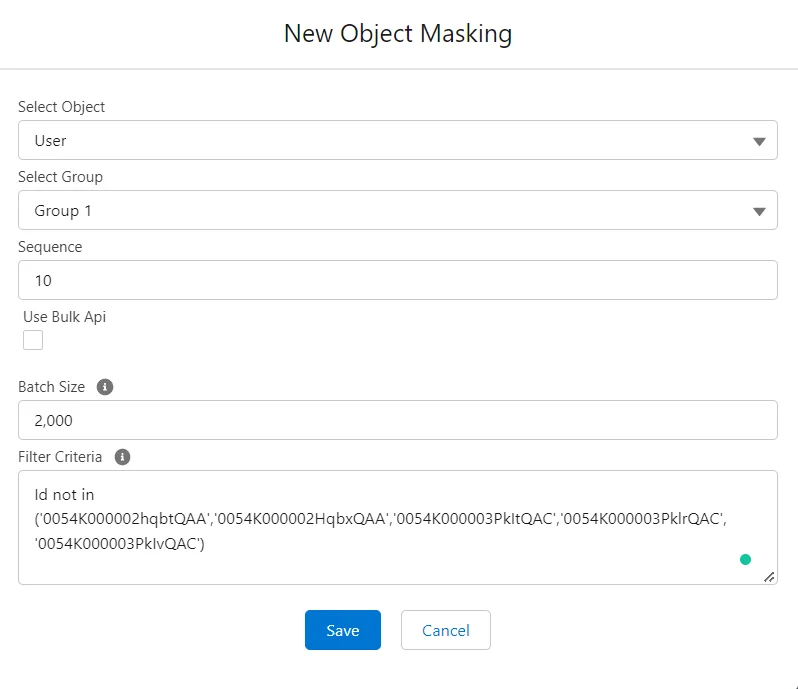
Your completed record would look similar to this.

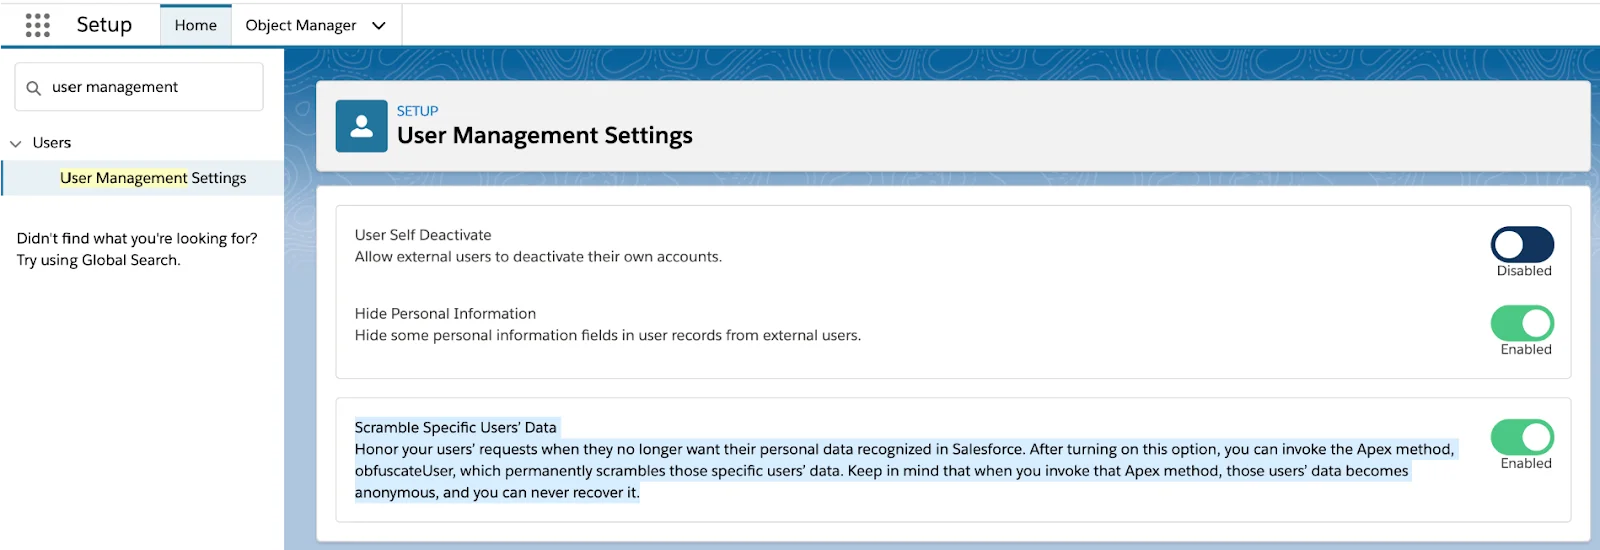
- Navigate to Setup Users User Management Settings and enable “Scramble Specific Users’ Data”.
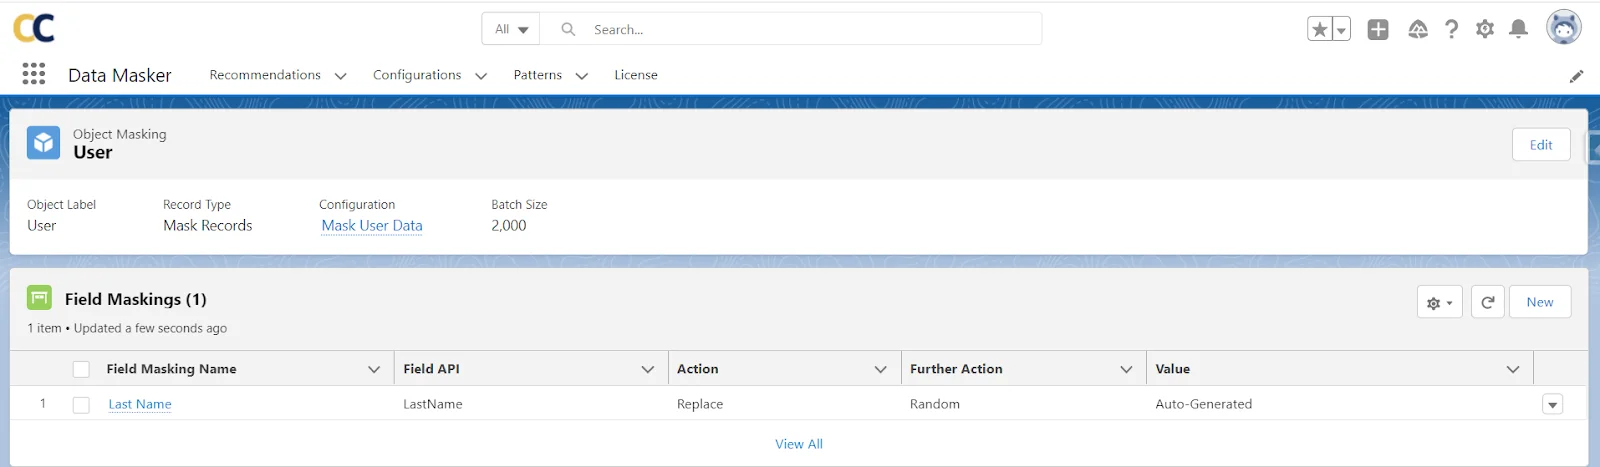
- Create a new mapping for the ‘User’ Object, and add the ‘Full Name’ field for replacement with ‘Random’. This is all that is needed.
Note: Data Masker uses a Salesforce-provided API that will mask the entire user record, deactivate it, and send no email or notification to the user.
- Click on ‘Run Masking’ button
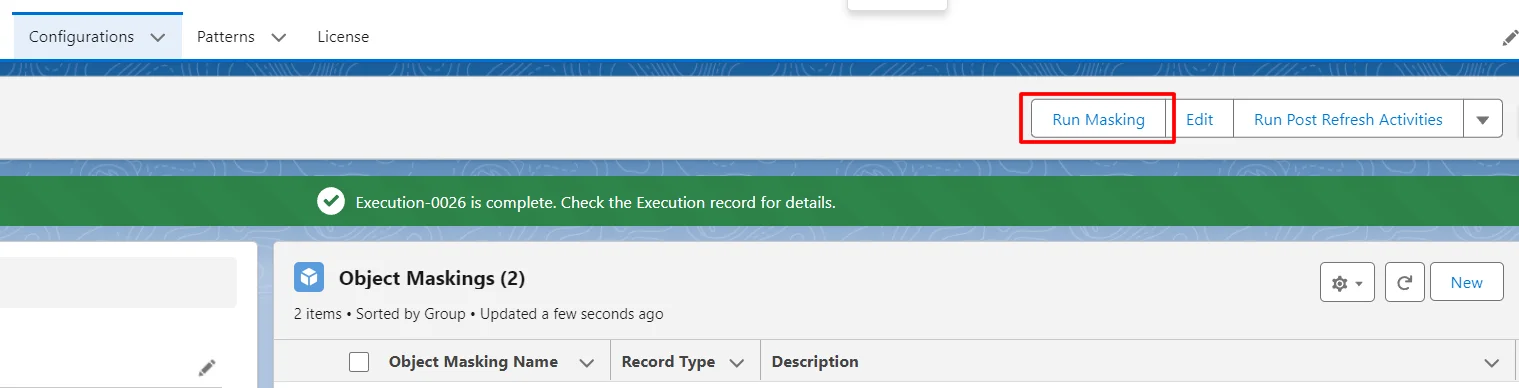
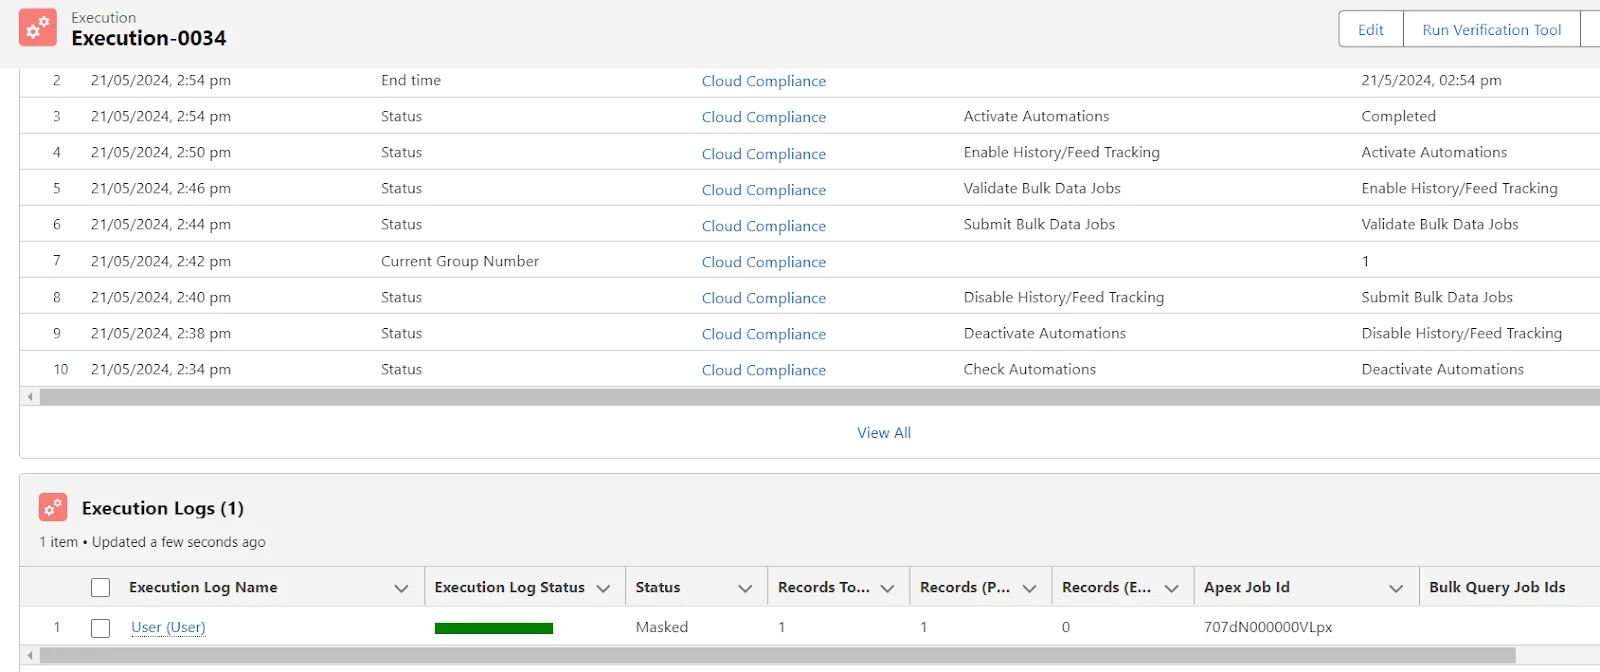
- Validate that the execution was successful by navigating to the data masker’s ‘Execution’ tab.
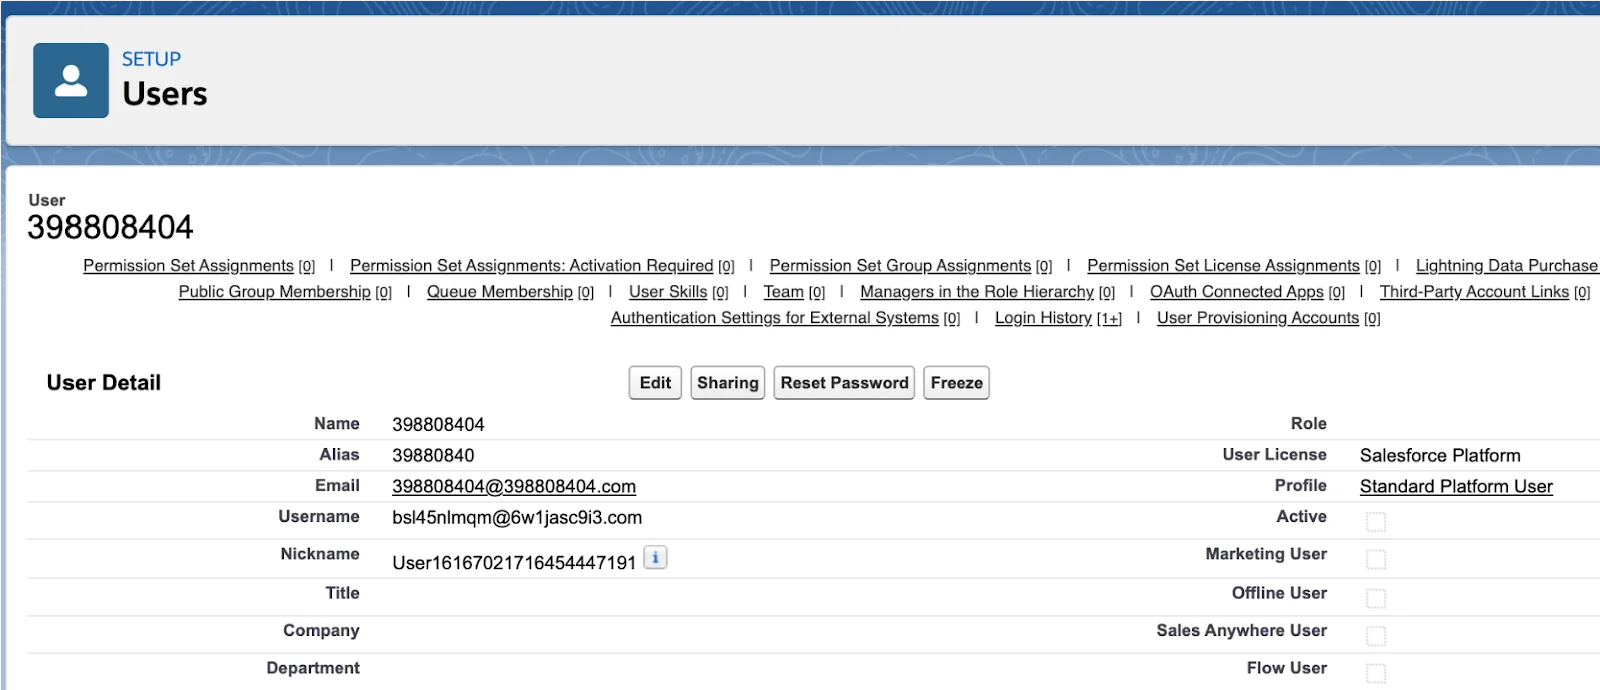
- Navigate to the user record to validate that it was successfully anonymized
Mask user object’s custom fields
- Allows masking of both standard and custom fields with full field selection control
- This feature enables organizations to mask custom fields on User objects, providing greater flexibility for data protection requirements.
When to use:
- You need to mask custom fields on User object
- You want to select specific fields for masking
- You need rollback capability
- You prefer Bulk API processing for performance
Configuration:
- Navigate to your Configuration
- Add Object Masking for User object
- Uncheck “Use Standard User Obfuscation”
- Choose processing method:
- Select “Use Bulk API” for bulk processing
- Leave unchecked for batch processing
- Navigate to Field Masking tab
- Select fields to mask
- Configure masking patterns for selected fields
- Save the configuration
What happens:
- Field Masking UI is visible
- Can select any User field
- Note: Email Address can be masked when masking users with only for ‘Privacy Portal Profile’ and Community User profiles
- Supports both Batch and Bulk API processing
- Rollback mode available during execution
- Field mapping validation enforced
Note:
Batch Processing
-
Standard Obfuscation: Always uses batch mode
-
Custom Masking: Available when “Use Bulk API” is unchecked
-
Processes records individually
-
Lower performance for large datasets
Bulk API Processing
-
Standard Obfuscation: Not available
-
Custom Masking: Available when “Use Bulk API” is checked
-
Processes records in batches of up to 10,000
-
Better performance for large datasets
-
Supports rollback functionality
Run Test Masking Behavior
With Standard Obfuscation
-
Rollback Mode: Disabled (grayed out)
-
Message displayed: “Rollback is not supported with standard obfuscation”
-
Test runs without rollback capability
With Custom Masking
-
Rollback Mode: Available and configurable
-
Functions like any other object masking
-
Can test changes before permanent masking
The system enforces these validations:
-
Use Standard Obfuscation and Use Bulk API cannot be selected together
-
Field mapping is required when using custom masking
-
Field mapping is ignored when using standard obfuscation
- Note: Its not recommended for masking emails by custom method, as it will trigger an email for internal users (other than portal users) and the users needs to verify manually.
Query and Verification
After masking execution, you can verify results using Export Query:
Standard Obfuscation Query:
SELECT FIELDS(STANDARD) FROM User WHERE Masking_Status__c = 'Masked Standard' LIMIT 200
Custom Obfuscation Query:
SELECT FIELDS(CUSTOM) FROM User WHERE Masking_Status__c = 'Mask1 - Masked' LIMIT 200
Optional: Configure in Production so that it gets automatically propagated to full and partial copy sandboxes
Note: Data Masker is designed to not run in Production. We are configuring it here so that all Sandboxes created and refreshed after this step will always have Data Masker as part of the Sandbox image. Full and partial copy sandboxes will also get this configuration. Make sure your Sandbox templates have our Objects ‘Configuration, Object Masking & Field Masking’ selected. However, Data Masker mappings are considered data and will not migrate to Dev and Dev Pro sandboxes. For those, you will have to manually create the configuration/mapping above.