(Only when upgrading from 2.0 and older versions)
The DataMasker application can be installed by users, in addition to Users who already have the DataMasker application installed in Production/Sandbox can update it to the most recent version.
There are certain steps that need to be taken after upgradation is done to the most recent version. This article will assist users comprehend these considerations –
- Add picklist value ‘Validating Records’ in the field ‘Status’ for an object ‘Execution Log’
While processing, the Execution Log shows the status ‘Validating Records’ when the Reconciliation batch is running. ‘Status’ is the picklist field and initially, this value is not added in case of upgrade so the user needs to add it manually.
Follow the below steps to add this Picklist value –
Step 1 – Go to Object Manager and search for an object ‘Execution Log’

Step 2 – Go to ‘Fields and Relationships’ and search for the field ‘Status’
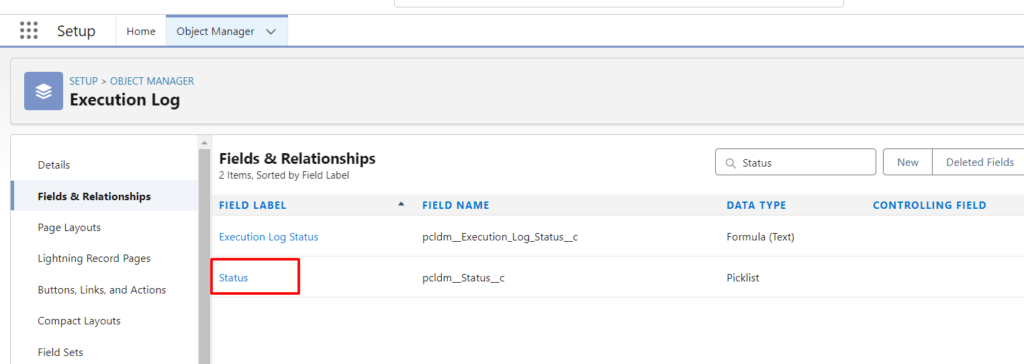
Click on ‘Status’ field
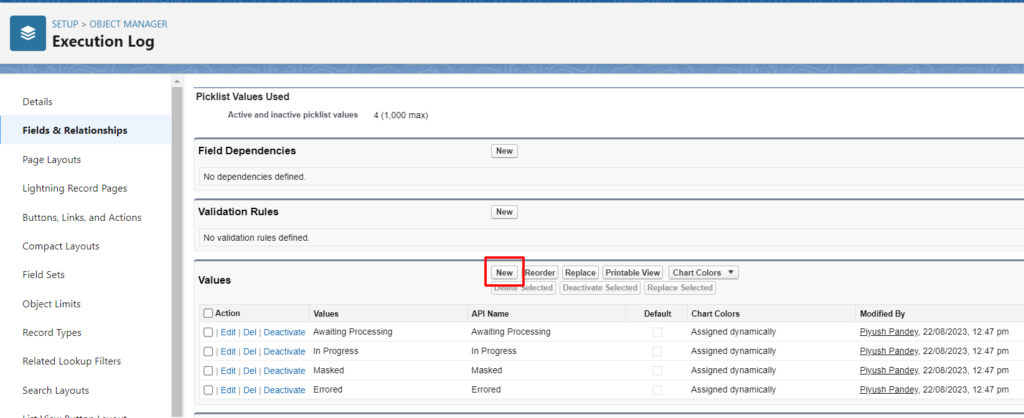
Step 3 – Scroll down to the section ‘values’ and click on the ‘New’ button
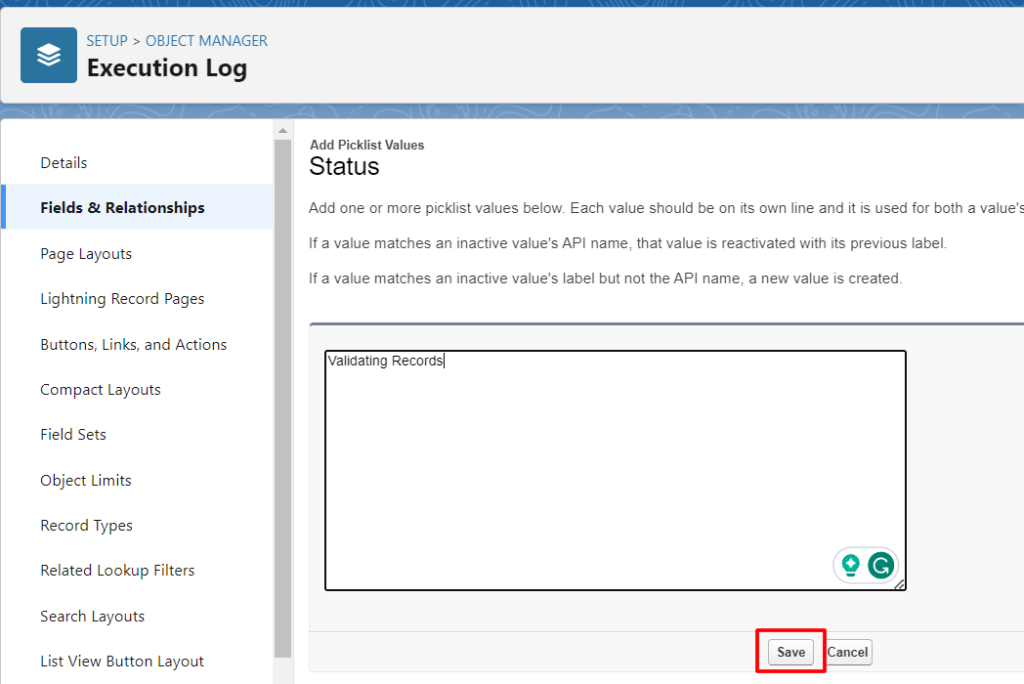
Step 4 –
Add value ’Validating Records’ can click on the ‘Save’ button
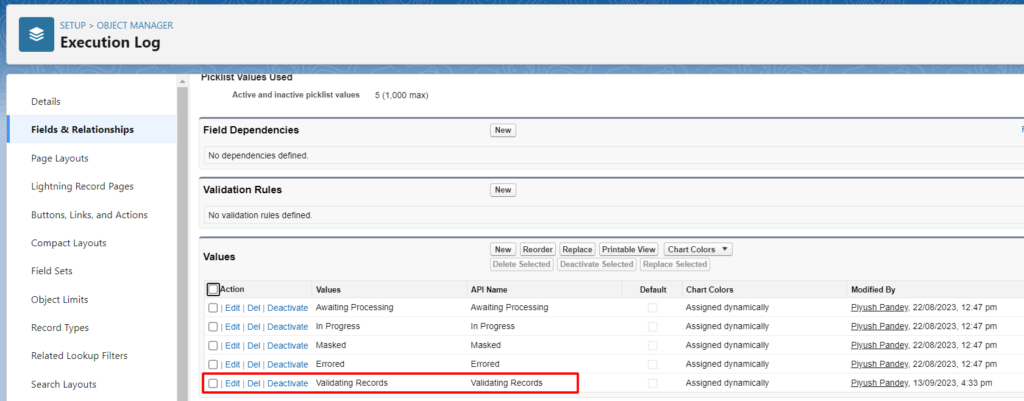
Here we have added the status ‘Validating Records’ in the picklist field ‘Status’
2. Add Prefix and Postfix action in the picklist field ‘Further Action’ for an Object ‘Field Masking’
Masking actions Prefix and Postfix are frequently used when it is necessary to maintain the current field value together with any attached values as a Prefix/Postfix.
After upgrade these actions are not available in the Field Masking, if not already added.
Step 1 – Go to Object Manager and search for an object ‘Field Masking’

Click on the object ‘Field Masking’
Step 2 –
Click on the Fields and Relationships and Search for the field ‘Further Action’
Click on the Field ‘Further Action’

Step 3 –
Scroll down to the section ‘Values’ and click on the button ‘New’
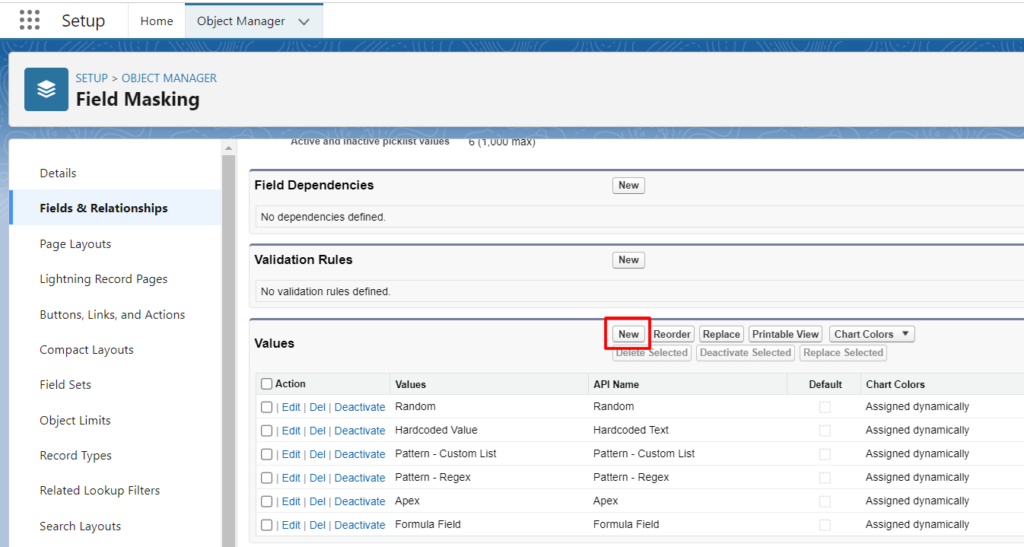
Step 4 –
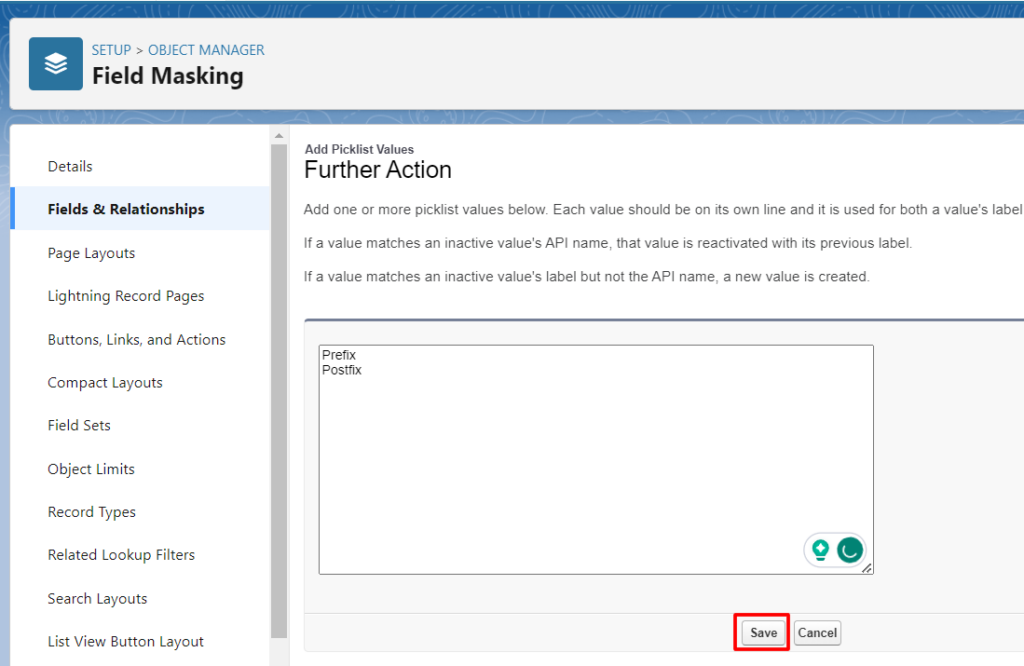
Add values ‘Prefix’ and ‘Postfix’ as shown in the below screenshot and click on the Save button
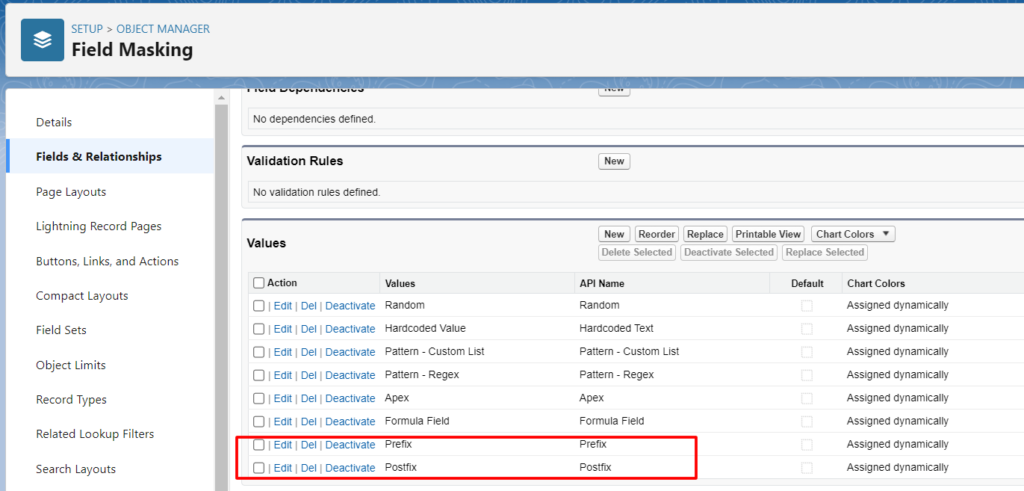
Here we have added the actions ‘Prefix’ and ‘Postfix’
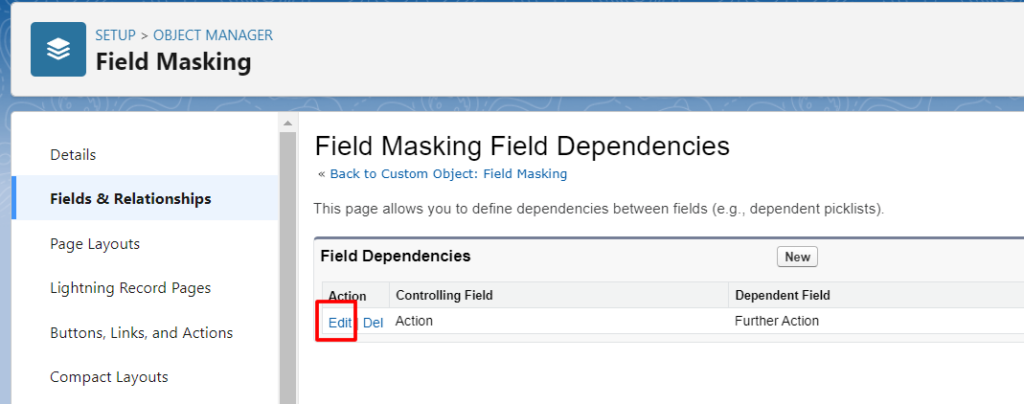
Step 5 – Now again go to Fields and Relationships and click on the button ‘Field Dependencies’

Click on the Edit button
Step 6 – Press CTRL key and select both actions and click on the button ‘Include Values’
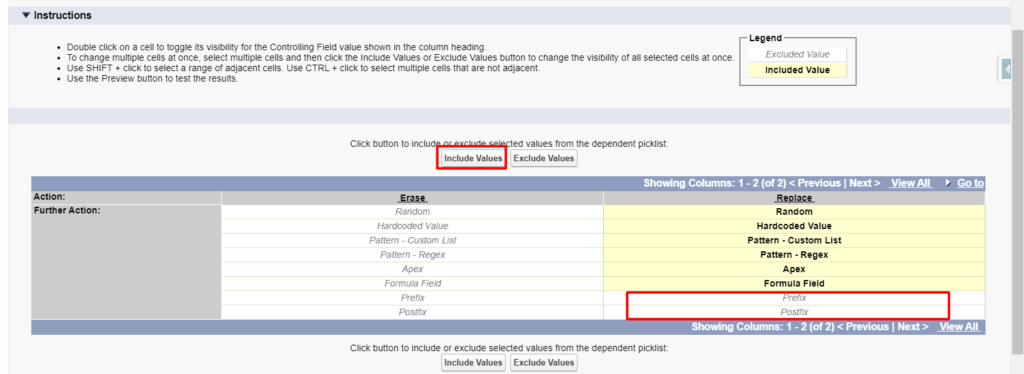
Now the actions have been included

Here we have added the actions so user can verify the added action in the DataMasker field masking component.
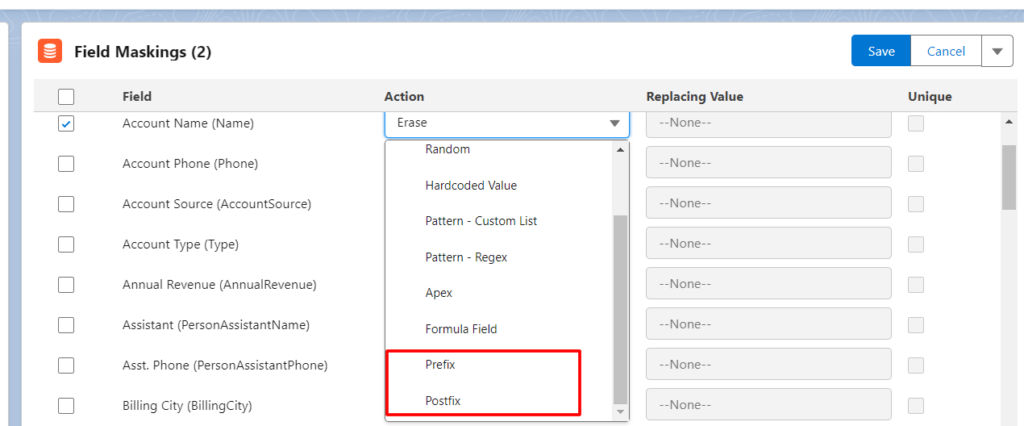
Now user can use these two actions along with others for masking.

