With the help of Cloud Compliance, users can integrate consents available in Salesforce (CRM) with Marketing Cloud. It helps Prospects (in Marketing Cloud) for managing their own consents via the Self-service portal (Cloud Compliance).
Whenever there is a change in the consent values, Marketing Cloud can trigger various automation or unsubscribe prospects from various email smart lists.
Prerequisites In Salesforce (CRM)
Before doing Cloud Compliance’s integration with Marketing Cloud, the user needs to complete the following steps in the same order as mentioned below :
- Consent Management
- Privacy Portal Basics
- Self Service Enablement
- Marketing integration guide
- Click the below link to know about Marketing Cloud & Salesforce connection in detail
Prerequisites in Marketing Cloud
- CRM should be connected to Marketing Cloud. Kindly refer to the following trailhead for more details.
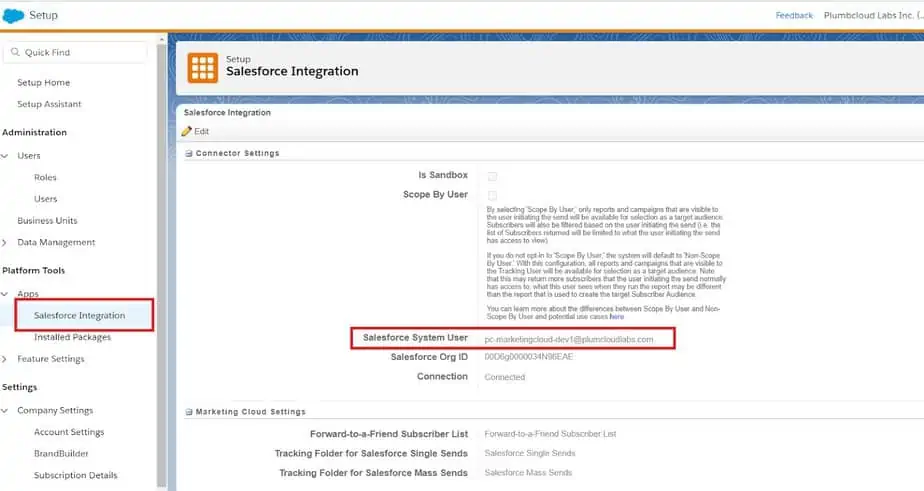
Solution Steps
1. For this integration guide, consider Contact object records but users can replicate on Lead object records too.
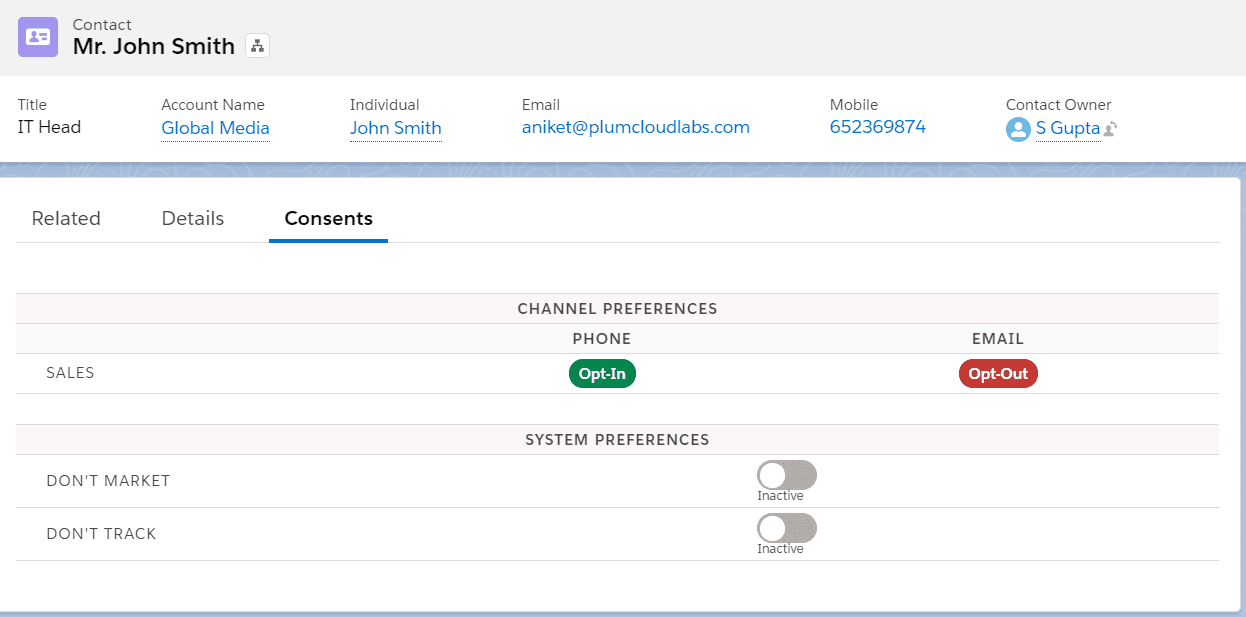
After configuring data use purpose records and system preferences, the Consent matrix for Contact records in Salesforce (CRM ) will be as follows –
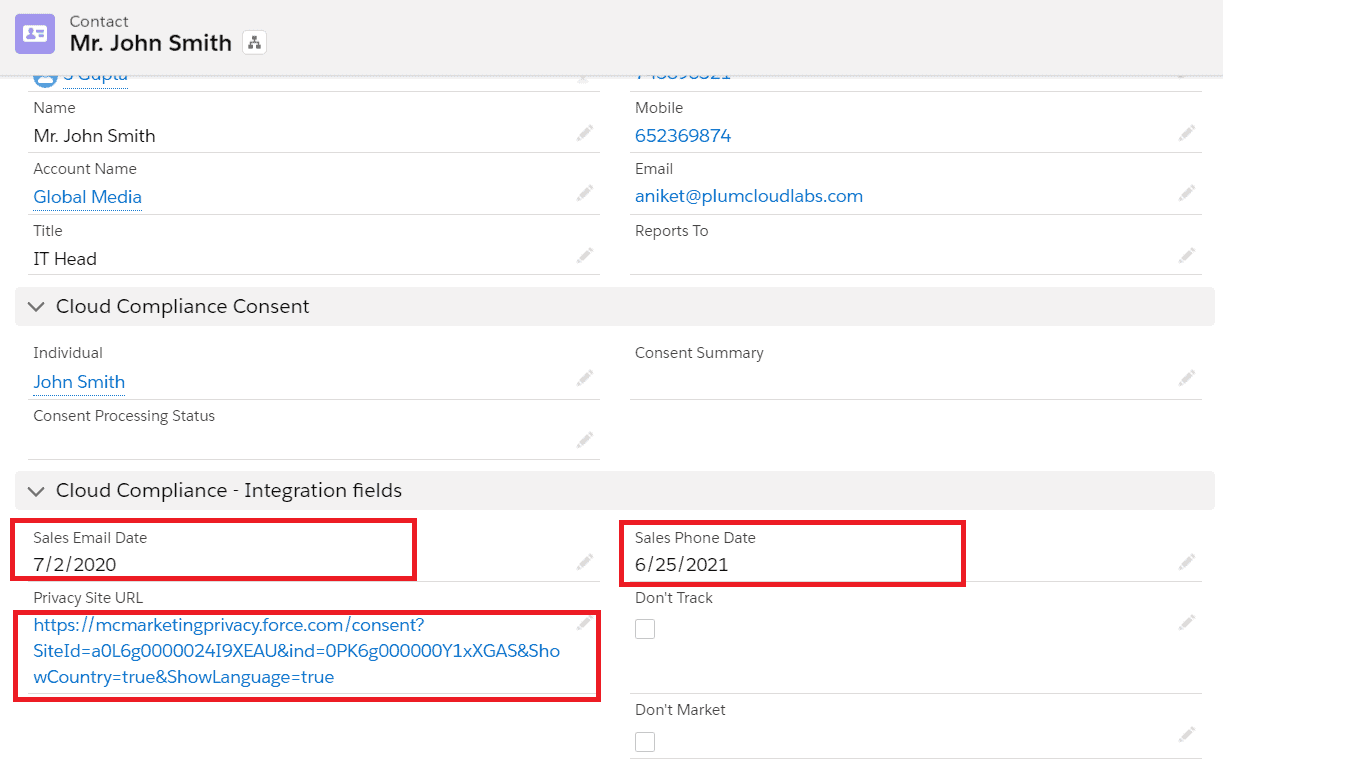
2. In the Cloud Compliance – Integration fields section on the Contact record page, some field values will be auto-populated. Here ‘Sales-Phone’ is having the status of Opt-In which is the basic consent given by that contact during the lead generation process. So whatever is the End date of this ‘Sales-Phone’ consent, it will be propagated to the custom Consent Date field created on the Contact object.
In the following screenshot, ‘Sales-Phone’ is a date field showing the End date for the consent given which is Opt-In, and ‘Sales-Email’ is a date field showing the consent End date which is Opt-Out currently. ‘Privacy Site URL’ will be populated with a URL that will be pointing toward the Self-Service Portal related to the Contact. All this data propagation is controlled by Cloud Compliance.
Note – Ensure the “Privacy Site URL” field is added to the Contact/Lead page layout. Before saving the record if users create any new field on Contact/Lead it will be created in Marketing Cloud when sync happens.
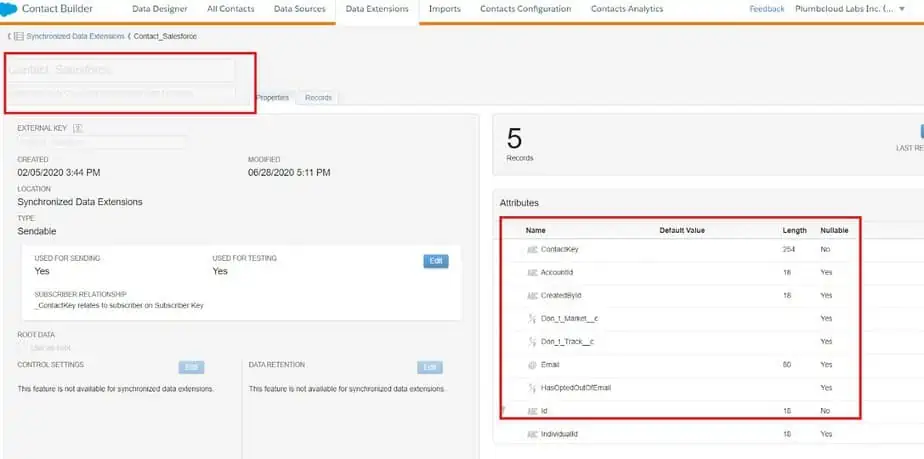
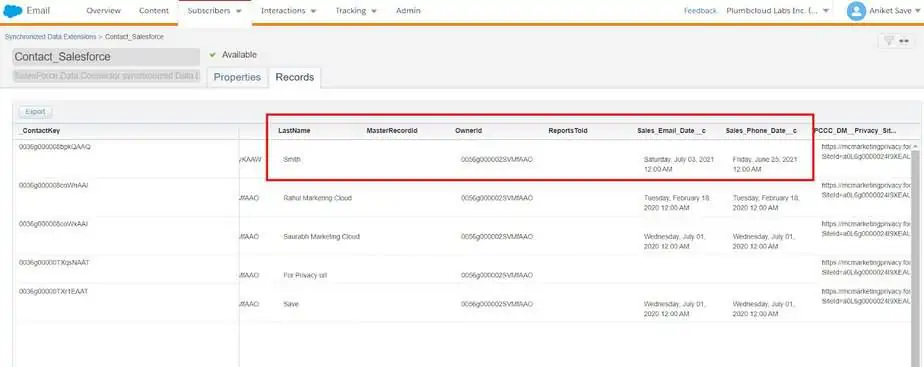
3. To sync this and other contact records in Marketing Cloud users need to set up a Data Source in Marketing Cloud and add attributes that are nothing but the fields. Select the fields which are required in Marketing Cloud. Users can also choose which records to be pulled in from the Contact object. Now create a Synchronized Data Extension by syncing it once. Later on, this will sync every 15 minutes.
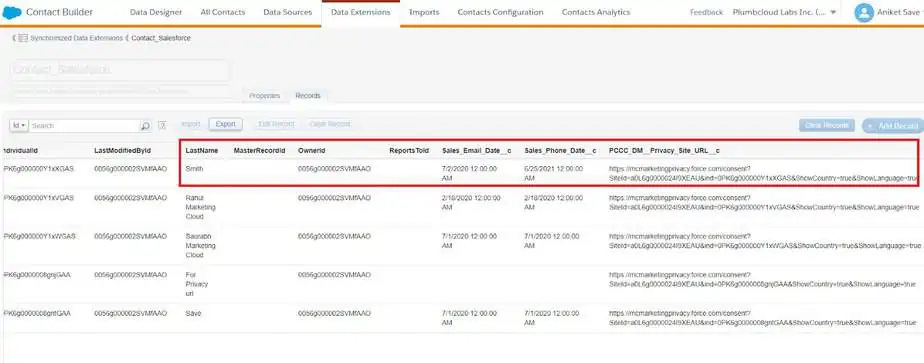
The Synchronised Data Extension (SDE), e.g. “Contact_Salesforce’ will be used to sync data from CRM to Marketing Cloud in the future.
4. Marketing Cloud takes 15 minutes to sync Synchronised Data Extension with CRM and a further 10 minutes will be required to update the local data extension.
If the user wishes to send an instant ‘Welcome email’ whenever any Lead or Contact is generated in CRM, then the user should consider the following two approaches –
- Journey Builder route or (Journey Builder Subscription plan required)
- Triggered Sends route
Note: Once the “Welcome email” is sent to Lead/Contact, further all steps to complete the marketing cloud life cycle is via Automation Studio. Here the assumption is that the ‘Privacy Site URL’ of Lead/Contact has been populated in the Local Data Extension.
5. After syncing the SDE i.e. ‘Contact_Salesforce’, the records will be populated with the current consent dates & Privacy SIte URL from CRM.
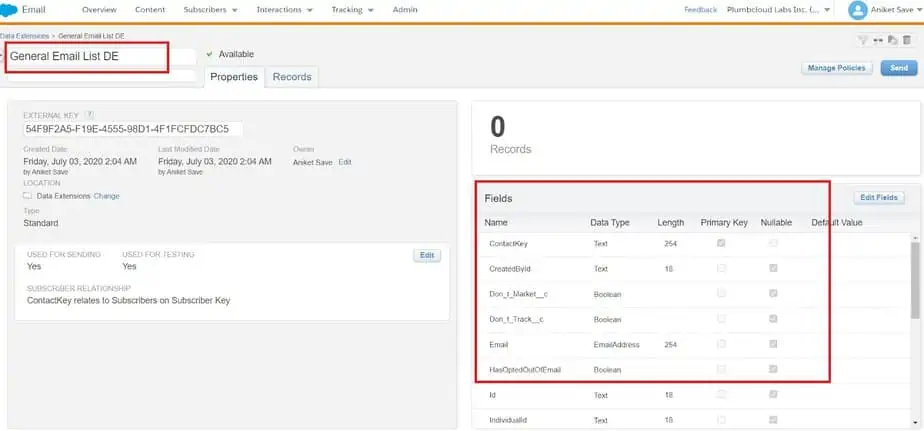
6. Create a Local Data Extension DE and make sure that all fields which are available in the Sync DE are already created. In this case, consider ‘ General email List DE’. Currently, there are no records as the Sync process is not completed. Now make sure to sync this DE with our Synchronized DE.
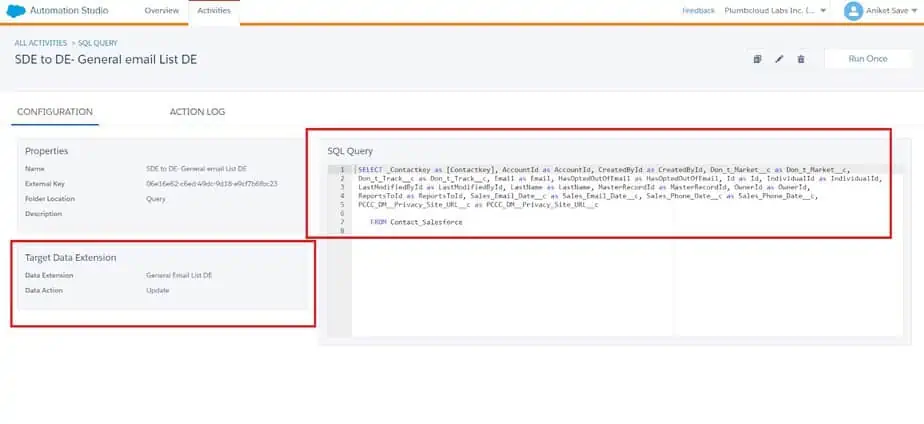
7. To sync this DE, write a Query Activity in the Automation Studio and keep it on an Update basis. Once the Activity is saved, the user can run it in real-time.
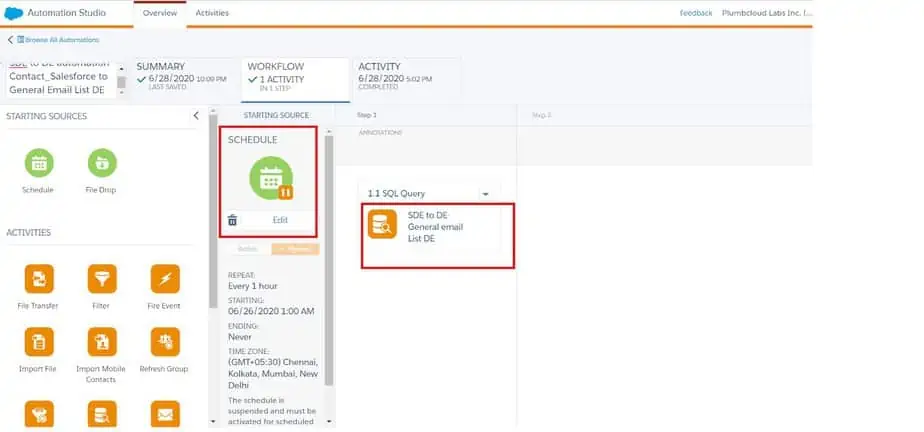
8. Users can automate this query by creating a schedule in the Automation studio which is available under the Automation tab. Users can set this on an hourly basis which is the minimum value one can set.
9. To send an email to the Contacts belonging to ‘General email List DE’ first create an Email Template under Email Studio. In the email template, the user needs to make sure to embed the ‘Privacy Site URL’ in the footer section. This URL will allow the contact to manage their own consent using the Self-Service Portal (Cloud Compliance). Users need to create different Email Templates based on their Purposes.
For eg. For this case, we have created a ‘General email template’ specific to our ‘General email List DE’.
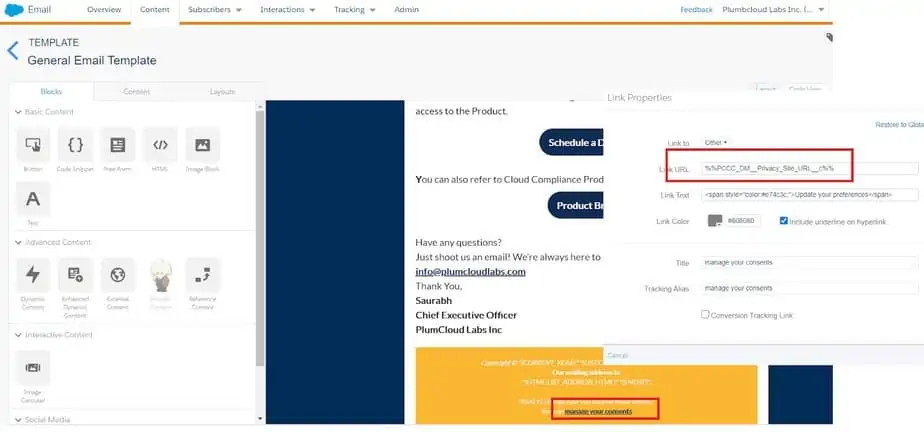
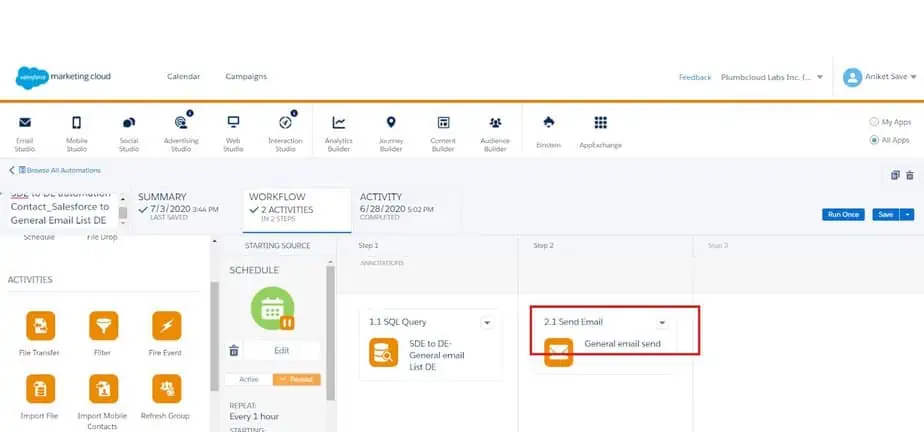
10. Now if users want to send this email template to the General Email List DE via automation or schedule, they have to add an activity ‘Send Email’ in the same automation which they have created in the above solution step no 6. In the Send, Email activity the user has to select the email template and add it as an activity. Now user can either schedule this Automation or run it manually so that email is fired to the contacts inside the General Email List DE
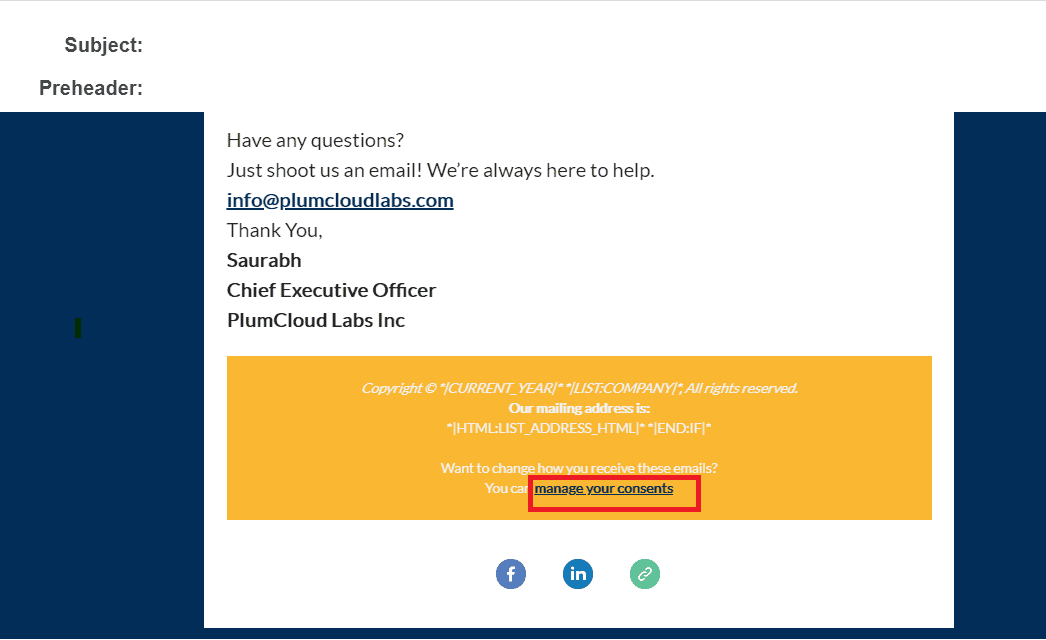
11. After executing the automation activity, contacts will receive an email from Marketing Cloud and they have to scroll down to the footer section and click on ‘manage your consents’ which will send a request to send a verified email containing that contact’s Consent preference self-service center link.
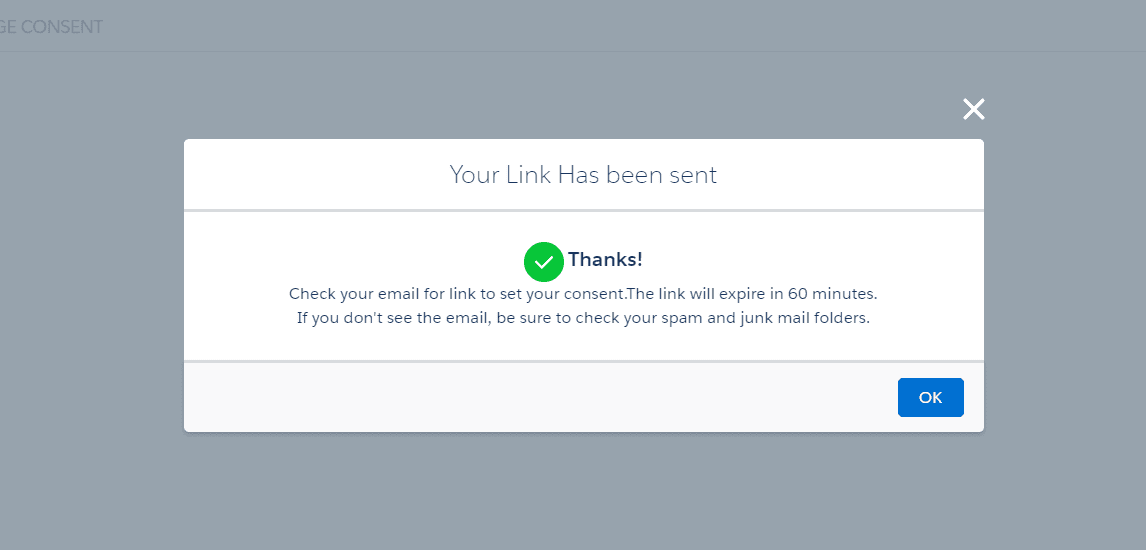
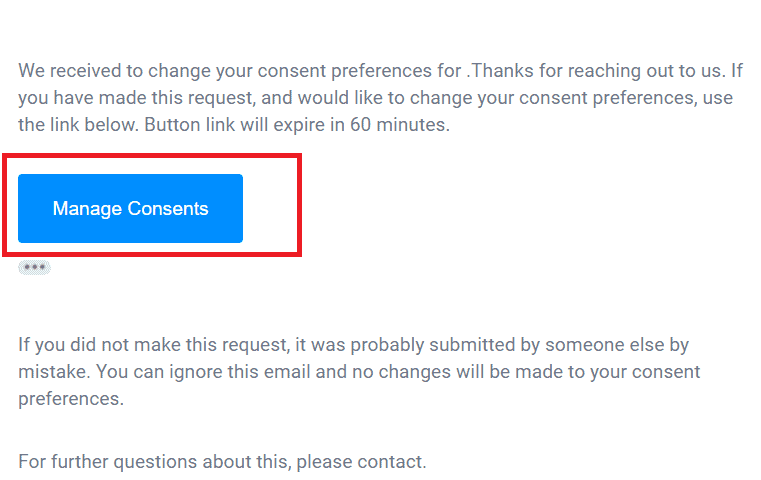
12. After clicking ‘manage your consents’ a verified email is sent with a message like this. The verified email will take the contact to a dedicated self-service portal from where he can manage the consent.
13. Once the verified Contact receives the email, the next thing that the prospect needs to do is to click on the ‘Manage Consents’ button which will navigate to the Self-Service portal.
14. After clicking the ‘Manage Consents’ button the Self-Service Portal will be as follows –
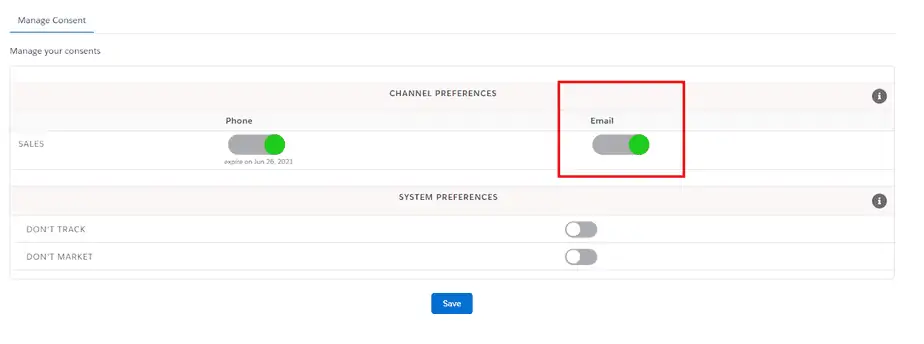
15. If consent values are updated from the self-service portal then Cloud Compliance will be updating the consent value in Salesforce (CRM) which is the background. The updated consent values can be seen reflected in the Consent matrix of Salesforce (CRM).
For eg. ‘Sales Email’ which was Opt-Out earlier has now been given an Opt-In
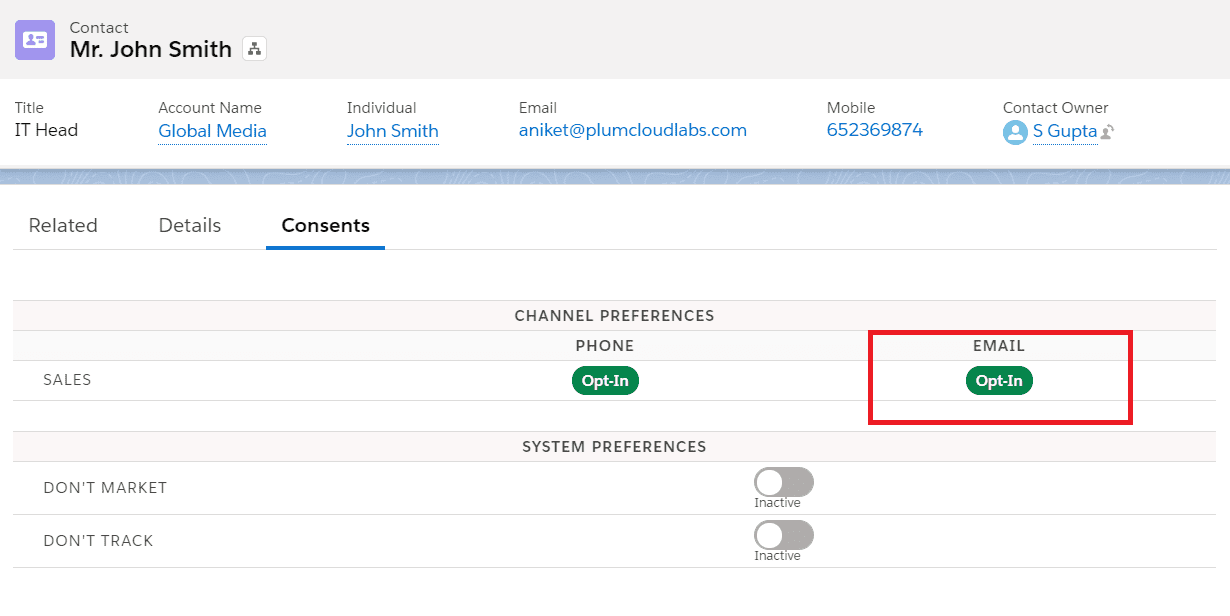
16. Once again these new consent preferences will be allowed to propagate on custom date fields on Lead/Contact objects of CRM.
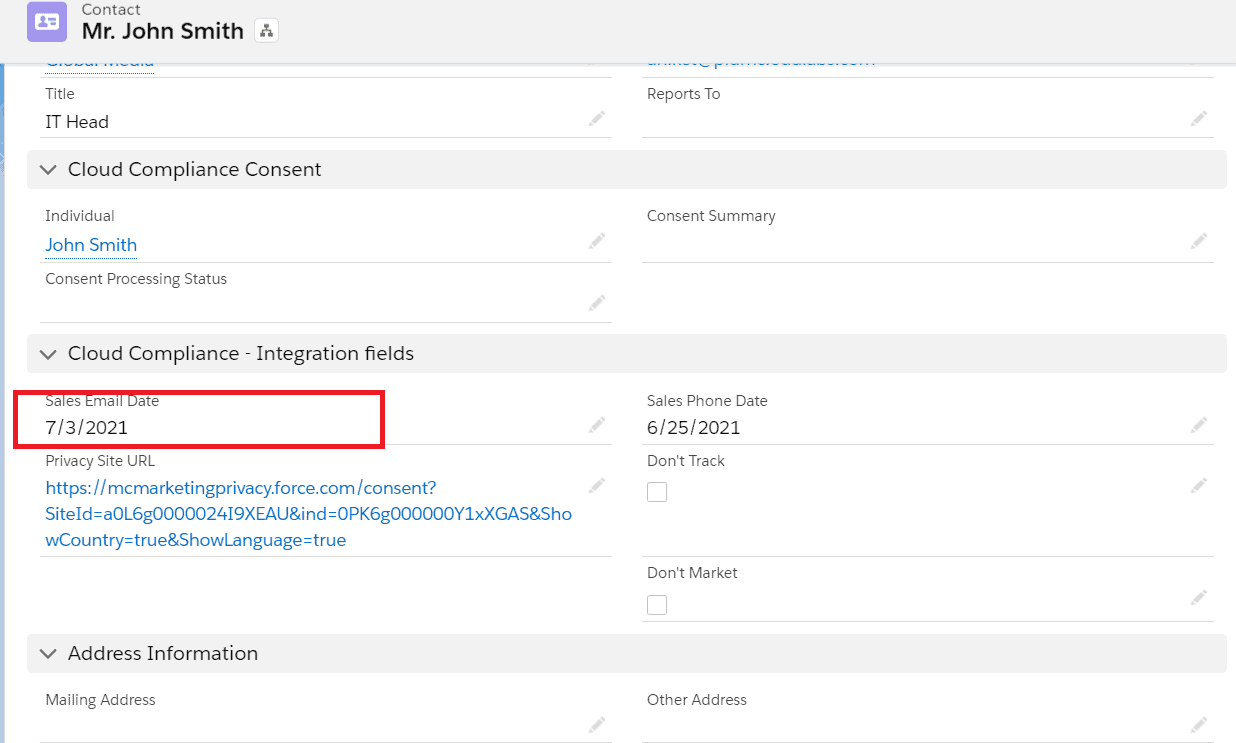
17. As soon as the Marketing cloud sync occurs, these new values will be propagated to the Marketing Cloud. This can be verified by navigating to the corresponding Person record and checking that new consent values as given on Self-service have been propagated onto Marketing Cloud.
Note – Similarly Users can add this contact to the new Filtered Data Extensions on the basis of other Purposes (Sales-Email date) and send them different email templates with Privacy Site URL embedded in them.
This is the complete life cycle of Marketing Cloud synchronization with Cloud Compliance.
