


Overview:
To achieve scalability and high performance, you can split records of the same objects into different chunks.
For example, the Contact object contains 18 million records distributed evenly over three years. Suppose we then decide to split the Contact object into three unique mappings – this means that each mapping will now have six million records.
This split allows the processing of all three batches of six million records simultaneously instead of processing one contact masking batch containing all 18 million records.
Solution:
After creating the Configuration record, you need to add objects and fields to the object masking and field masking records.
The following steps cover how to create these object-masking and field-masking records.
Object Masking
Step 1: Navigate to the ‘Configuration’ tab
Click on the ‘Configuration’.
You will now see all of the configurations that you have created.

Step 2: Navigate to the ‘Object Masking’ section
Click on any configuration record and scroll down to the ‘Object Masking’ section.
Step 3: Create an Object Masking record
Click the ‘New’ button to add an Object Masking record.

You will then be prompted to select a record type: ‘Delete Records’ or ‘Mask Records’
Delete Records: To delete records, select the ‘Delete Records’ button and click ‘Next.’ The Delete Records Page Layout will then display.
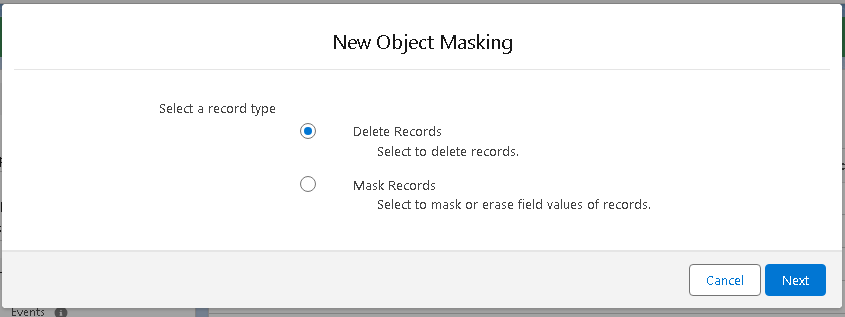
Mask Records: If you want to mask records, then select the “Mask Records” radio button.
By clicking on this, the Mask Records Page Layout will display.

Select an Object and determine Group, Sequence, Batch Size, and Filter Criteria, then select the ‘Use Bulk API’ checkbox.
This allows you to process records in bulk and improve masking performance.
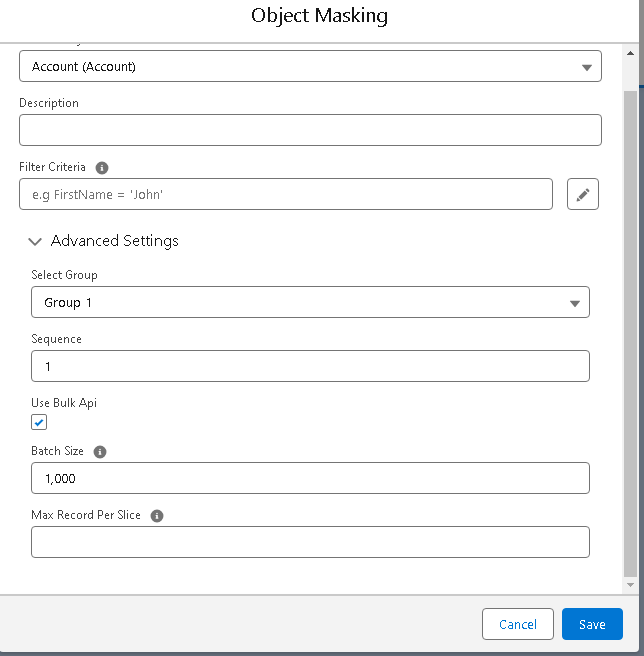
- Group:
The Group criteria decide on masking priority. That means objects that are added in Group 1 will be masked first, followed by objects in Group 2, and so on up to Group 10. You can add an unlimited amount of objects in a single Group and put Standard as well as Custom Objects in the same Group or a different Group - Sequence:
The Sequence criteria work within different Groups. The Sequence criteria allow you to decide the priority for an object to be masked within a Group. For example – an object that has a Sequence value of 1 will be masked first, and so on for an infinite number of values. Manually, you may set as many sequences in a single group as you can on both Standard and Custom Objects. - Batch size:
The Batch Size determines the number of records that should be processed in a single batch. You can set it from a minimum value of 1 to a maximum of 1000 records. - Filter Criteria:
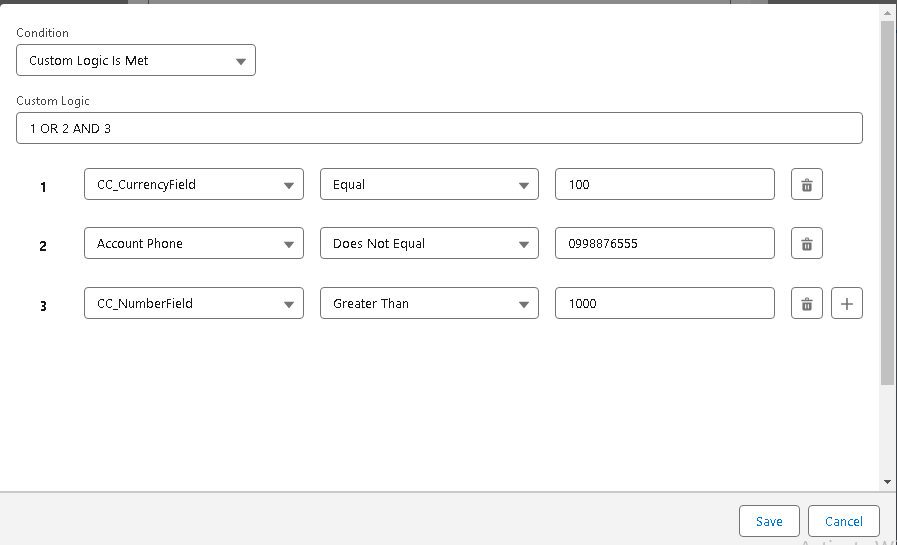
You can use the Filter Criteria to filter records based on your own criteria. Everything that can fit into the SOQL WHERE clause can also fit into the Filter Criteria. Logical operators, Literals, LIMIT, and others can be utilized. Click on the pencil icon to create filter criteria using the query builder. Which includes ‘All/Any Conditions met’ and custom logic made by the user. Filter criteria created by using these operators have a very low probability of syntax errors.
Step 4: Save your changes
Click on ‘Save’.
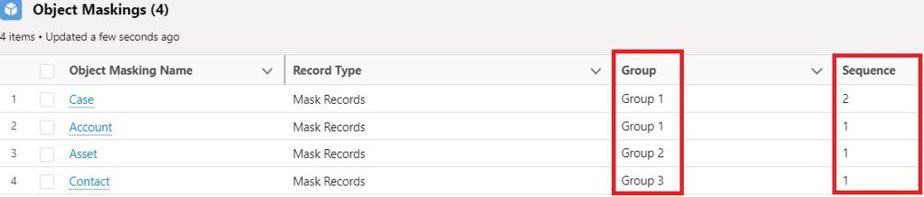
Likewise, you can create multiple records of object masking with different groups and sequences.
Field Masking
Step 4.1: Pick an Object
Click on the Object name for which the user wants to add Field masking.
You will be redirected to the field masking component, which allows you to add multiple fields simultaneously.

Step 4.2: Choose Fields
Here, users can select multiple fields at a time and specify the action that needs to be implemented to mask the field.
To achieve this, the user needs to select the fields by clicking the checkbox. Then, further select ‘Action’,’ Replace Value’, ‘min’, ‘max’.
Actions
Users can select one action at a time by clicking the dropdown:-
- Erase: To erase the field values.
- Random: Replace with randomized(autogenerated) text/string.
- Hardcoded: Replace with a hardcoded string.
- Pattern: Replace with a custom list or Regex.
- Apex: Replace with specific characters.
- Formula field: Replace with a formula of the same data type.
- Prefix: Attached additional prefix value to email/Text data type fields
- Postfix: Attached additional postfix value to email/Text data type fields
- Erase: If you select Erase, select the field from the dropdown list and click ‘Save’.
This function is used to erase the field (e.g. name, number, email, address, etc.)
Note: – Never add mandatory fields under erase action.
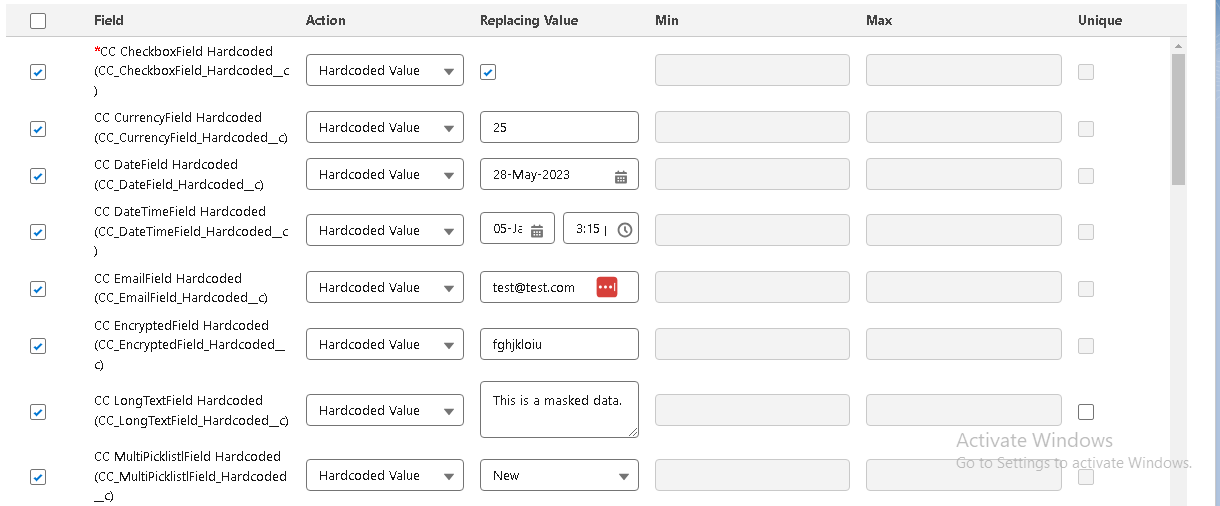
- Hardcoded Value: Hardcoded values are values where you can add any hard-coded text/string to replace the actual value with the chosen one.
Select the field where you want to apply masking to and click ‘Save’. Repeat this until desired field maskings are set up.
Enter any String in the ‘Enter Value’ textbox field by which you want to hardcode the selected field.
Make sure the value entered in the textbox is of the same data type of the field selected for masking.
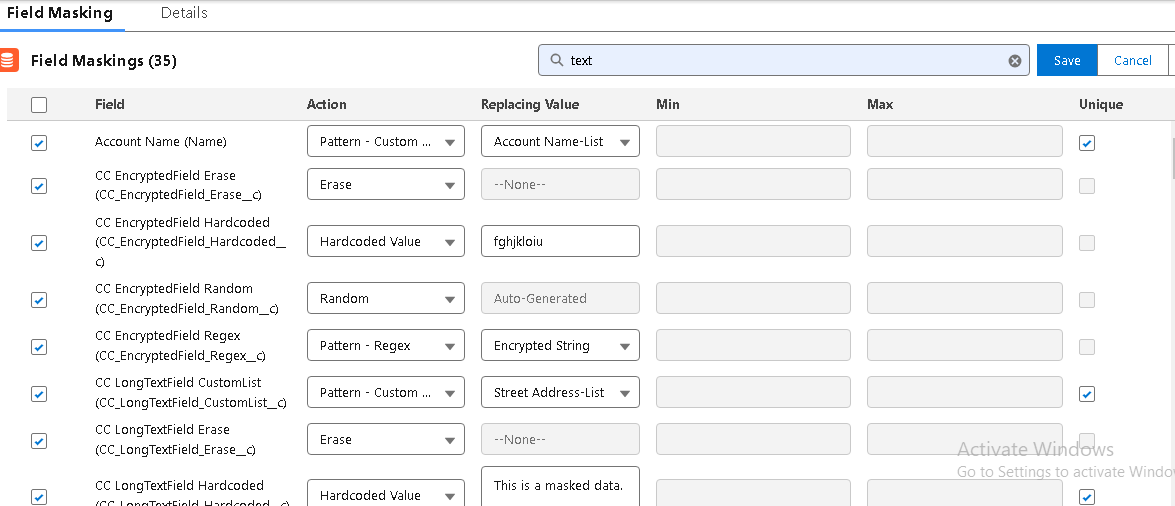
In the following example, each data type field will be replaced by a Hardcoded Value.
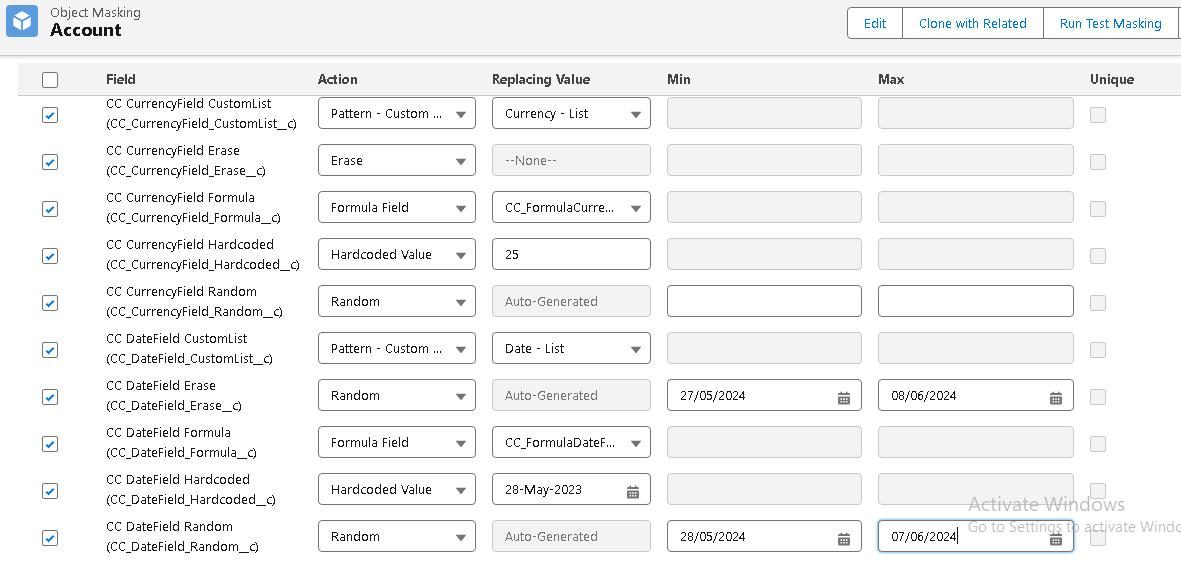
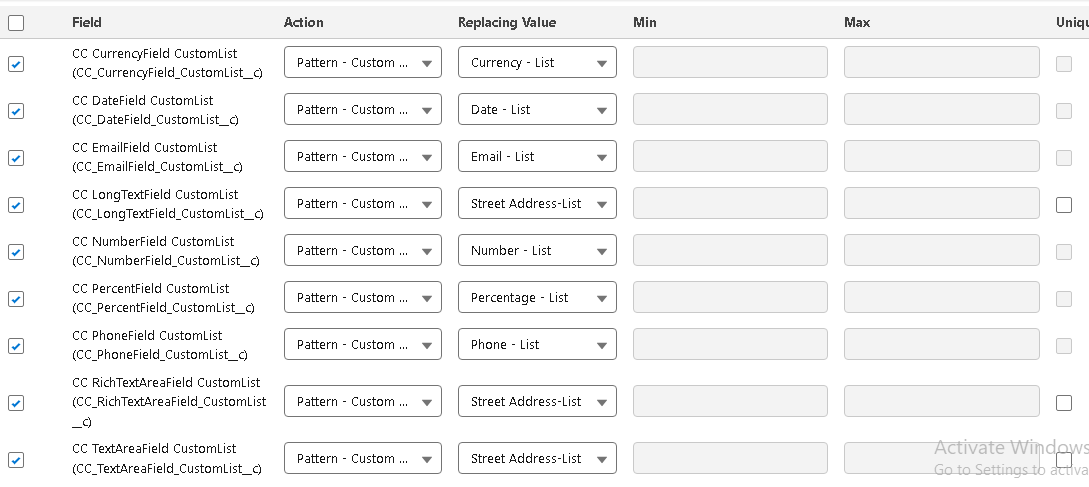
- A Pattern – Custom List: – While selecting ‘Pattern – Custom List’ from Actions, choose the value by which you want to replace the selected field by using patterns.
A Pattern – Custom List can be any combination of items or names from the default list or the lists created by the users.
- Pattern – Regex:- While Selecting ‘Pattern – Regex’ from Action, choose the value by which you want to replace the selected field by using patterns from your sandbox (e.g. email, phone number, etc.).
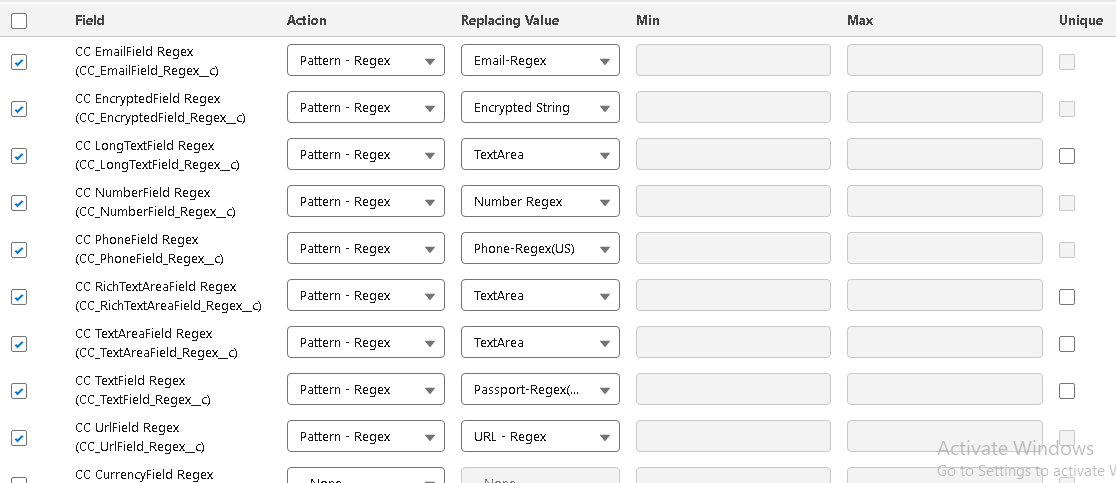
You can also add your own Masking Pattern.
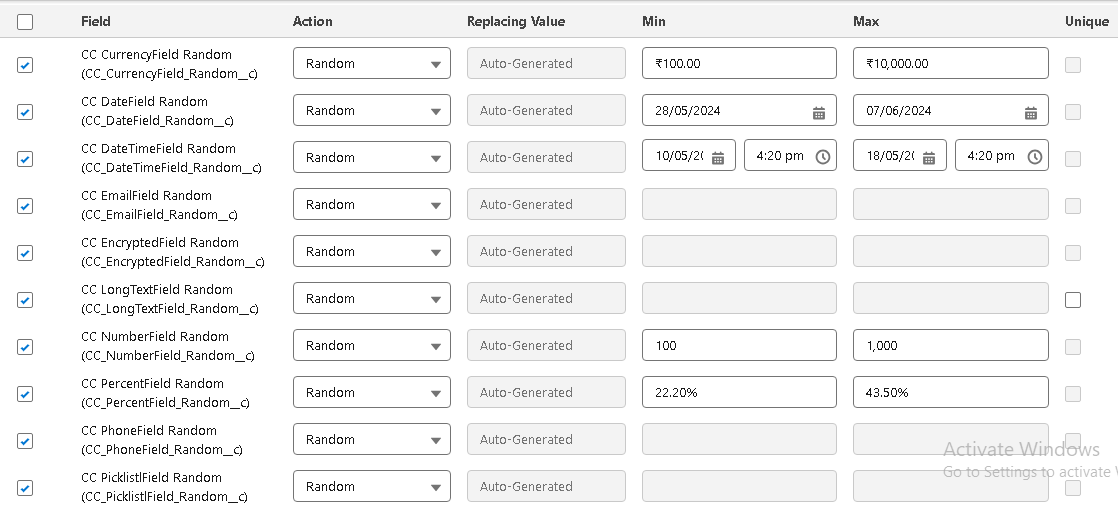
- Random:- While selecting ‘Random’ from Actions, choose the field by which you want to replace the selected field with a Random text/string.
For random action, min and Max values can be given. The masked value will be within the given range.
- Apex:- While selecting ‘Apex’ from Actions, choose the field by which you want to replace the selected field with Apex texts/strings.
For more information about Apex text strings, read this article.
After adding all fields, you can see a list of your field masking, as shown.
-
Formula Field:- The action ‘Formula Field’ is used to mask the records by formula field return values. Users can choose the API name of the Formula Field from the dropdown in the Field Masking.
To use this action, refer to the article – Data Masking by Formula Field.

- Prefix: Prefix value is added just before the field values. This action is only applicable for Text/Email field data types.
- Postfix: Postfix is added just before the field values. This action is only applicable for Text/Email field data types.
- Unique Checkbox: Unique functionality creates unique values for each field value added to the field masking. Users can check the Unique checkbox in the Field Masking component to create unique values.
After masking, the DataMasker appends the ID of that record next to the value.
Note - User can create Unique values for the fields with Text and Text area data types only.
After Masking with the Unique Checkbox, the record value will append the Record ID along with the value mapped by the ‘Replace With’ action that makes the record value unique.
Masking performance score:
For each field, based on the masking type calculate a score as below.
Below Is a dynamic banner that will show the ‘Masking Performance Score’ based on the actions selected in field masking against each field.
- 1-2 Is Fast
- 2-4 is Medium
- 4+ is slow
Based on the above score, the dynamic banner will show the message:-
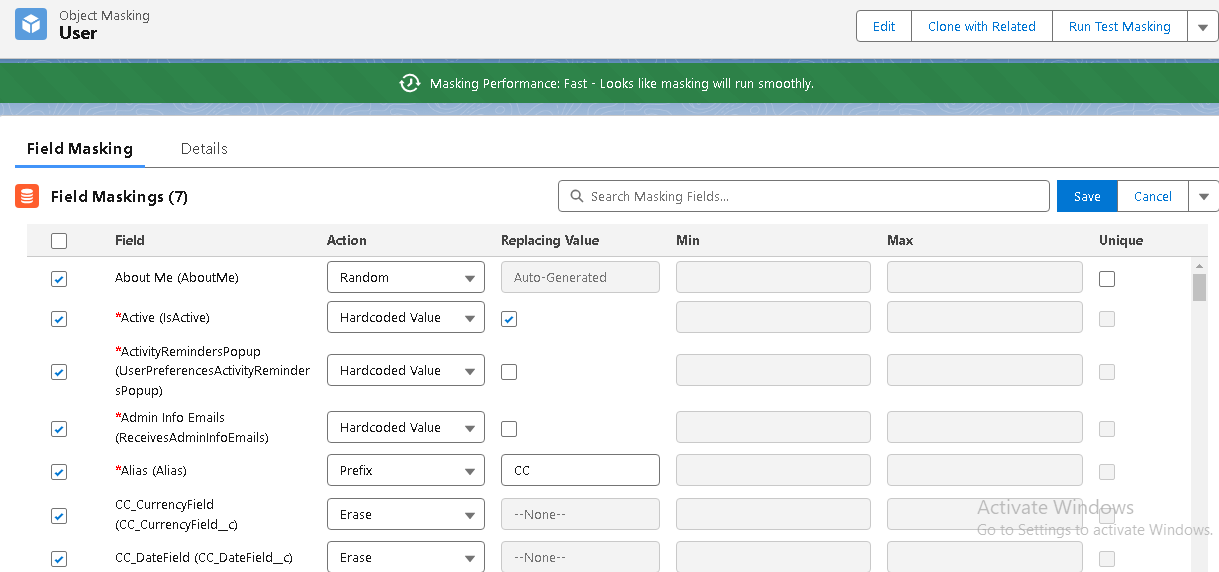
- Green banner: “(Masking Performance: Fast – Looks like masking will run smoothly)“.
For Eg, when the user selects the field masking action as hardcode and Erase, which are lightweight operations.
Masking performance score:
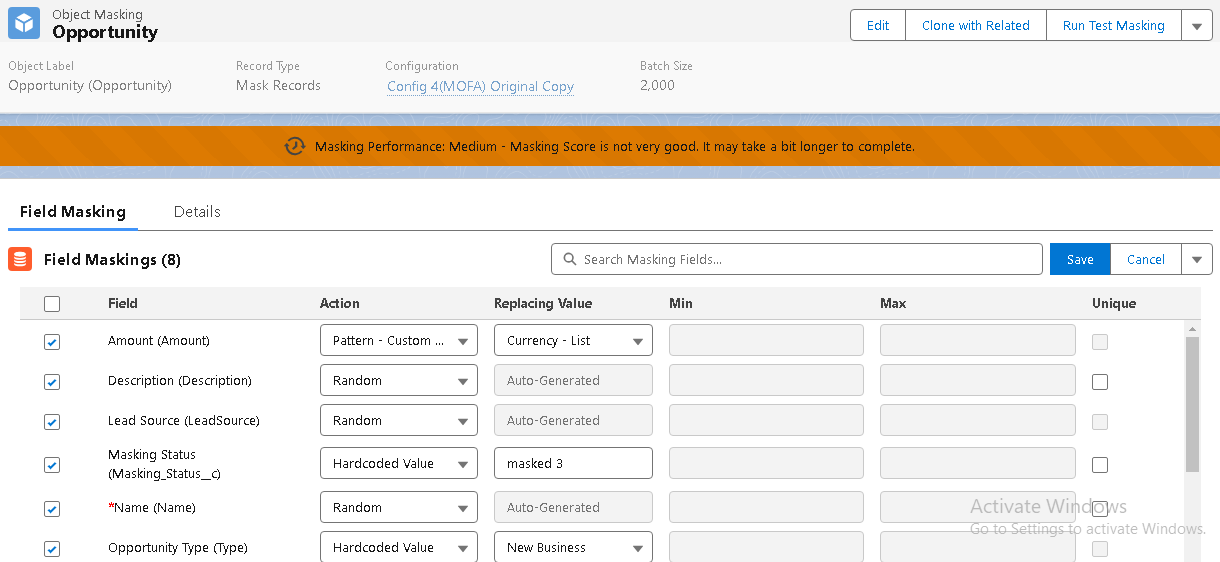
- Yellow banner: (Masking Performance: Medium—Masking Score is not very good. It may take a bit longer to complete). In the below configuration, Random and custom list actions are included in field masking actions. Random is considered to be an expensive operation compared to Erase and hardcode.
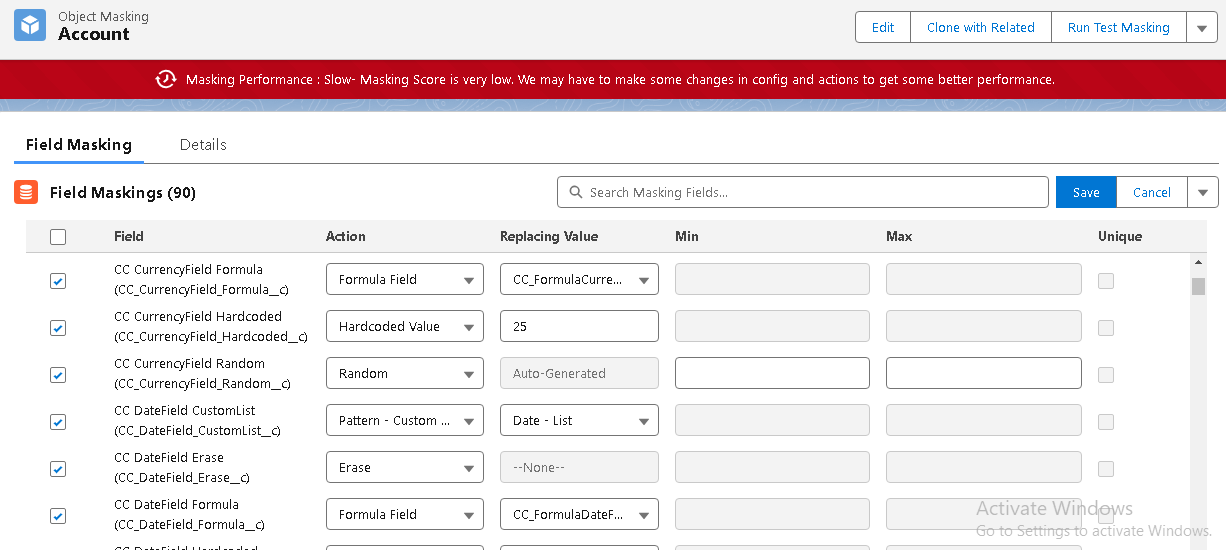
- Red Banner: (Masking Performance: Slow—Masking Score is very low. We may have to make some changes in the configuration and actions to get better performance.).
Here, the configuration has Custom and regex patterns and formula fields as masking actions, which makes it complex.
Search functionality on Field masking:
The user can search any field with its data type or API Name and field name. This helps users find field selections for masking for any object.

Middle Name and Suffix Fields
If the user wants to add a Middle name field and a Suffix field for masking, then two permissions need to be assigned to the user.
Permissions
- Enable Middle Names for Person Names
- Enable Name Suffixes for Person Names
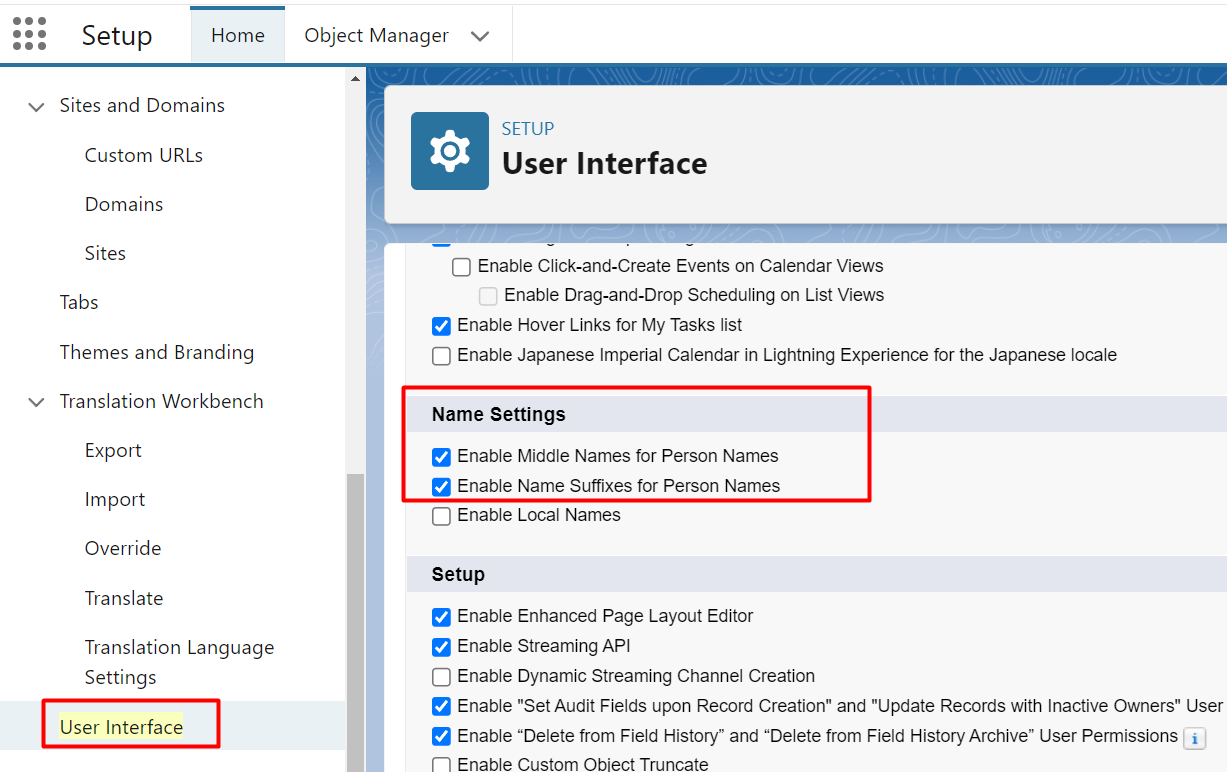
Users can assign these permissions from ‘User Interface.’ To assign those permissions follow the below path,
Setup -> Home -> User Interface ->Scroll Down and click on the ‘User Interface’ -> Go to the section ‘Name Settings’
Users can check the two checkboxes and click on the Save button to assign these permissions as shown in the screenshot below.
Special Use Case - User Masking
Masking User records is considered one of the best ways to protect the personal information of org’s users.
When utilized, Salesforce permanently scrambles the user’s object data and replaces it with random character strings. The user’s detail page exists, but all of its fields will contain meaningless strings of characters.
Salesforce simply obfuscates or scrambles personal data because you can’t delete a user in Salesforce; you can only disable or deactivate a user.
In other words, the user record still remains in the database, but this method performs a soft delete. This masking process does not work on Custom fields.
For further information on masking and user records, read this article.