Here are the Consent Configuration Steps –
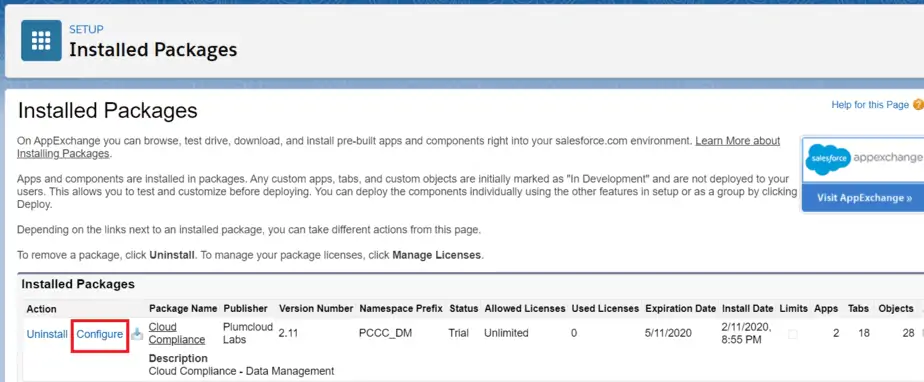
- Click on the ‘Configure’ button on the Installed Packages page.

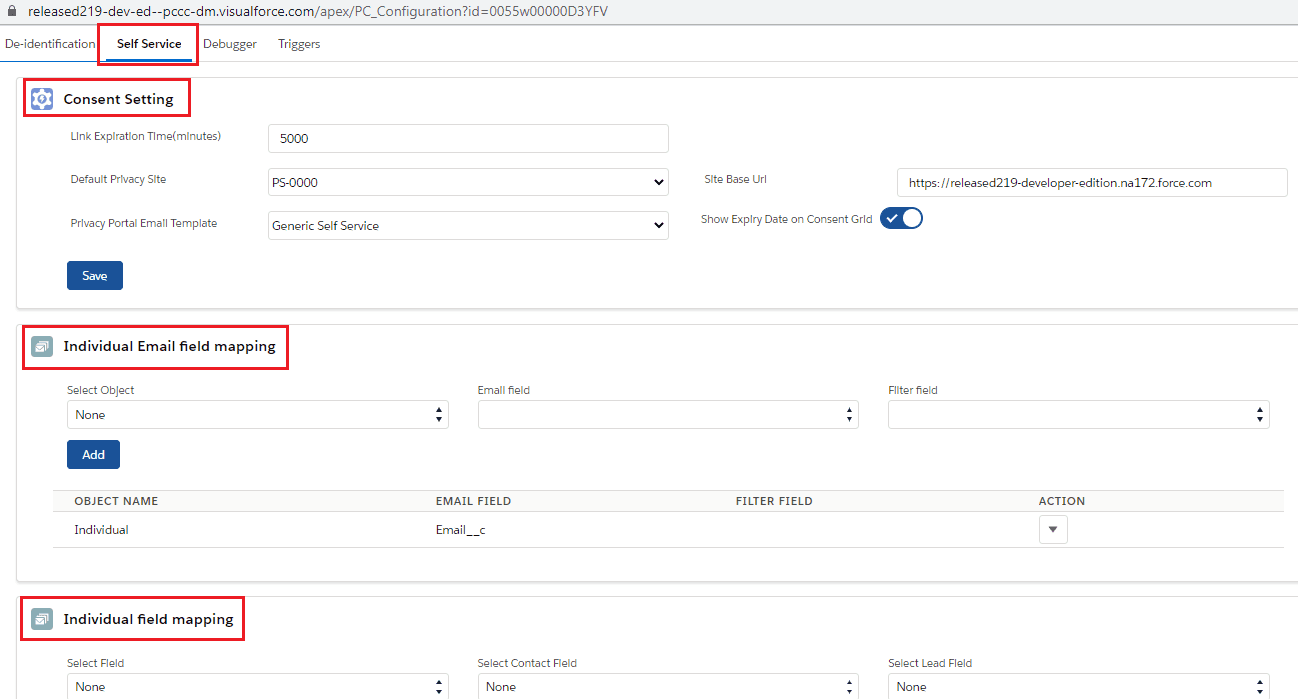
- A new window will open showing the four options in tab –
- De-identification
- Self Service
- Debugger
- Triggers (This configuration is used only For Marketing Integration)
- Go to Self Service Tab
Self Service :
- These three different sections in the Self Service Configuration tab –

- Consent Setting – This is used for the “Self Service” feature of Consent Management.
- Individual Email Field Mapping – This Configuration is used for Individual grouping rules and Consent management. As the standard Consent Management feature of salesforce was built around the individual objects, it needs to be mapped to the email field. Before creating this mapping, create the custom ‘Email’ field on the Individual object. Individual Email field mapping is as follows :

- Set Display Field :
In the Action dropdown of Individual Email Field mapping, the option ‘Set Display Field’ will display fields on the Self Service Portal.

- Basically the records available on Self Service Portal are Individual records. Hence you need to add Individual fields of your choice on the Self Service Portal. Fields can be FirstName, LastName, Email, etc.
- Individual Field Mapping – This is used for the Self Service feature of Consent Management. You need to add the individual fields in this section so that it will be available on the consent grid as ‘System Preference’ consents.

- ‘Select Field’ drop-down – Select the individual fields as system preferences for Consent Management.
- Info Text – This is the help text that can be visible when you update consent preferences from the Self Service portal.
- Alert Message – You need to provide necessary alert messages which will be displayed upon the selection of ‘Show Alert when Value’ as True/False.
Note: For Marketing Integration enhancement, to propagate Individual System preference values to Contact & Lead, you need to create additional fields on Contact & Lead which can be populated on the Individual field mapping section i.e. Select Contact fields and Select Lead Fields.
Refer Marketing integration Implementation Guide for additional configurations at

Triggers :
Note: Activate all these Triggers only if the you wants to perform Marketing integration.
Refer Marketing integration Implementation Guide for additional configurations.

The basic configuration is done and now it needs to be configured for all its features.


