Overview
Users can use this Batchable APEX-based API for automating the default consent creation process for contact and leads to address Web2Lead, Lead, and Contact Bulk Import and other scenarios where an implicit contact/lead creation is required.
This API can be used to process a large number of records asynchronously in batches and can be scheduled as per business requirements.
The method used for this Batchable APEX is as follows –
String schJobName = 'Consent Scheduler 1'; |
- schJobName is a field that stores a scheduled batch name that will be executed. It should be unique.
- cronExp crone expression is used to define a time interval for scheduling an apex class.
For eg. String CRON_EXP = ‘0 40 0 0 0 0 ?’ ; represents
0 Seconds, 40 Minutes,0 Hours, 0 Days of Month, 0 Months, Day of the week, Optional year
That means it will execute every hour’s 40th minute
- ObjName refers to the object name on which the user wants to perform the “Batchable APEX consent creation” process.
- Scope refers to the number of records that will be executed in one batch.
Prerequisites –
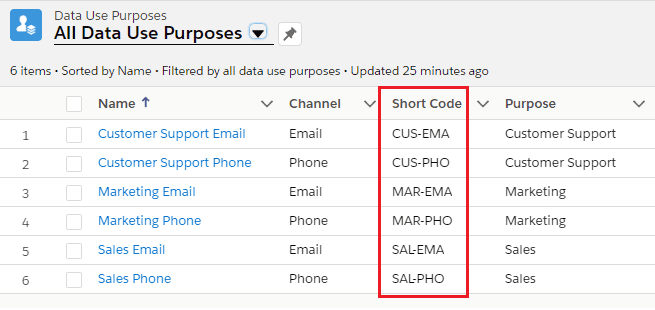
- Create the necessary “Data Use Purpose” records with the shortcodes in the following pattern. e.g. If the name of the data use purpose is “Marketing Email” then the shortcode will be “MAR-EMA”
- Add “Consent Summary” and “Consent Processing Status” fields on Contact and Lead page layouts which are provided with the managed package.
- Make sure that the Individual is associated with each Contact/Lead record in order to manage the consent creation using batchable APEX.
Note– If the individual is not associated with the Contact/Lead record, the user can run the auto Individual batch provided by “Cloud Compliance”. It will automatically create individual records for each Contact/Lead record based on defined criteria.
For more details about this batch refer to this link Grouping Rules for Individuals.
Solution Steps
1. Navigate to any Salesforce Contact/Lead record for which users want to manage consent. Make sure that the “Consent Summary” and “Consent Processing Status” fields are there on that particular record containing the “Opt-In”/“Opt-Out” values with shortcodes and “Awaiting” status respectively.
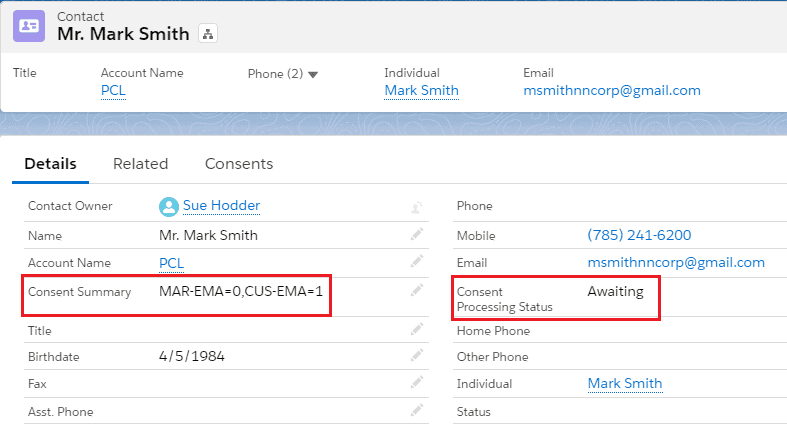
Note– Here we use “1” for “Opt-In” and “0” for “Opt-Out” with the shortcode values e.g. MAR-EMA=0, CUS-EMA=1.
2. Shortcodes are coming from the “Data Use Purpose object.
3. Open the Salesforce Developer Console. Prepare the create scheduleJob method by passing the necessary parameters and executing the code.

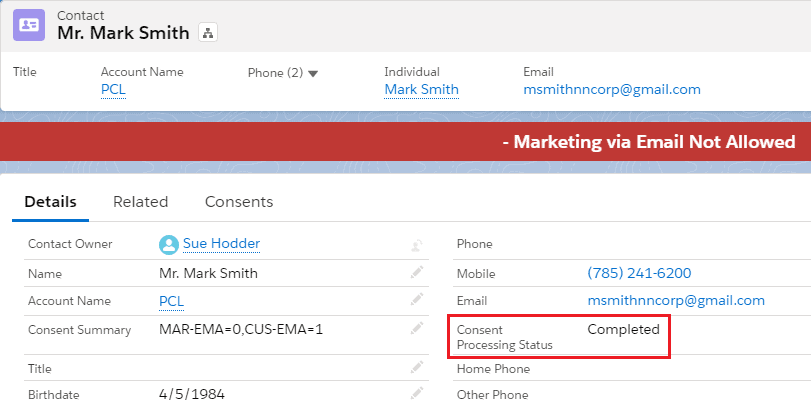
4. Navigate to the contact record and check the “Consent Processing Status”. The batch will be executed as per the scheduled time and after that, the consent processing status will be converted to “Completed”.
5. Similarly, navigate to the consent tab on the same record and validate whether the consent is created or not based on provided input in the “Consent Summary” field on the contact object.
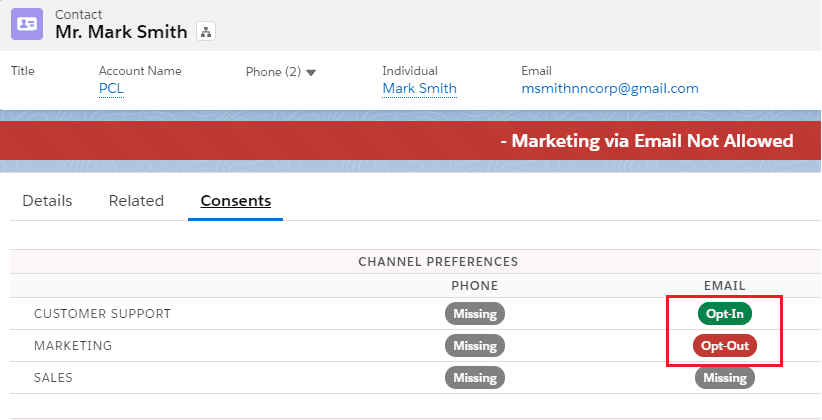
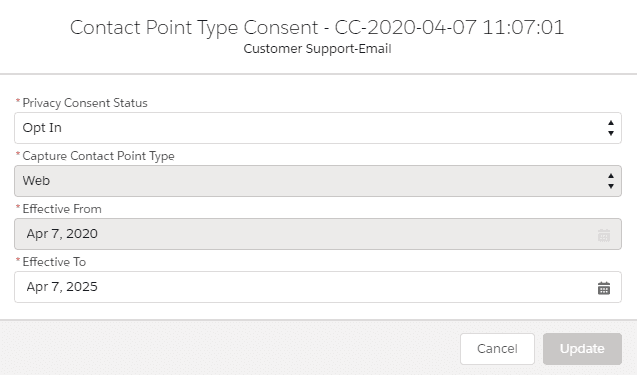
6. Click on any one of the newly created tabs (Opt-In/Opt-Out) to check the consent “Effective To” date.
