


Prerequisites –
Users should have the “CC full access” permission set assigned.
De-identification Basics –
- RTBF/ de-identification allows the user to de-identify any number of records attached to the objects in the hierarchy mapped.
- Up to three levels of the hierarchy of objects can be mapped.
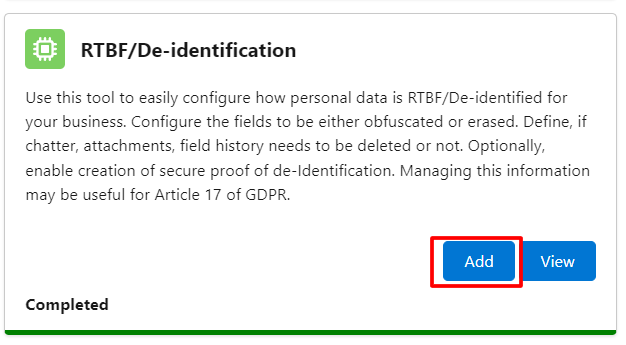
- To create the mapping for RTBF/De-identification, click on the “Add” button on RTBF/De-identification tile.
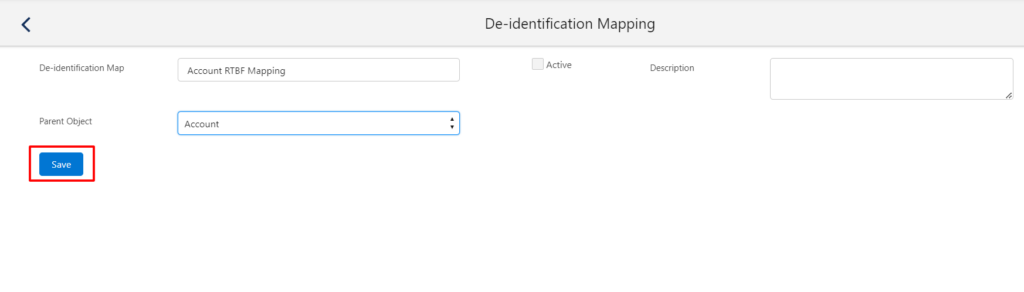
- Enter the De-identification map name.
- Enter Description, which is optional.
- Select the parent object from the picklist.
- Click on the ‘Save’ button.
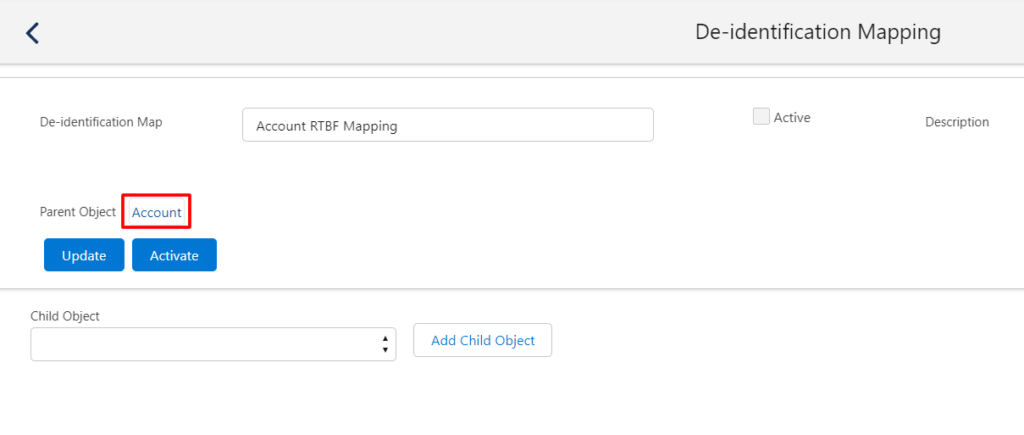
- To add field mappings, click on the Account link and configure the other settings.
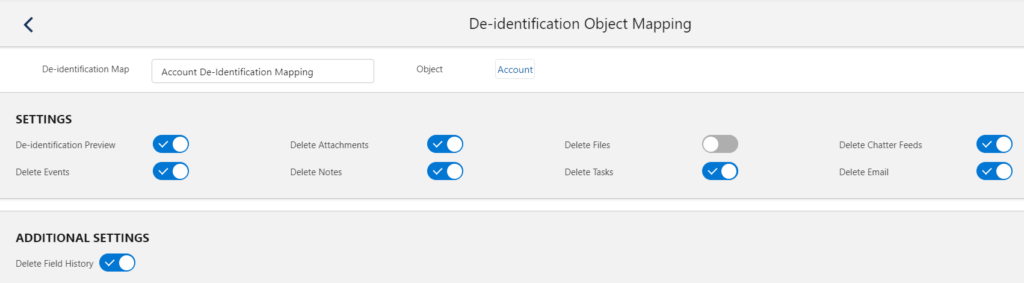
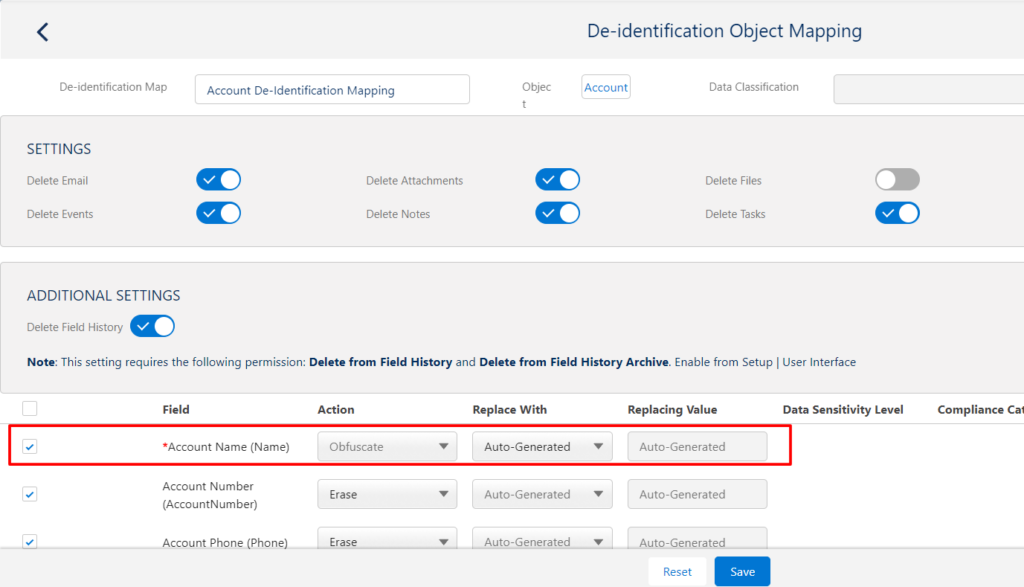
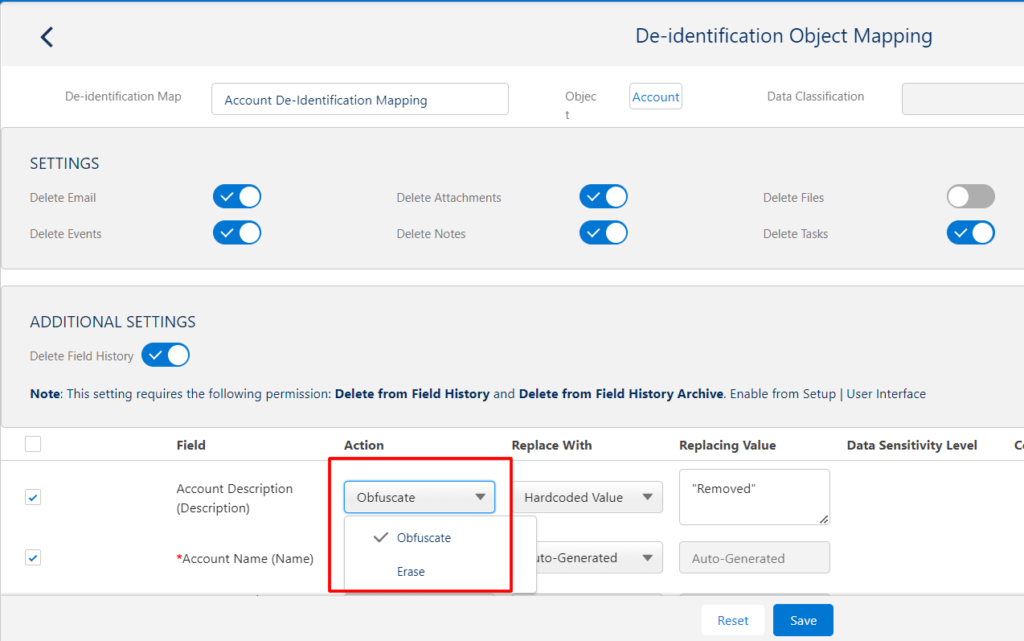
- The De-identification object mapping screen is as follows: –
Note – To enable delete functionality, follow the below path –
Setup -> Installed Package -> Configure -> De-identification -> Data Deletion -> Enable Delete
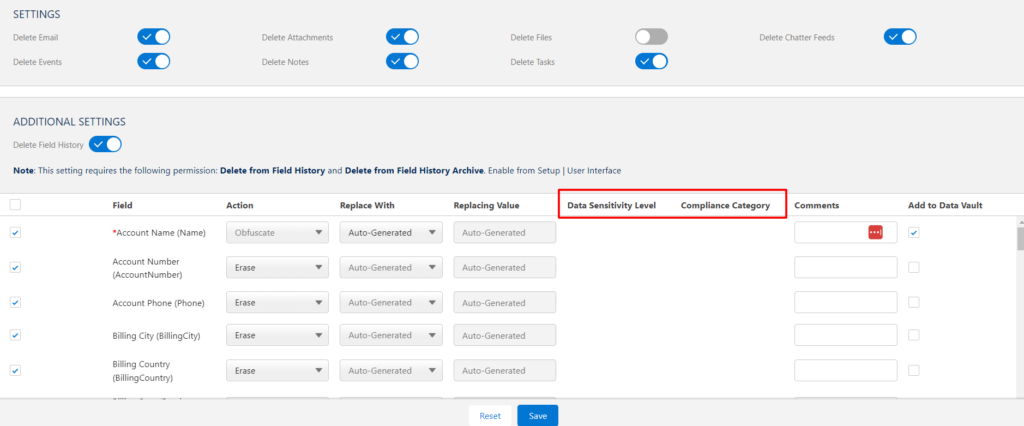
SETTINGS :
- Delete Attachments: It allows users to delete the attachments related to the de-identified record.
- Delete chatter feeds: It allows users to delete the chatter feeds related to the de-identified record.
- Delete Events: It allows users to delete the events related to the de-identified record.
- Delete Notes: It allows users to delete the notes related to the de-identified record.
- Delete Tasks: It allows users to delete the tasks related to the de-identified record.
- Delete Emails: It allows users to delete the Email activities related to the de-identified record.
- Delete Files: It allows users to delete or de-link the files which are related to the de-identified record.
Note: If the file is shared exclusively then that file will get deleted permanently from the de-identified record and if the same file is shared with two or more different records then the file will get delinked from a de-identified record and remains as it is with the second record.
ADDITIONAL SETTINGS:
Delete Field History: It allows users to delete the history of the related record.
Note: Support for Delete Archived Activities
Cloud Compliance supports deleting archived activities. Salesforce archive history contains the activities –
- Events that ended more than 365 days ago
- Closed tasks due more than 365 days ago
- Closed tasks created more than 365 days ago (if they have no due date)
For more details, refer
https://help.salesforce.com/articleView?id=activities_archived.htm&type=5
Caution: If this setting is not enabled from ‘Setup’ -> ‘User Interface’ and Object mapping includes selecting “Delete from Field History” and “Delete from Field History Archive “from the Addition setting then field history deletion will not be possible. This may result in insufficient De-identification. For more details – refer to Enable Field History Deletion
Data Classification:
- Data Classification enables users to classify the data as per the Data Sensitivity Level. Users can decide which data is to be De-identified and which is not.
- To process the records as per Data Classification user needs to add the Data Sensitivity Level to the fields of an object.
- This functionality has been introduced in CC 2.29 version and onward.
- User can see the Data Classification section on the De-identification mapping page as shown in the below screenshot.
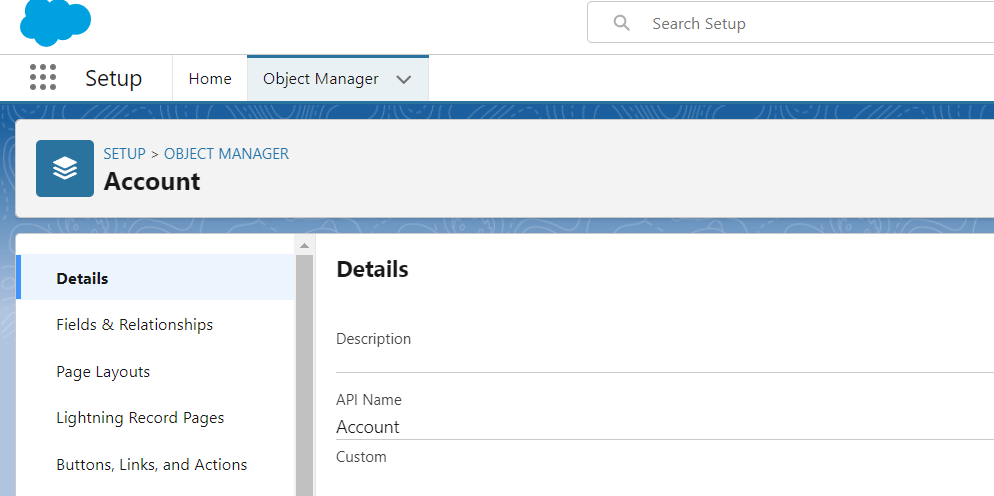
To configure Data Classification user can follow the below steps:
Note: Considered the Account object as an example.
- Go to the Object Manager and select Account object.
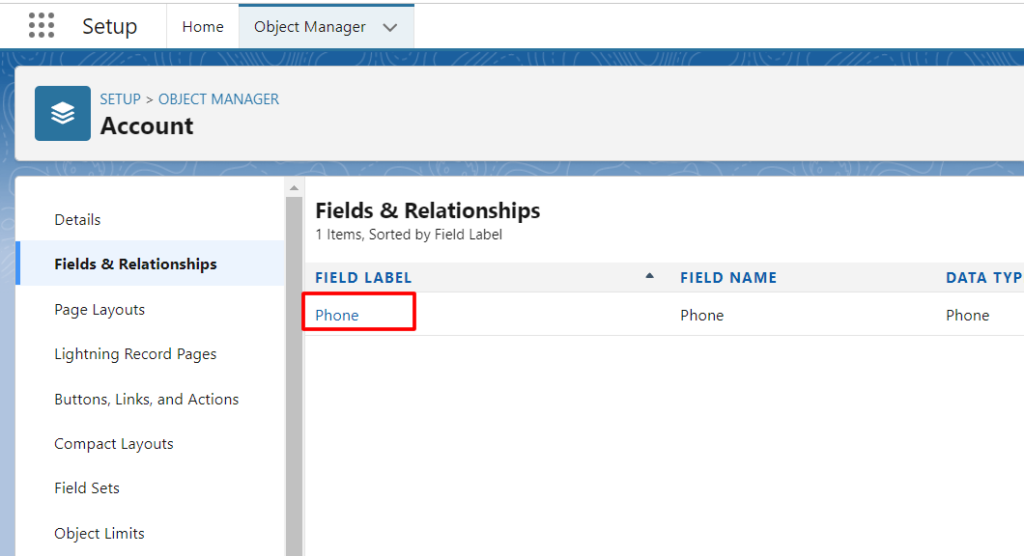
- Click on Fields and Relationships and select Phone.
- User can see a picklist “Data Sensitivity Level”, select “Confidential” and click on the Save button.
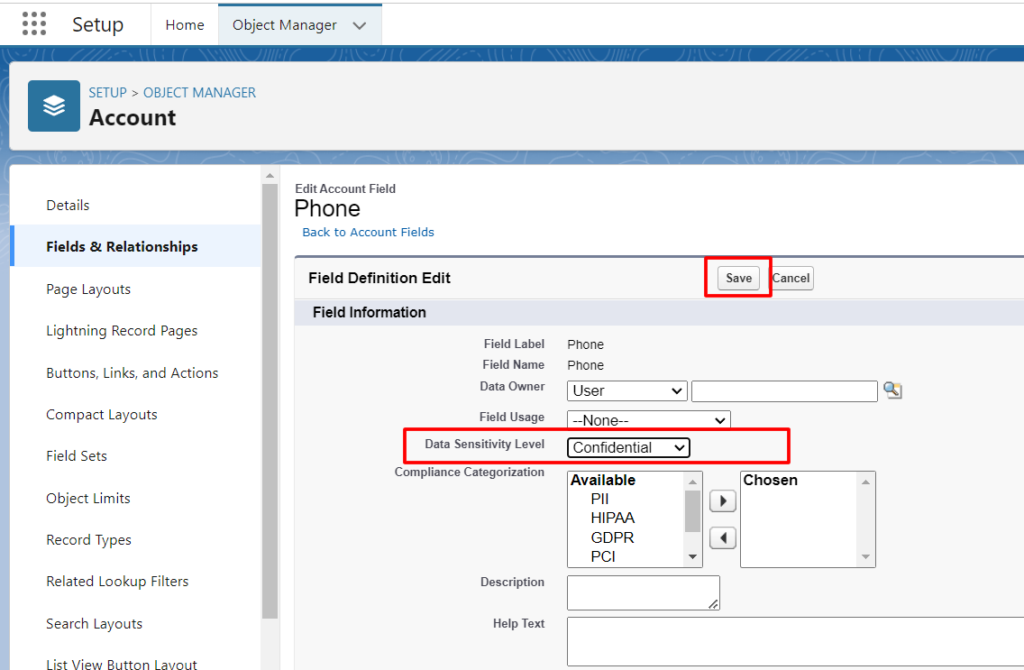
- Data Sensitivity Level “Confidential” has been assigned to the Phone field of Account Object.
Now user can go to the Account De-identification Mapping page and assign Data Sensitivity Level “Confidential” and click on the “Save” button.
The records which contain a value in the “Email” field of the Account object will be processed.
Likewise, users can assign different Data sensitivity Levels to multiple fields.
ADD MAPPING 1:
Section 1 – Action :
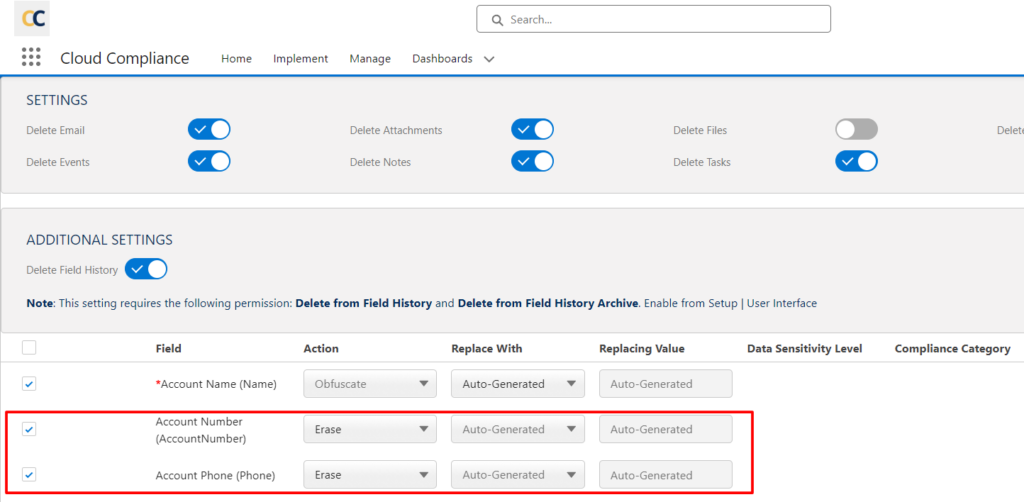
- In the ‘Action’ field possible Action selection can be ‘Erase’ or ‘Obfuscate’.
- Erase: It will completely delete the field value. Here is one sample mapping showing Erase Action :
- Obfuscation: It can be achieved using three different ways –
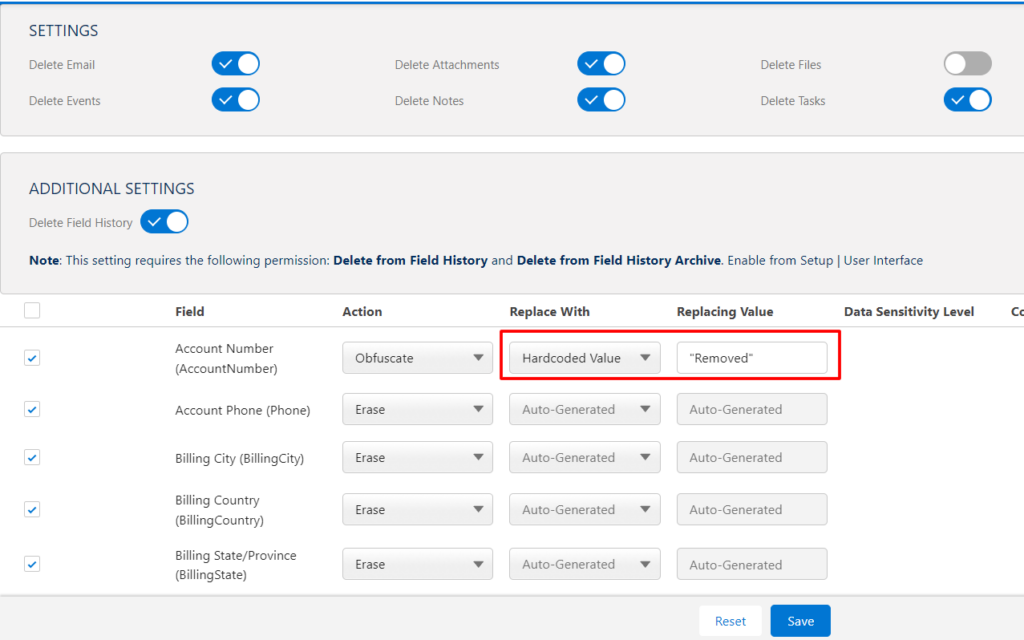
- Obfuscation by Autogeneration: In this obfuscate action, the field value will be replaced by randomly generated scramble data. To achieve this obfuscation, keep the ‘Replace With’ field value as it is i.e To ‘Auto-Generated’
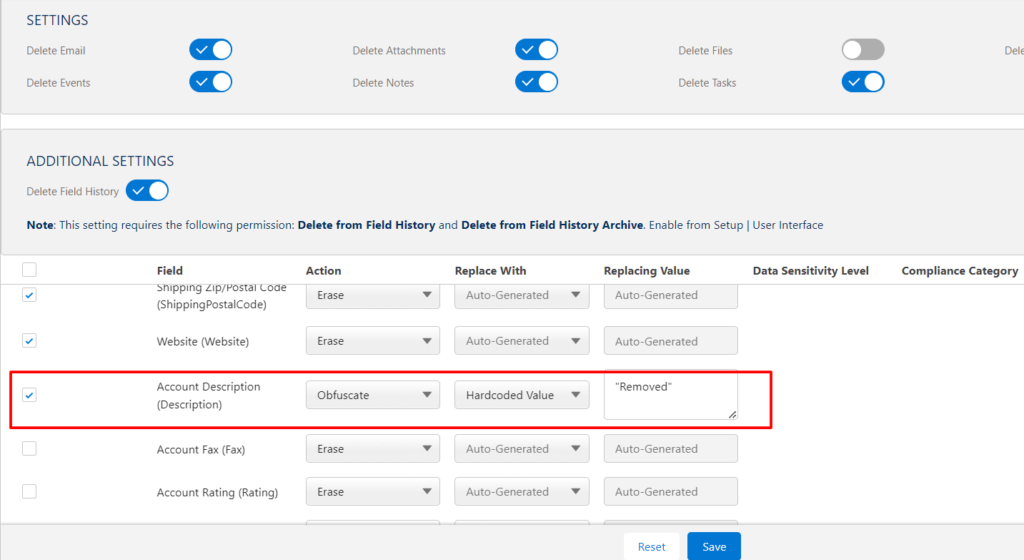
- Obfuscation by hardcoded value: Obfuscation also supports replacing field value with hard-coded value. To achieve obfuscation using hardcoded value write the hardcoded value in double quotes in the section ‘Replace With’.For e.g. “Removed”.
- Obfuscation by value from the Formula field: Another special feature with regard to Obfuscation is replacing the field value with the formula field value. For e.g. The use case is, To preserve the email domain and obfuscate the rest part of the Email field. It can be done in the following manner:-
- Create one Formula Field named ‘Random Email’ which is returning text data type. Consider the formula body which preserves the email domain as follows:-
TEXT(ROUND(sqrt((value((left(right(text(CreatedDate), 6), 2)) & text(DAY(DATEVALUE(CreatedDate))) & text(Month(DATEVALUE(CreatedDate))) & text(Year(DATEVALUE(CreatedDate))) & (left(right(text(CreatedDate), 9), 2)))) / 100), 6)) + "@" + SUBSTITUTE(Email__c, LEFT(Email__c, FIND("@", Email__c)), NULL) |
- Now go to mapping, select Obfuscation as Action, add the field “Email” in the ‘Source field’ and in ‘Replace with’ provide the API name of the Formula field which is “Random_Email__c” and click Add mapping.
Note – It should not be in double quotes.
The Email domain is preserved and the former part is obfuscated.
Section 2 – Selection of Field: In the field selection section, the user can add fields that contain PII data and need to be de-identified
Section 3 – Add To Data Vault: If a user wants to store the proof of de-identification then the user needs to select the ‘Add to Data Vault’ option.
Section 4 – Replace With: Replaced with Obfuscation of three types, Obfuscation by Autogenerated, Obfuscation by Hardcoded value (value should be put in quotes), and Obfuscation by value from the formula field.
Section 5 – Comments: In the Comments section, users can add any additional information if required.
Section 6 – Button ‘Add Field’: Finally, the user needs to click on the ‘Add Field’ button.
In a similar way, users can add the fields of choice as per the requirement.
Note –
- The system-required/mandatory fields can only be obfuscated not erased.
- Picklist values can only be obfuscated by another value in the list.
- Date & Date Time fields can be obfuscated by a special Date & Date Time format. For the Date field format should be like this — MM/DD/YYYY and for the Date Time field it should be like this — YYYY-MM-DD HH:MM: SS
- Fields of the type of reference/ relationships can be erased but not obfuscated.
- If a user makes changes(Add/Remove/Update) in fields of mapping then the user has to activate the mapping each time to make it available for use.
ADD MAPPING 2: CC 2.29 version and onwards
In the new CC 2.29 version and onwards, Mass add fields functionality is provided so the user can check the checkboxes next to the field name and can add as many as fields available in a single click. For eg, in this case, the object is Account.

- Action
- In the ‘Action’ field possible Action selection can be ‘Erase’ or ‘Obfuscate’.
- Replace With
- Auto-Generated
In this obfuscate action, the field value will be replaced by randomly generated scramble data. To achieve this obfuscation, keep the ‘Replace With’ field value as it is i.e To ‘Auto-Generated’.

- Formula Field
Another special feature with regard to Obfuscation is replacing the field value with the formula field value.-

- Hardcoded Value
Obfuscation also supports replacing field values with hard-coded values. To achieve obfuscation using a hardcoded value write the hardcoded value in the section ‘Replace With’.For e.g. Removed.
- Data Sensitivity Level
The user can add the filter based on the Data Sensitivity Level so that CC will check the Data sensitivity level of the field for the record that the user wants to do RTBF on.
- Compliance Category
The compliance acts, definitions, or regulations that are related to the field’s data.
Default values:
CCPA—California Consumer Privacy Act
COPPA—Children’s Online Privacy Protection Act
GDPR—General Data Protection Regulation
HIPAA—Health Insurance Portability and Accountability Act
PCI—Payment Card Industry
PersonalInfo—Personal information.
For use with the Enhanced Personal Information Management feature. Only available if Enhanced Personal Information Management and Digital Experiences are enabled.
PII—Personally Identifiable Information
The field corresponds to the ComplianceGroup field on the FieldDefinition Tooling
API.
- Comments
In the Comments section, users can add any additional information if required.
- Add to Data Vault
If a user wants to store the proof of de-identification then the user needs to select the ‘Add to Data Vault’ option.
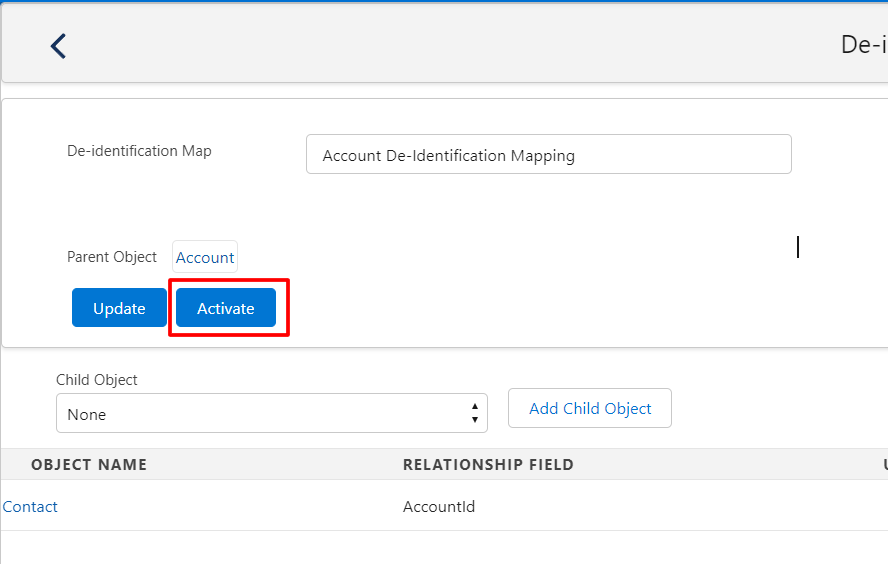
- After adding the necessary fields make sure to activate mapping by going back to the previous page and clicking the “Activate” button.
Note – Mapping activation will take a few seconds. Users can refresh the page and check whether the “Active” checkbox is checked or not.
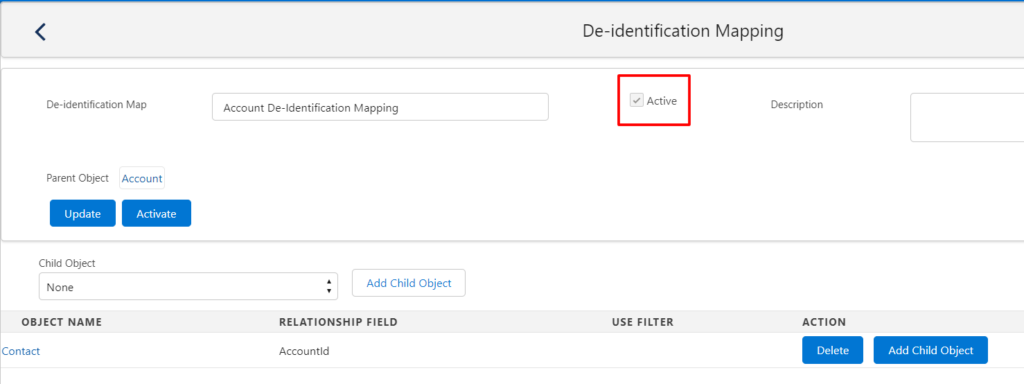
- If a user wants to achieve RTBF/De-identification for child and grandchild objects i.e. hierarchical de-identification, users can add related objects in the mapping.
- After saving parent mapping, the child object field will appear for adding the child object in the de-identification mapping. Click on the add child button. A child object will be added.
- You can also add the search filter. On the basis of this search filter records will be selected.
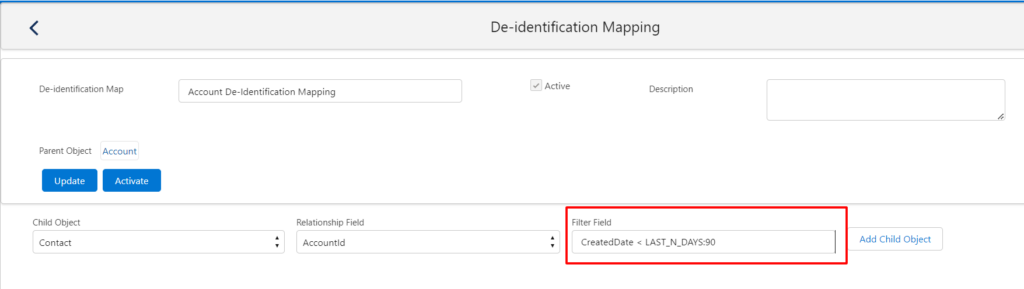
- To add the mapping of the child object “Contact” in this example, click on the Contact link and add the mapping of the fields in the same way as the Account field mapping.
- To add the grandchild object click on the radio button next to the Contact link.

- A grandchild section will appear, add the grandchild object, “Case” in this example.
- Click on the case to add the field mapping.
- Once the mappings are ready for all the objects Account, Contact and Case go to the list of mappings and mark parent object mapping as “set as default”. (In this example i.e. Account De-Identification Mapping)

The other options in the drop-down list:
Reconfigure: This allows you to reconfigure the mapping.
Set As Default: When multiple mapping exists for the same object, then the mapping which is ‘Set as Default’ will be used as the default mapping for the De-identification purpose for the particular object.
Deactivate: This allows you to deactivate the mapping which can be further used by activating it again.
Delete: This allows you to delete the mapping from the system.
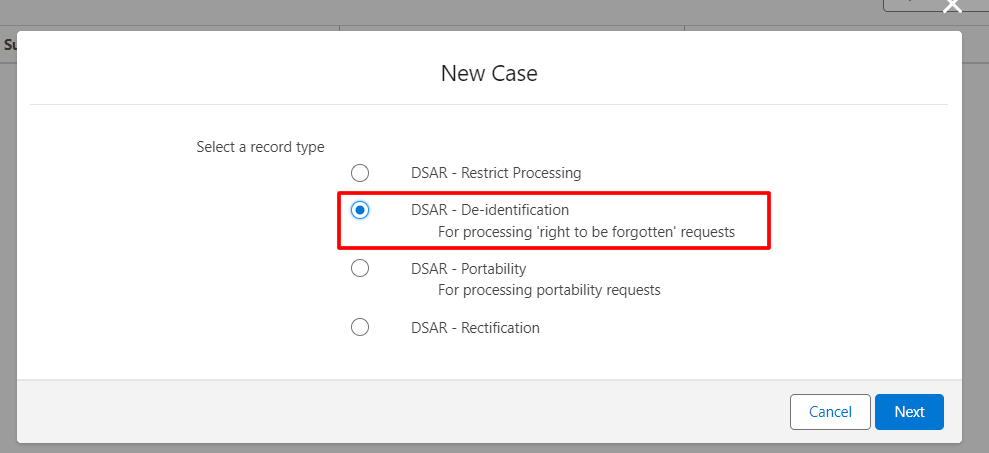
- Now navigate to the case to create a new case to process cascade de-identification.
- Select “DSAR – De-identification” and click next.
- In the Data Subject field enter the salesforce ID of the parent Record.
Note – if it is a contact record, then the user can directly select a contact from the lookup field of contact.
- Save the case
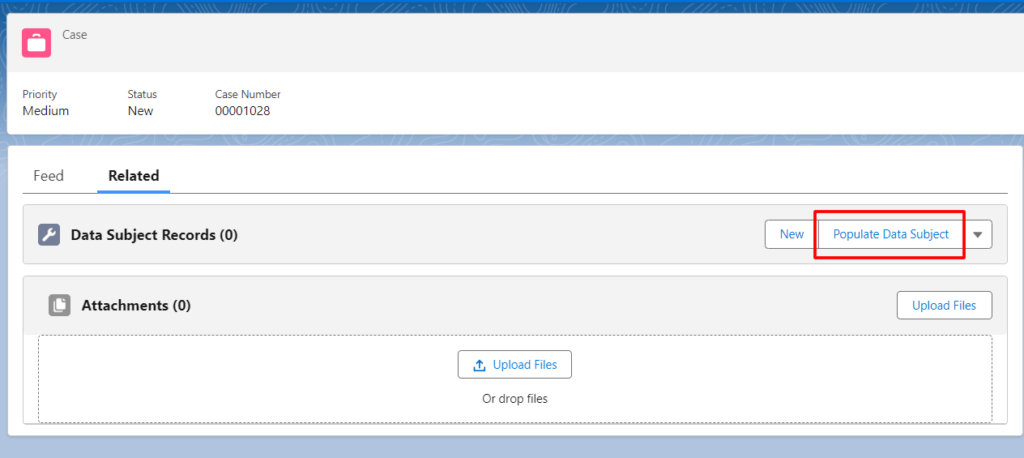
- Go to the “Data subject records” related list.
- Click on the “Populate Data Subject” button.
- Background scripts will run and all the child and grandchild records related to the Account record will show up in the related list.
Note – In the case of the CC 2.29 version and onward RTBF feature allows users to select the mapping before populating the data.
- Go to the “Data subject records” related list.
- Click on the “Populate Data Subject” button, After that User can select the RTBF mappings of a particular object.

- Select the Mapping as per the business use case. In this case, there are two Mappings
- After Selecting the mapping, click on the Select button
- Background scripts will run and all the child and grandchild records related to the Account record will show up in the related list.
- Status is “Awaiting Processing” as the de-identification is yet to be processed.
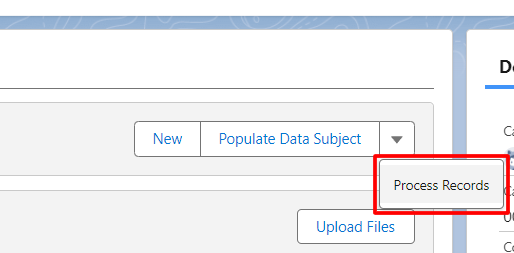
- Select the drop-down list near the “Populate data Subject” button and click on the “Process Records” button.
- Now the status has changed to “Processed”.
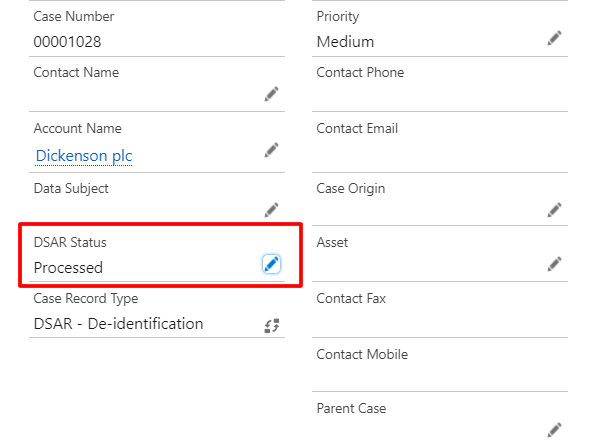
- You can check the deidentified records according to the mapping.
- In a similar way, users can de-identify any records of any object by mapping them individually or in a hierarchy.
Note –
- If the org is upgraded from CC v2.19 to a later version of Cloud Compliance then make sure that the “Processed” value is added in the “DSAR Status” picklist field on the Case object.